 Our Jayco Pinnacle fifth wheel was built in 2018. Although online streaming had become popular by then, including a TV antenna on an RV roof was standard practice. We moved into our fifth wheel in April 2020 and never used the TV antenna, relying on streaming channels for our watching pleasure. For us, the antenna proved problematic, creating a contact point toward the front of our rig for low-hanging trees to easily grab and turn it. When that happened, the metal part of the unit faced sideways or forward, making it even easier to catch on leaves and branches. Bob had wanted to remove the RV TV antenna since we became full-time RVers. It led to some major issues, such as pulling our roof membrane out from under the rig’s nose cap — which resulted in roof leak issues later on — and leaning off our roof. Out with the Old After another roof rip while traveling from Mississippi to Georgia, Bob decided the time had come to do away with the antenna once and for all. He consulted YouTube to see what might be involved in the process. We already knew we’d have to remove the self-leveling caulk around the unit on the outside. But we didn’t know what needed to be done on the inside. The TV antenna controller was attached to our bedroom ceiling. When packing the rig for travel, we always checked to ensure the antenna faced the correct way. Bob removed three screws to disassemble the controller. An 8-inch or so PVC pipe dropped out of the ceiling. Climbing onto the roof of our rig, he painstakingly peeled away the caulk around the TV antenna, a blister-creating process. That revealed four screws holding the unit in place. After removing those, the antenna didn’t easily let go. It held securely in position.  Bob broke the seal around the unit and was able to separate it from our roof and disconnect the coaxial cable, exposing about a 3-inch hole that matched the one in the bedroom. With the unit out of place, he carefully removed the rest of the caulk, a necessary step before we could effectively cover the hole.  In with the New We had found some 0.032-inch aluminum at Lowe’s that we thought would work great to repair the new roof opening. Bob spray-painted it to keep it from getting overly hot on bright, sunny days. Then he cut it into two even pieces to ensure coverage of the screw holes left from the antenna. In the process of covering the hole, he managed to rip a new opening in the roof from his shoe rubbing on the membrane. Undeterred, he took off his shoes to avoid introducing additional holes and applied Eternabond tape, a staple on our rig, to hide the hole.  Bob positioned the first piece of aluminum and screwed it into place. Carefully matching up the seam with the other piece, he repeated the process. Then he spread new self-leveling caulk around all edges, making sure to cover the screws and middle seam. We’re relieved to be rid of the antenna from our roof. The topmost items on it now are two air conditioning units, conveniently located away from the roof’s edges.
You might also like Navigating Low-Clearance Bridges in an RV.
2 Comments
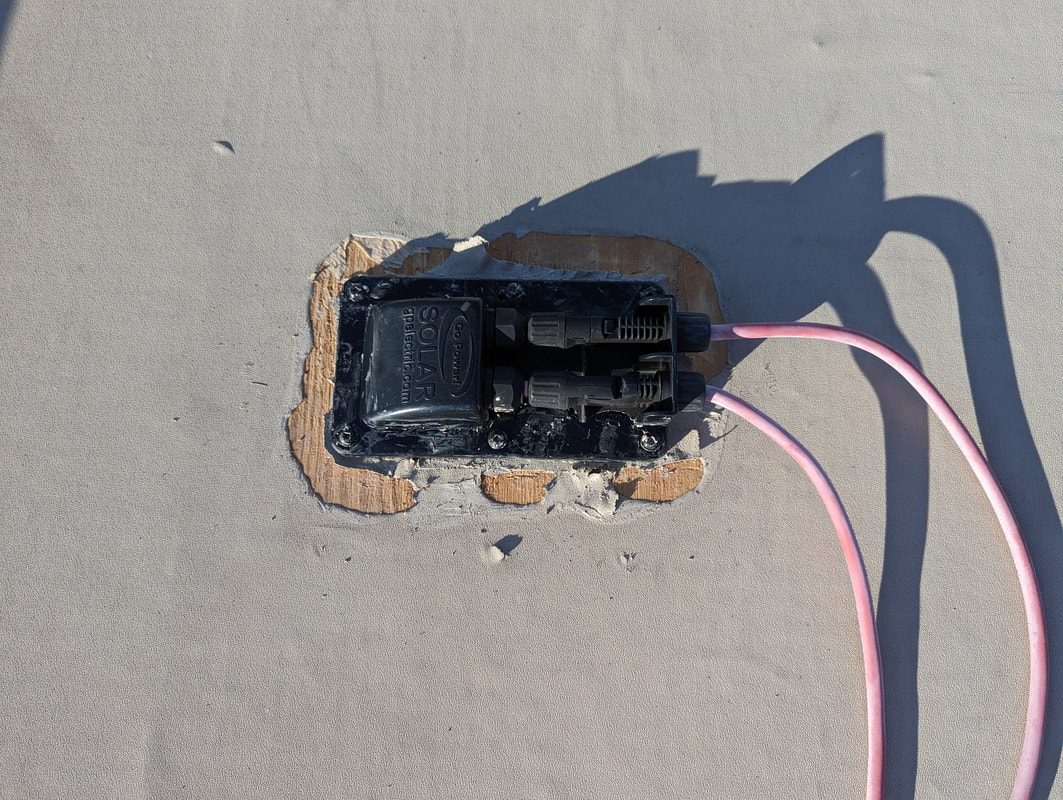
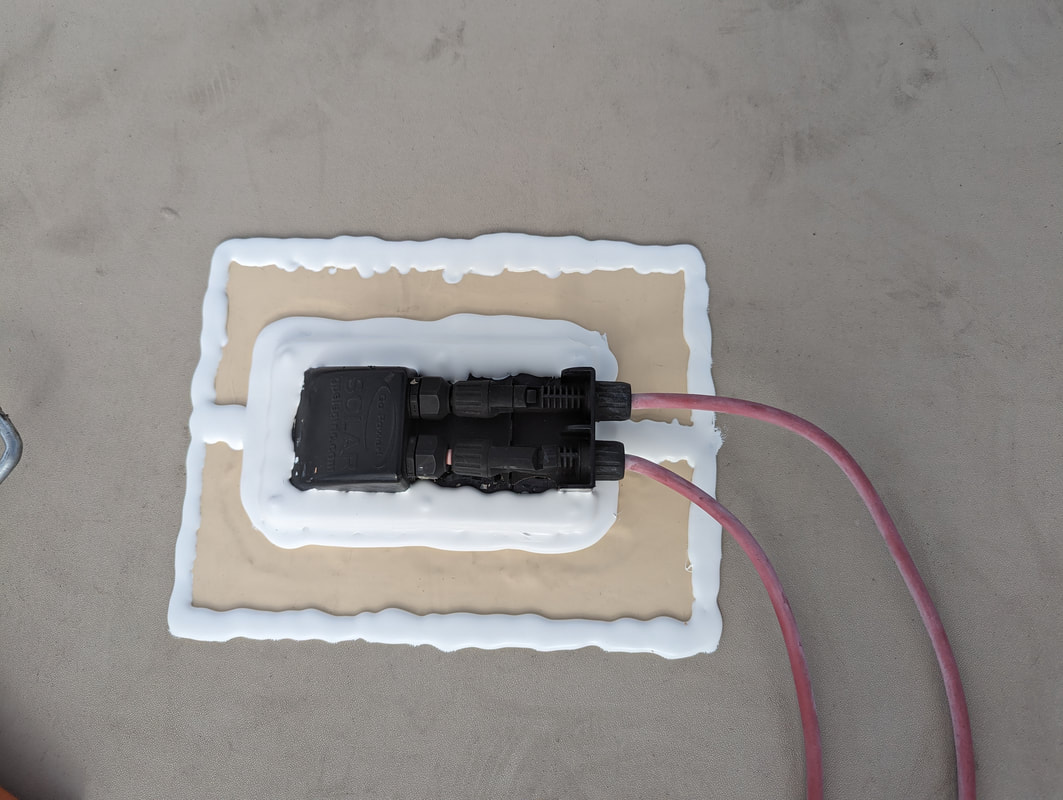
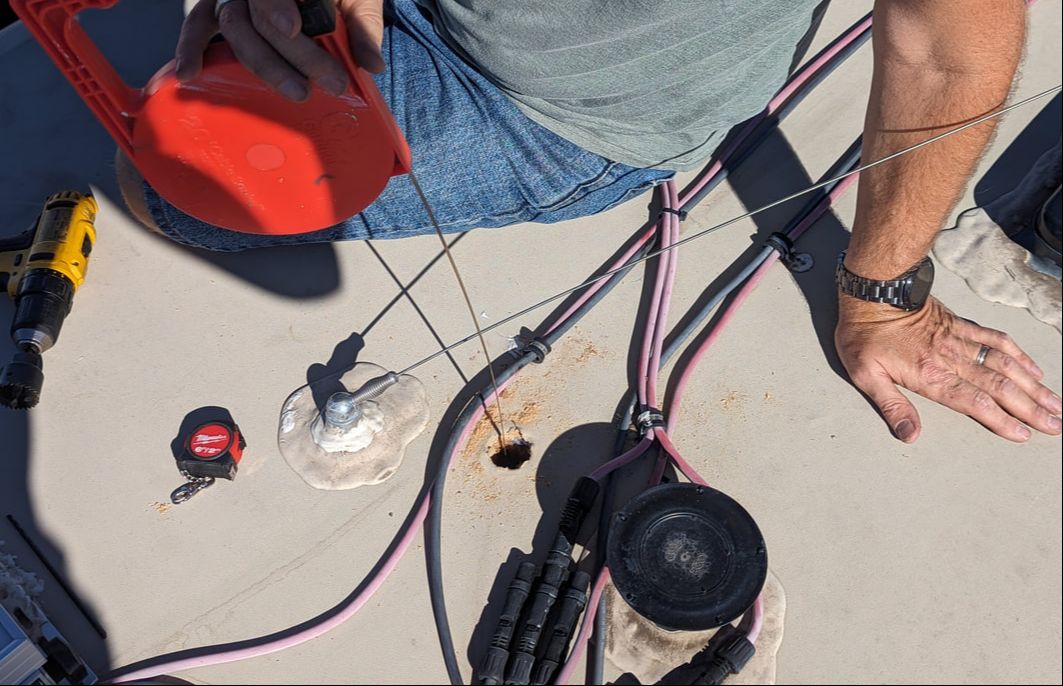 “I need to drill a hole in the roof,” Bob told me. A red flag quickly sprang up in my brain, reminding me of the many months of roof troubles we had encountered only a year earlier. Those issues had resulted from a leak. We certainly didn’t want to introduce the possibility of another one. The impetus behind this intentional hole in the RV roof was to run another pair of cables to support additional solar panels, significantly increasing our power capacity for boondocking endeavors. Bob thought we could add another junction box next to the existing one on the roof for the six solar panels already in place there. But, after attempting to break the seal around the attached box to get underneath it — prior to his announcement to me — he had managed to cut through Tagalong’s roof membrane, exposing plywood to the elements. Breaking Through the Ceiling Per usual with any roof job, the weather forecast called for rain, giving us a definitive deadline to get the wood covered. Some Durabond tape and self-leveling caulk took care of that. But Bob still needed to add the other cables and junction box. With our longest drill bit secure in our cordless drill, he started making a hole in the roof as I watched, my anxiety easing at seeing just a tiny hole. When the bit didn’t cut all the way through to the interior ceiling, Bob remembered he had to cut through the space between the roof and rafters. We needed a longer drill bit. An RV neighbor loaned us one, and Bob was able to break through the ceiling. Then, using a borrowed fish tape, he pulled some twine from inside the rig up to the roof — and then the cables needed to power the solar panels. Zip, zip, zip. Bob completed the wiring job, with the help of RV friend Alan. 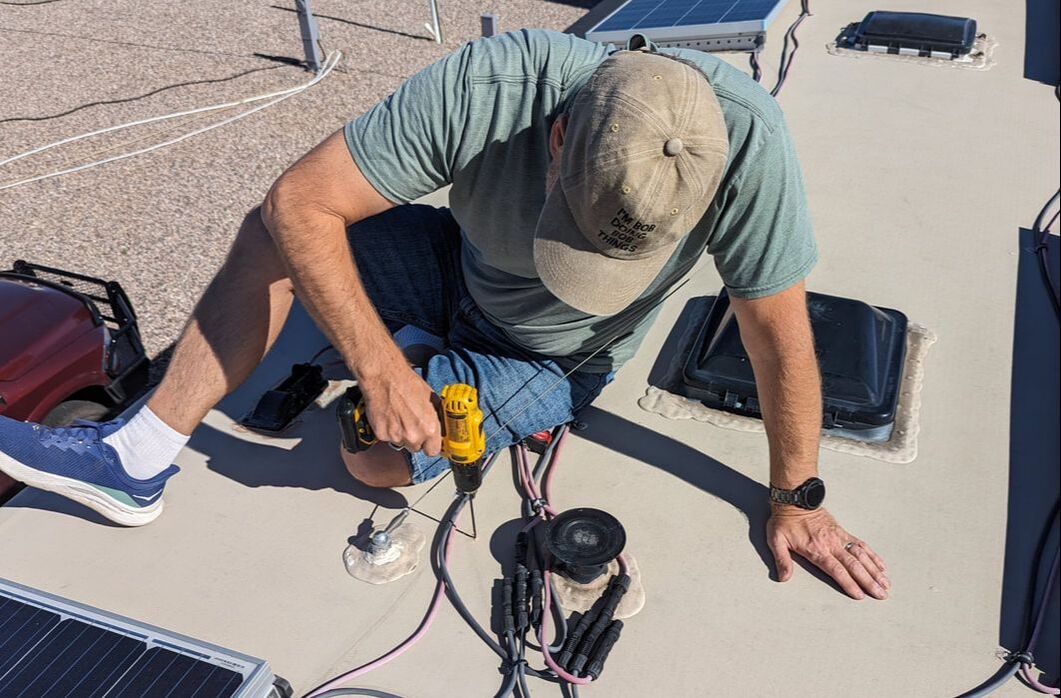 Placing the Panels The solar panels still needed to be added. On a blustery day, we managed to get the four new panels up on the roof, with Bob at the top of our onboard RV ladder and me climbing and clinging to the lower rungs to awkwardly hand each panel to him. Next came the placement. Where was the right location for each panel to ensure maximum sun exposure? After much deliberation, we agreed on the best arrangement, and Bob got busy securing the panels to the roof. 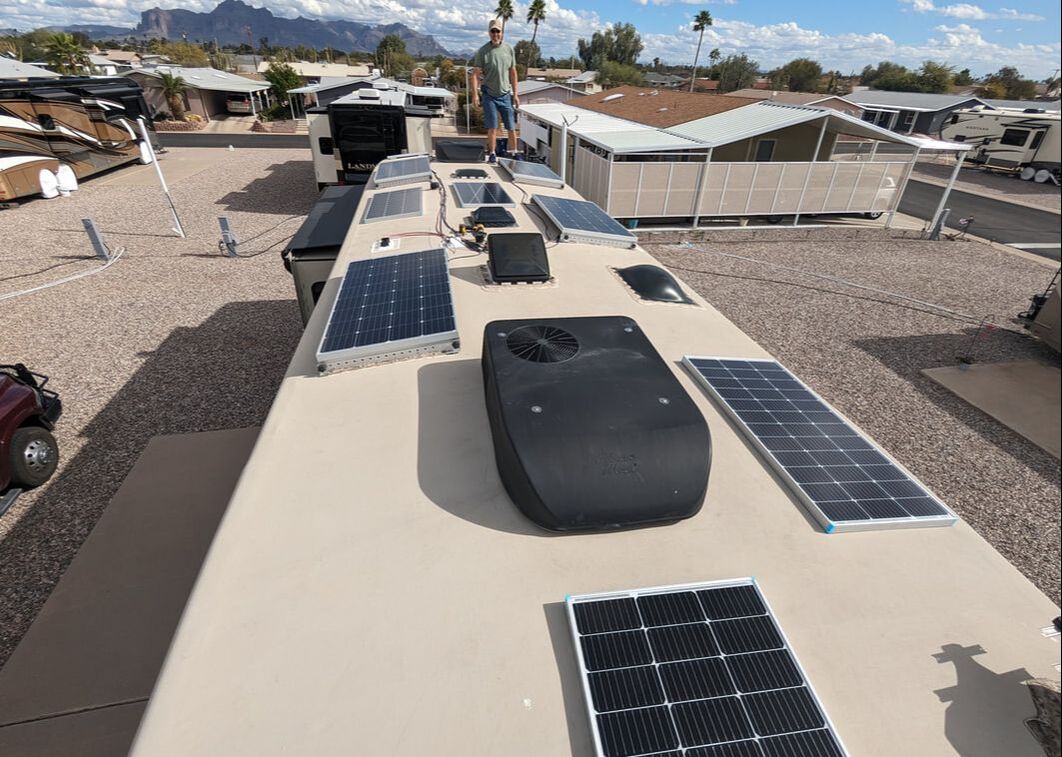 With 10 solar panels, we should be able to live off grid indefinitely — well, until our black tank fills up. The additional panels provide 42% more electric-generating solar capacity than our previous arrangement did. For the new panels to convert solar power to usable electricity, Bob also had to install a second solar charge controller — along with myriad wires, fuses, and junctions — in the basement of our rig. He completed the install with no issues. 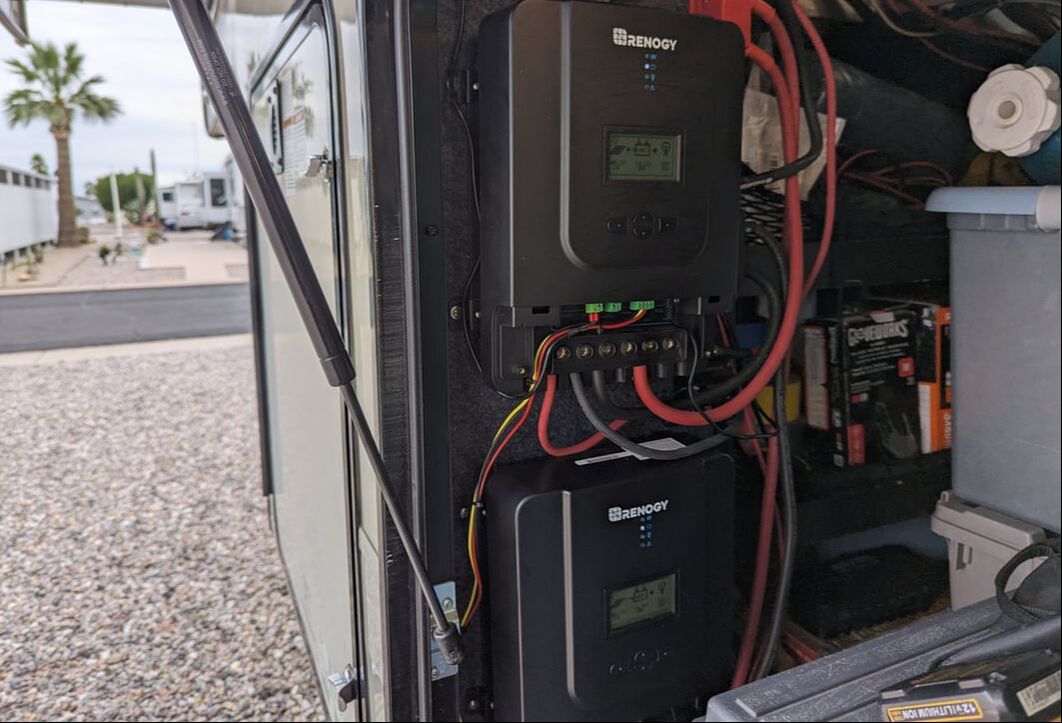 The initial test of the new panels didn’t look promising. The new solar charge controller displayed a message indicating inefficient wattage. But after a couple of days — and the sun emerging from behind clouds — the new panels started working properly. Look out, America. Here we come for more boondocking!
You might also like 12 Best RV-Related Purchases.  Some full-time RVers are drawn to the lifestyle by the freedom to fly by the seat of their pants, deciding when and where to move based on how they feel upon waking any morning. Others, like us, take a more disciplined approach. It’s more conducive to success with our 42-foot fifth wheel that stands 13 feet, 3 inches tall.
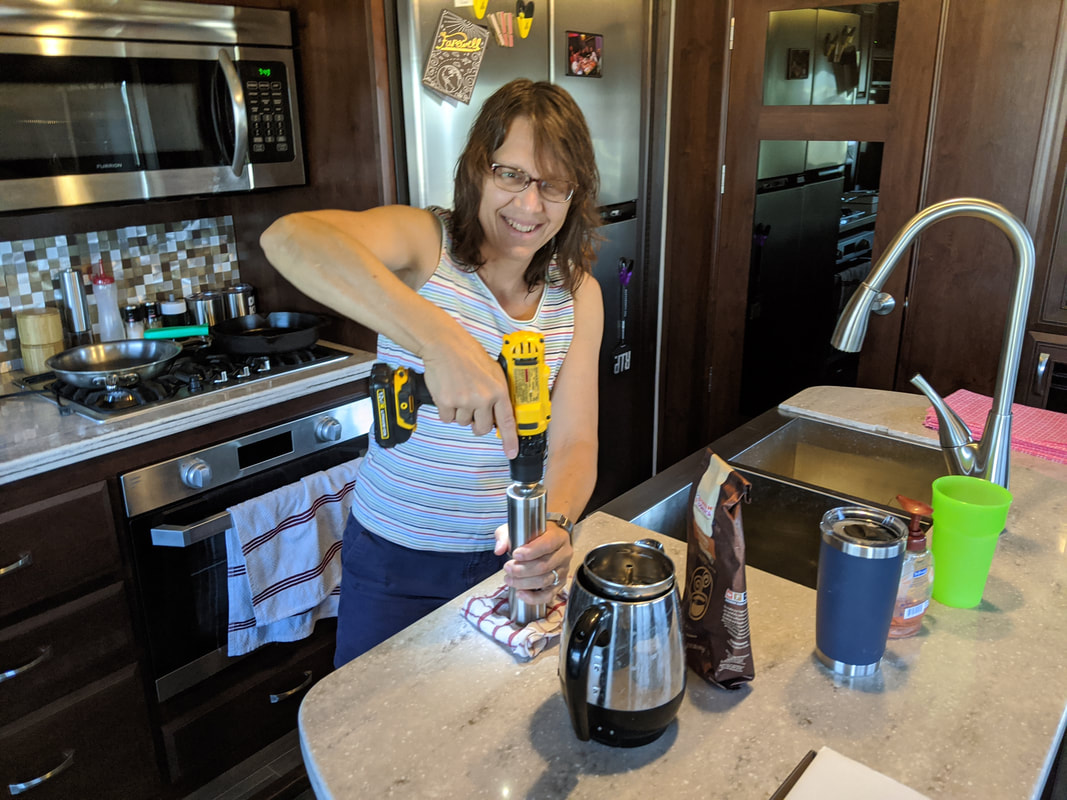
For our plan of attack, we rely on a number of phone apps to aid us in navigation and exploration. Apps for RVing abound, many of which we haven’t tried in our four years on the road. But a few have become standbys. Let’s take a look. 1. Campendium If we’re not moochdocking on the property of friends or family, Campendium tends to be our first app of choice for checking camping possibilities in a given area. For an annual fee, it shows us campgrounds, boondocking options, dump stations, overnight parking stops, and even Bureau of Land Management (BLM) land to help us make informed decisions. We’re able to search based on location, price, hookups, cell signal strength, amenities, and more. What we really like about this app is the reviews of people who’ve stayed at the places we’re considering. Freecampsites.net is another source we consult sometimes when researching places to stay. 2. Harvest Hosts If we don’t like what we find on Campendium for the area we plan to visit, we check our options on Harvest Hosts. We’re part of Boondockers Welcome, which was acquired by Harvest Hosts. The app incorporates both memberships. Harvest Hosts allows RVers to stay at museums, farms, wineries, breweries, and more for a single night. Boondockers Welcome lets guests stay on people’s personal property for up to five nights, depending on the host. Some hosts even offer electric, water, and/or sewer hookups for a small fee. Each host and experience is unique. We enjoy meeting our hosts, learning about their area, and spending time with them. 3. Open Roads As we travel the country, we make a lot of fuel stops — but fewer than we did before upgrading our fuel tank. Open Roads is our go-to app to save money at the pump. It allows us to get trucker discounts at Petro, TA, Love’s, and a few other truck stops across the country — and fill up at the diesel pumps the truckers use, which is super helpful since our rig is only 3 inches shorter in height than most semis. We’re also able to fill our diesel exhaust fluid (DEF) at the pump this way, instead of having to pour the smelly stuff into our truck’s DEF reservoir from a box. We use a handful of individual fuel station apps as needed in concert with Open Roads: TA, Love’s, Pilot, and Maverik. Although Open Roads tells us the prices for diesel fuel with our discount, it doesn’t tell us if a given stop has a dump station or other amenities we might be interested in, such as restaurants. The individual apps help with that. 4. CoPilot Because of the size of our rig, navigating can be challenging. We pay an annual fee for the CoPilot trucker app, which allows us to enter the dimensions of our rig and then routes us accordingly, steering us clear of low overpasses and bridges that can’t handle our weight. Other apps, such as Roadtrippers, allow RVers to enter their rig’s dimensions as well. We haven’t used those apps much as we’ve been very happy with CoPilot. However, after entering our height, length, and desired stops into Roadtrippers to plot a possible course for travel, I received a warning that certain legs of the journey wouldn’t work for us. But the app didn’t reroute us to routes that would. 5. Google Maps Although we trust CoPilot and its directions, we don’t solely rely on it for navigation. We also check Google Maps — especially satellite view — to ensure we can get into and out of fuel stops, parking lots, and potential camping spots. In addition, we take advantage of Google Earth and its distance-measuring feature to give us a realistic picture of what we might find at a given destination. 6. Ultimate RV Checklist To ensure we don’t forget any steps when packing up the trailer for travel and connecting it to and disconnecting it from the truck, we use a checklist app. We had used Tasks for a couple of years, but when it suddenly lost our checklists, we decided to trade it for an app with a backup option. Ultimate RV Checklist fit that bill. It comes with preloaded checklists you can use as is, or you can create your own to fit your needs. We did the latter. At one point, that app also stopped working. When that happened, we found that the backups couldn’t be easily reloaded into the app. So we moved them into Google Keep. I plan to put them back into a checklist app, where I can easily check them off and then uncheck them to reset the app for the next use. 7. OneControl Our Jayco Pinnacle came with OneControl by Lippert onboard, which we can use to turn lights on and off, open and close slideouts and awnings, and level the trailer. The control unit is right inside the trailer door. There’s also a OneControl phone app that offers the added convenience of being able to use it from outside the trailer. It comes in handy to assist with retracting the rear and mid stabilizers when we’re getting ready to connect the truck to the trailer, as well as opening and closing awnings while outside enjoying nice weather, and things like that. Other apps we use on occasion include CAT Scale and Allstays. You might also like 4 Reasons We Avoid RV Resorts. 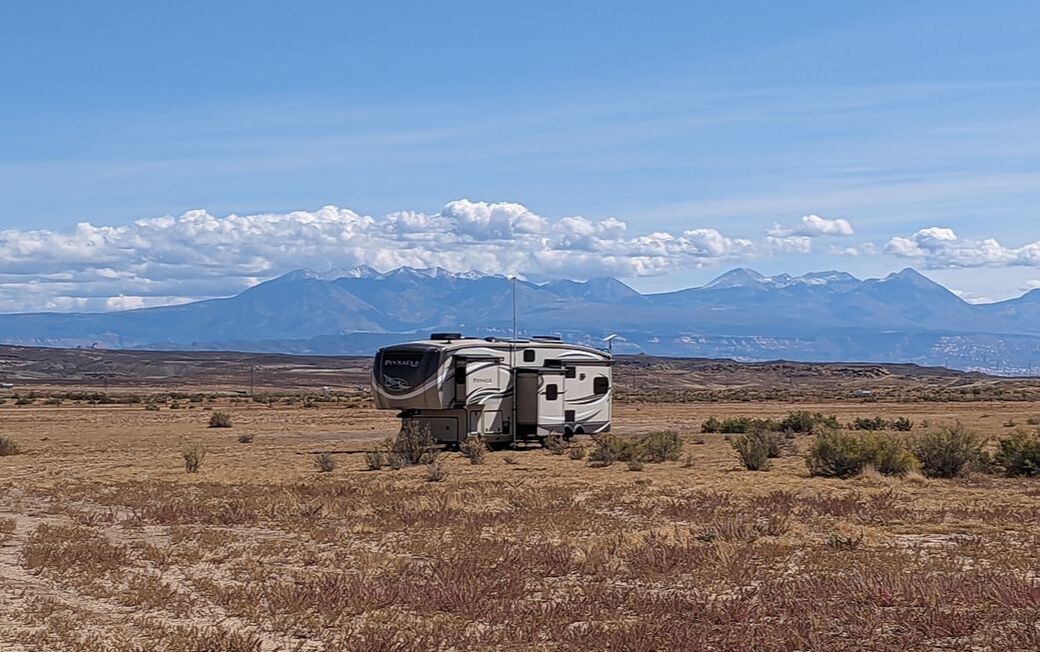 Ah, boondocking — wide-open spaces, beautiful views, quiet serenity, and economical cost. Since our rig is prepped with solar panels, generators, and large freshwater and wastewater tanks, we like to take advantage of dry camping when we can. An ultimate destination of Alaska in 2023 kept us in the West, providing abundant off-grid camping opportunities. Because of that, we did a lot more boondocking in our fourth year of RV travel than we did in the first three years combined. As a result, we feel much more experienced at it than we did when we got busted for camping where it wasn’t allowed. We’ve learned a lot since then about the importance of conserving all the water and electricity we can. That means reheating coffee and leftovers on the stove rather than in the microwave, among other things. Here are our favorite boondocking hacks that make living off the grid easy and enjoyable: 1. Plastic Grocery Bags One of the best practices of our boondocking success is using plastic grocery bags instead of tall kitchen trash bags to collect our waste. We learned this trick early on from full-time RVers Tom and Molly and continue to use it to this day. Because we don’t have a grocery-bag-size trash bin in our kitchen, we still line our normal-size waste can with a tall kitchen trash bag and hang the smaller grocery bag inside the larger bag, attaching it to two corners. This prevents messes from contents that don’t quite make it into the smaller bag. Plus, we can store about three full grocery bags in the tall kitchen bag. Then when we make a trip into town, we take the bags with us and deposit them in multiple bins for easy disposal. 2. Fat Trapper Another thing that helps with our trash situation is a gadget called the Fat Trapper (paid link). It’s a sealable plastic container that comes with heavy-duty bags for collecting grease and fat from cooking. We don’t want to put used oil and grease down our pipes because of odors and possible clogging — not to mention the water that would be required to wash it down. Nor do we want to put that in our trash bag as it could make a mess and sit there for a while, reeking, until we venture into town. 3. French-Press Coffee To avoid having to run our generators to make coffee every morning, we invested in a 50-ounce stainless steel French press (paid link). French presses work better with coarse-ground coffee than they do with what you can typically buy already bagged. For that reason, we purchased coffee beans and a manual coffee grinder (paid link) when we first moved into our fifth wheel. After a week or so, we traded elbow grease for a power drill to grind the coffee. That worked great. But then we got even smarter. We decided to buy whole beans and use an in-store grinder at the supermarket, allowing us to select the coarseness of the grind. Finding grocery stores that offered that feature during the pandemic became quite challenging, so we learned to stock up on bags of self-ground coffee before hitting the road for our annual trek. 4. Once-a-Day Dishwashing Because our freshwater supply and gray water tank capacity are limited when living off the grid, we let our dishes pile up in the sink and wash them only once a day. On rare occasions, we use paper dishes and plasticware, but those create more trash that we have to store until making a trip into town. If we’re camped at a place where campfires are allowed and firewood is abundant, we can burn our paper dishes. In reality, however, we don’t have campfires all that often. Another thing that can help with dishes is spraying dirty ones with a water/vinegar mixture from a spray bottle before leaving them in the sink. This can make the eventual cleaning process easier. Along those same lines, we often wipe food remnants from our plates and bowls using a napkin or paper towel before leaving them in the sink. 5. Prewashed and Sliced Produce In addition to washing dishes only once a day to cut down on water use, we try to buy pre-washed and pre-sliced produce when stocking up for a boondocking adventure. This can save quite a bit of water that we would have used to wash mushrooms, for example. That may not sound like a big savings, but cleaning produce uses more water than you might think. Tasks we took for granted in our sticks-and-bricks home aren’t always optional when boondocking. 6. Cast-Iron Skillet One of our best buys that we use on a daily basis is a 10-inch cast-iron skillet (paid link). After seasoning it well, it cooks great food evenly, helps us maintain healthy iron levels, and is easy to clean — saving water. Most uses require only wiping the pan with a paper towel and adding a little more oil to it. 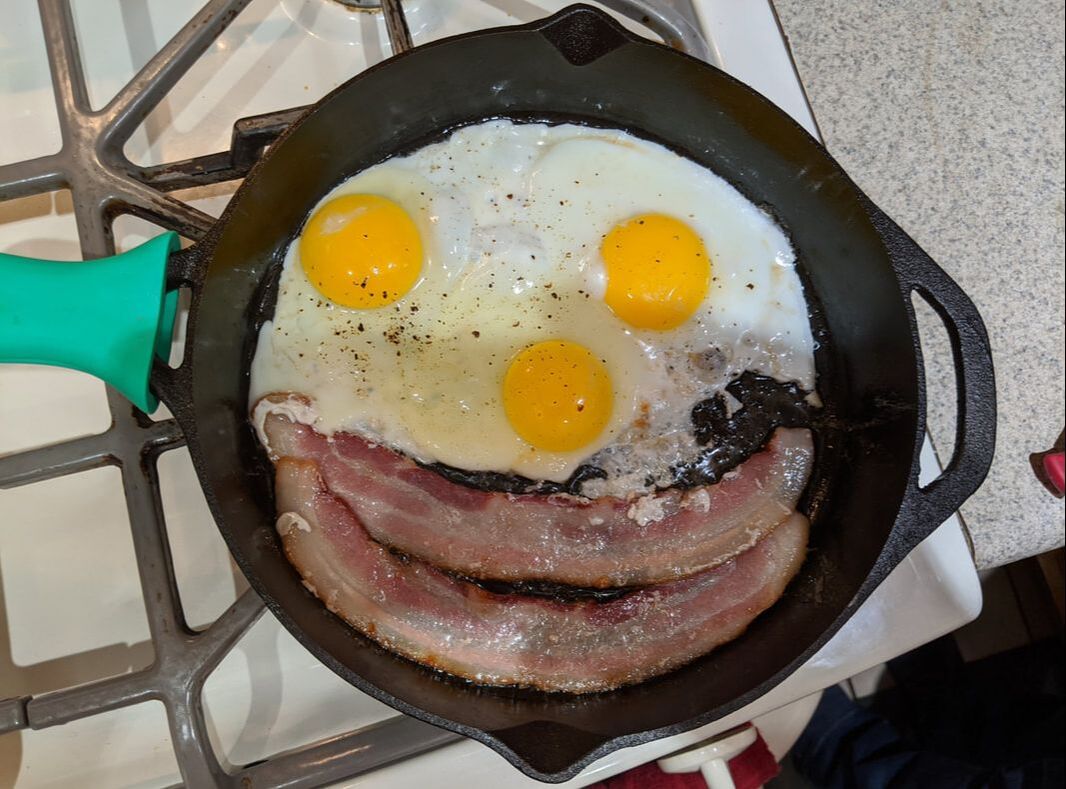 7. Window Shades for Temp Control Our RV came equipped with two shades on each window: a privacy screen and a black-out shade. The latter came in quite handy in Alaska’s land of the midnight sun. 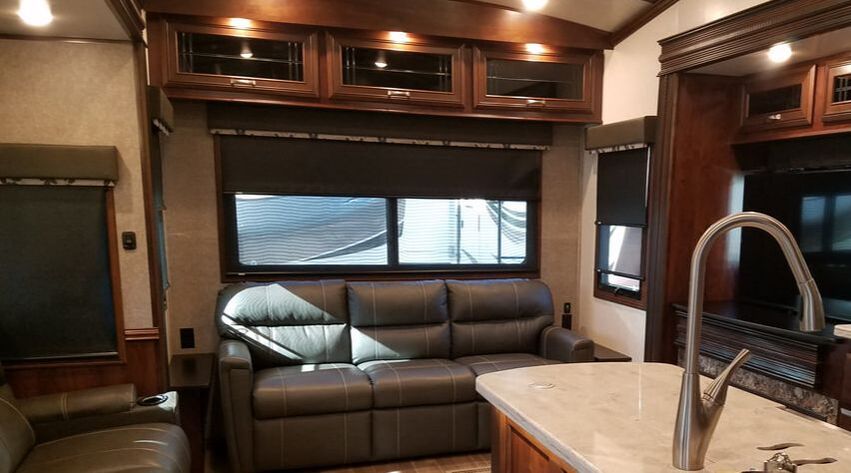 We use both shades to keep the interior of our rig temperate. Closing the screens on cold nights helps prevent warmth from escaping. And closing them on warm days helps keep the inside temperature tolerable.
You might also like 12 Best RV-Related Purchases. * As Amazon Associates, we earn from qualifying purchases. 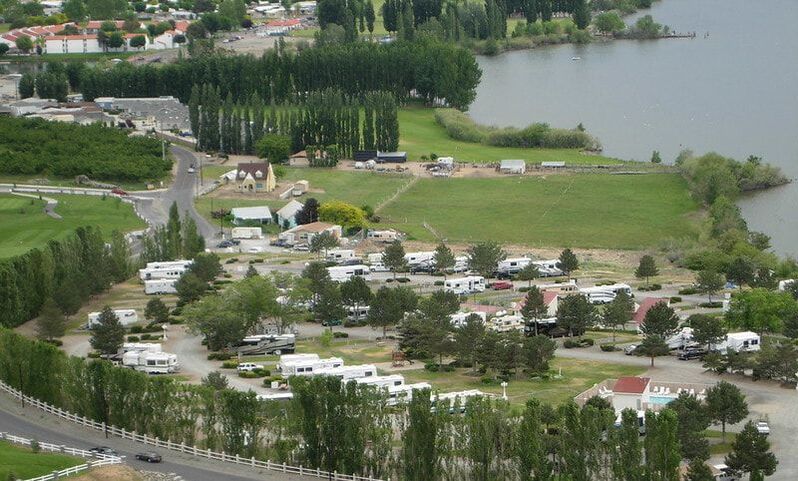 Across the country, campgrounds range from desert scenery with a picnic table and firepit to RV resorts nestled in trees and mountains offering all the bells and whistles: laundry facilities, pools, recreation activities, go-kart rentals, and more.
Although the latter options may sound like good places to visit, we typically avoid anything that has “resort” in the name. Here are four reasons why: 1. We Don’t Use the Amenities Most RV resorts include some combination of cable TV hookups, Wi-Fi, swimming pools, showers and bath houses, laundromats, miniature golf courses, and pickleball and/or tennis courts. Some even feature weekly movies, hay rides, pancake breakfasts, and things like that. Although those are appealing, we don’t have much use for them. As full-time RVers, Tagalong is our home. He stores everything we need for daily living and recreation, other than a washer and dryer. 2. They’re Geared for People on Vacation RV resorts, like hotel resorts, are really targeted at people on vacation. When you book a site for a week at an RV resort, the property managers expect you to take advantage of all they have to offer. When our kids were young, we spent our summer vacations in a travel trailer at a KOA near the Grand Canyon. It provided something for all of us: a playground, game room, and movies for the kids; a pool, mini-golf, and hayrides for the family; and a relaxing getaway for us as a couple while the kids played with friends and immersed themselves in activities. More recently, we stayed at an RV resort in Vermont because of its proximity to some friends we wanted to visit. In our full week there, we didn’t use the pool or mini-golf once, although we did visit the on-site laundromat. Since I work all week, the noise of vacationers can be a distraction. RV walls are not very thick. Fortunately, I have noise-canceling earphones that prevent background noise from trickling through my microphone on Zoom meetings. 3. They Nickel and Dime You Some of the aforementioned amenities come at a price. The Vermont RV resort charged for Wi-Fi, for example. If you’re already paying more at a resort than you would at a campground, shouldn’t Wi-Fi be included in the price? Because we travel all over, we had our own Wi-Fi setup and didn’t need to pay for that service. (This was before we purchased Starlink.) This resort also charged $9 per bundle of firewood for the convenience of having it in the camp store. Resourceful campers could find it cheaper outside the campground if they looked. The same bundle of wood cost only $5 at the campground we stayed at in Maine. 4. They Have a Lot of Rules It seems that part of the fees at RV resorts go to establishing and communicating rules. Whether or not those restrictions are enforced is another story. The Vermont resort wanted to charge our friends $4 just to enter the park to visit us. Maybe the operators thought our guests would use the amenities? Kelly called the office and sweet-talked her way out of the fee by assuring the worker that she and Jim would not be using the amenities. Rules have a place and are important to ensure order. But if we have a choice between paying extra money to stay at a location that has lots of rules or camping where we can be carefree, we’ll choose the latter every time — unless the first is our only option in close proximity to some friends or family we want to catch up with. You might also like How We Determine Our RV Stops. 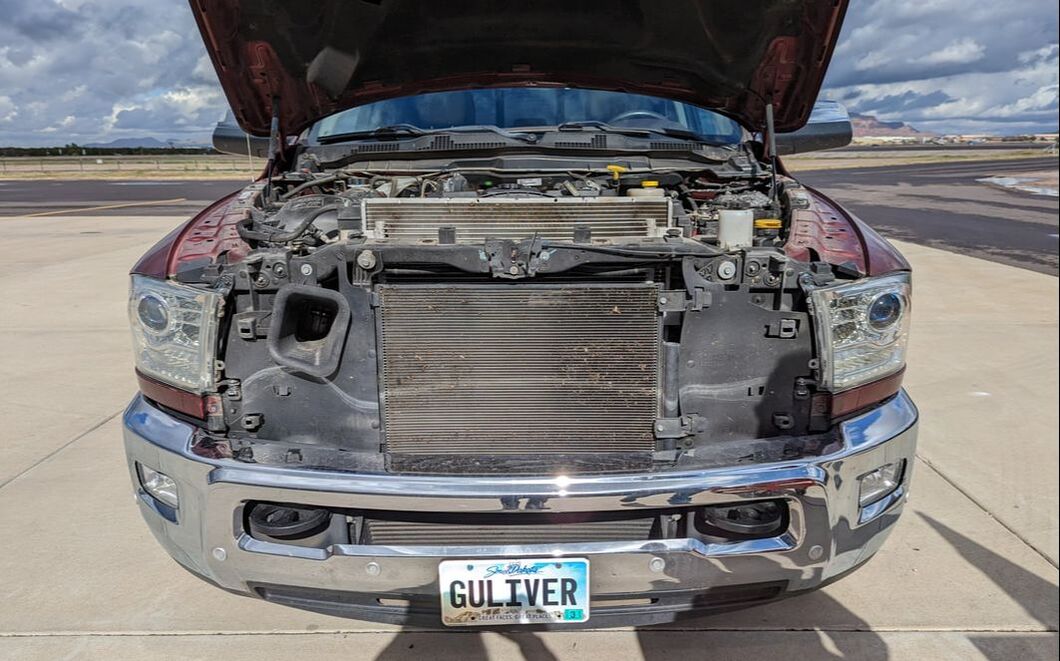 We had talked about getting a grille guard for our truck since embracing our RV lifestyle. After all, if anything were to happen to Gulliver, we might be unable to relocate our house on wheels. Despite that reality, other priorities on our wish list kept pushing a grille guard lower on the lineup. With a drive to Alaska in our sights, we decided the time had come to invest in protecting our hardworking truck from potential damage as a result of a collision with an animal or another vehicle. Evaluating Grille Guard Options Grille guards come in lots of types and price points and have many names — bull bars, push bars, brush guards, bumper guards. Most are made of steel. Some consist of a combination of sturdy metals, such as polycarbonate, aluminum alloys, and/or steel. Some are bolt-on additions whereas installing others is a lot more involved. We started noticing these parts on other trucks and assessing what would work best for our needs. A bolt-on one would fit our budget and provide some protection, but we wanted to be able to use our parking sensors — especially since the addition would extend the length of our 23-foot truck. Fitting it into a parking spot requires all the help we can get. The bolt-on grille guards we found, although supposedly easy to install, didn’t extend the parking sensors to the additional length of the new equipment. So, our search for the right grille guard continued. While camping at South Llano River State Park in Junction, Texas, a beefy grille guard caught our attention. Upon closer examination, we noticed diamond plate material attached to the grille guard replaced the entire front bumper. The owner saw us admiring the piece and came to talk to us. We explained the situation and our concerns about the parking sensors. He informed us the sensors had been extended for his equipment and showed us the proof. We were sold on a Ranch Hand front bumper rather than a basic grille guard, a cost difference of upward of $700. We knew that, despite the additional cost, this solution would give us the most peace of mind. So, we saved the money and purchased a Ranch Hand Legend Front Bumper. Replacing the Front Bumper 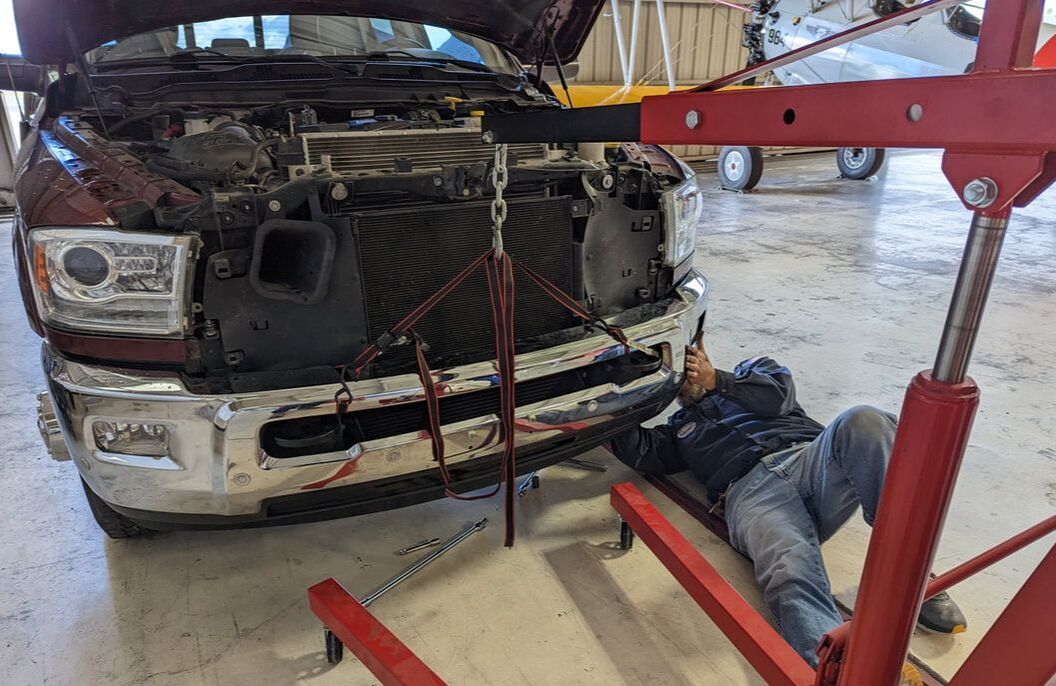 Installing the new equipment meant first removing the original bumper. We strapped the factory bumper to an engine lift to hold it in place as it detached from the truck and started loosening nuts and bolts. Having disconnected the factory bumper from the truck, I busied myself with installing grommets for the parking sensors into the new one, along with our fog lights. 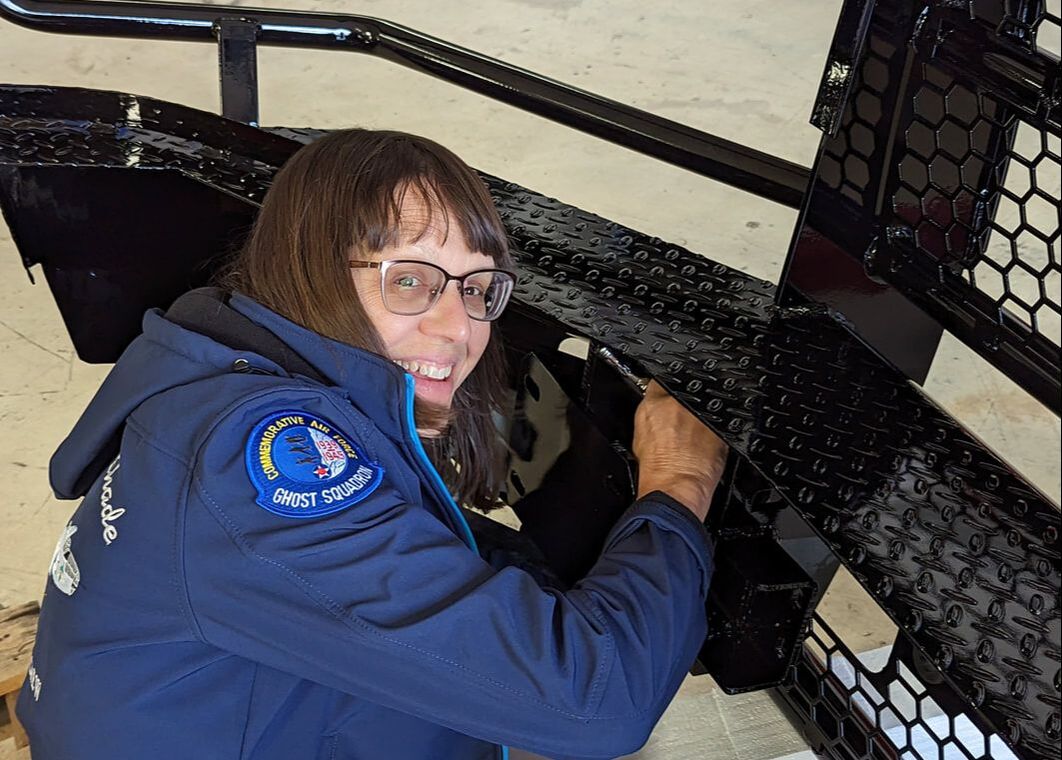 Because of the way the original bumper had been installed, we couldn’t dislodge the bolts holding its brackets in place. The radiators prevented enough wiggle room to back the bolts out of their holes. Without removing those brackets, we couldn’t attach the new bumper. The factory bolts had to be cut off. There was no other way around it. Our Commemorative Air Force friend, Chris R., came to our aid. He used a Sawzall to slice through the bolts. The loud grinding noise assaulted our ears, and the process proved more arduous and time-consuming than we had hoped. But the Sawzall got the job done. 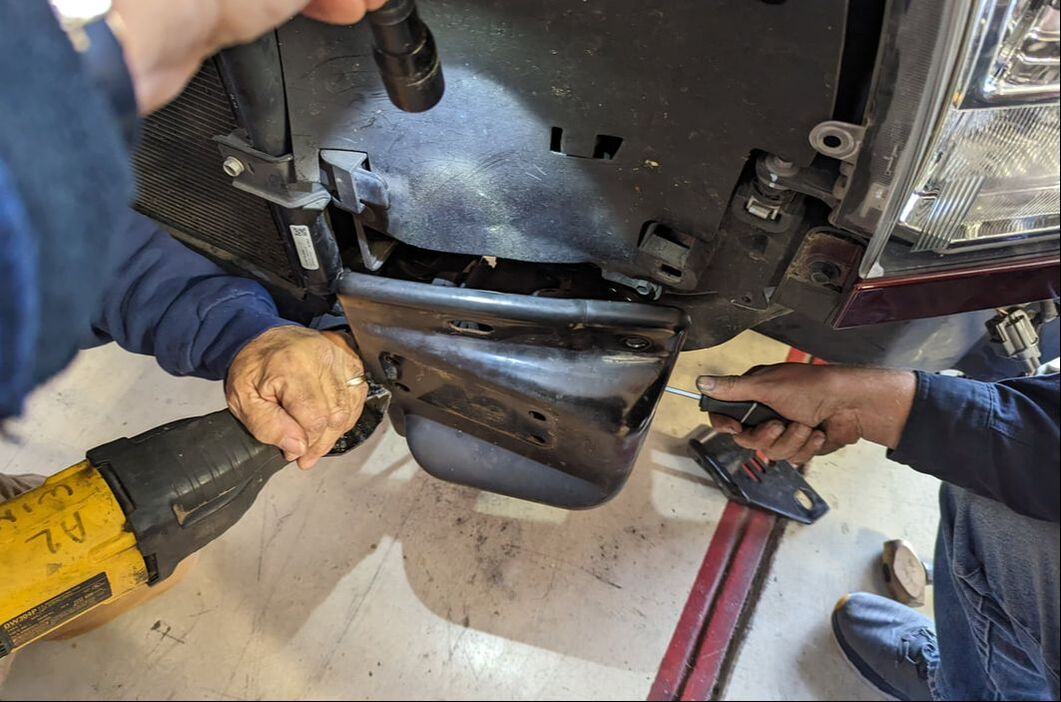 Able to carry the factory bumper on my own, I loaded it into the bed of the truck. We strapped the new, 300-pound bumper to the engine lift, thankful we had the right tool for the project. Although we had invested about five hours into the face-lift, we had gotten a late start. Because of that, we couldn’t complete the job in one day and had to leave Gulliver overnight. He looked sad. We left the new bumper on the engine lift and caught a ride home. 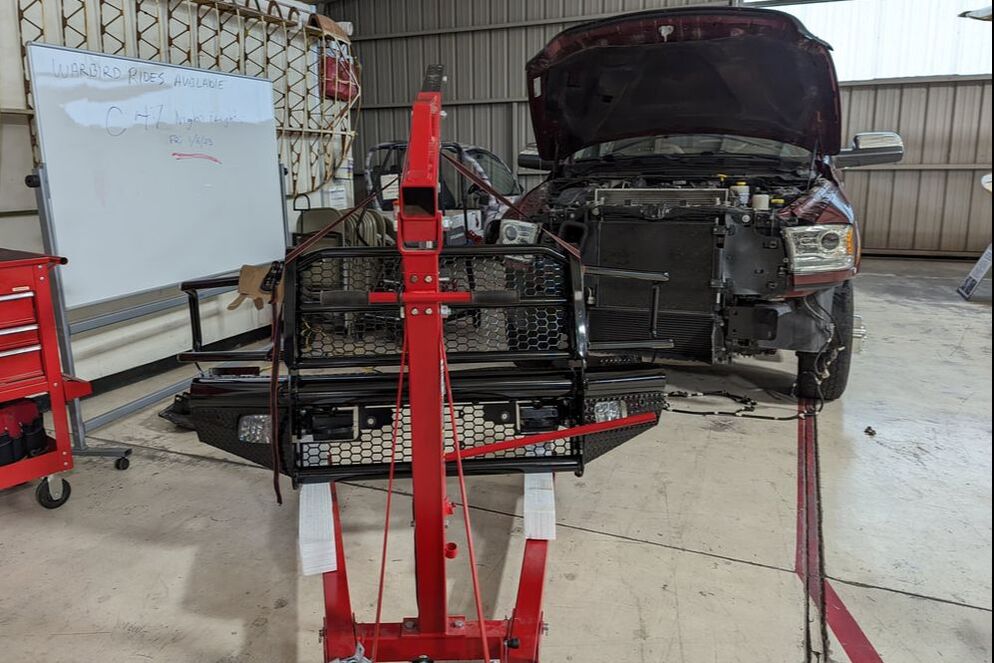 Finishing the Procedure The next morning, we returned to complete the job. We appreciated the help of friends Bob T. and Tim T., who graciously volunteered to help both days. It took the four of us to guide the new bumper into position and secure it to the truck. 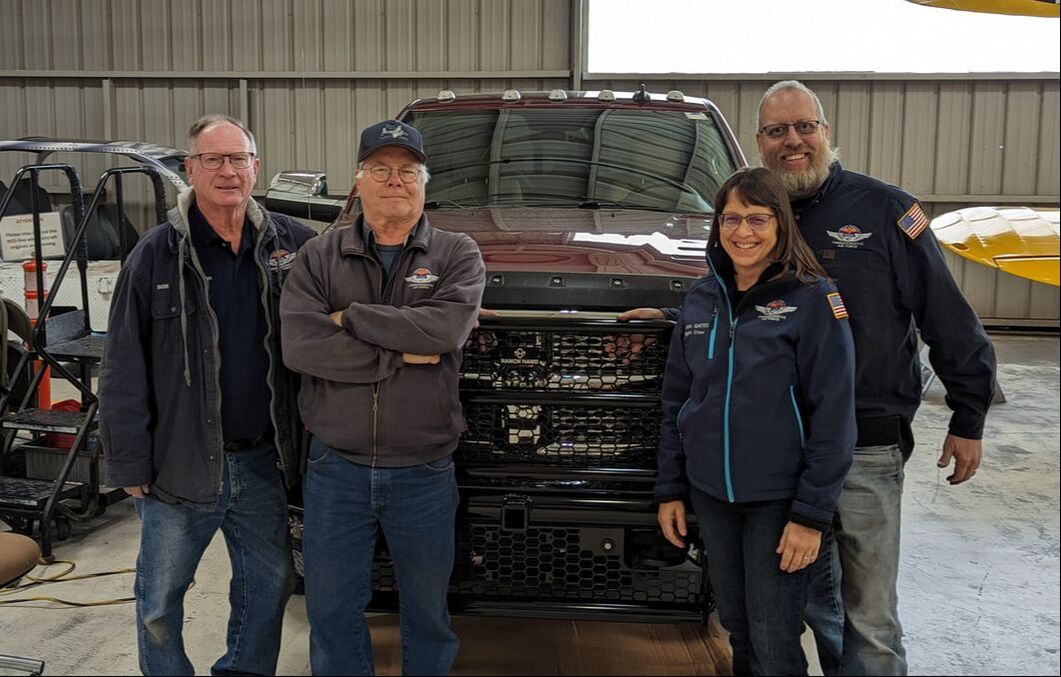 Gulliver looks beefier and is about a foot longer. He drives differently too. We can feel the weight in the front while traveling down the road. For the importance he provides to us and our lifestyle, we’re glad we took the plunge and upgraded his grille. And we were able to sell the factory bumper the same day we brought it home. Onward to more adventures. You might also like Gulliver Gets a Transplant. 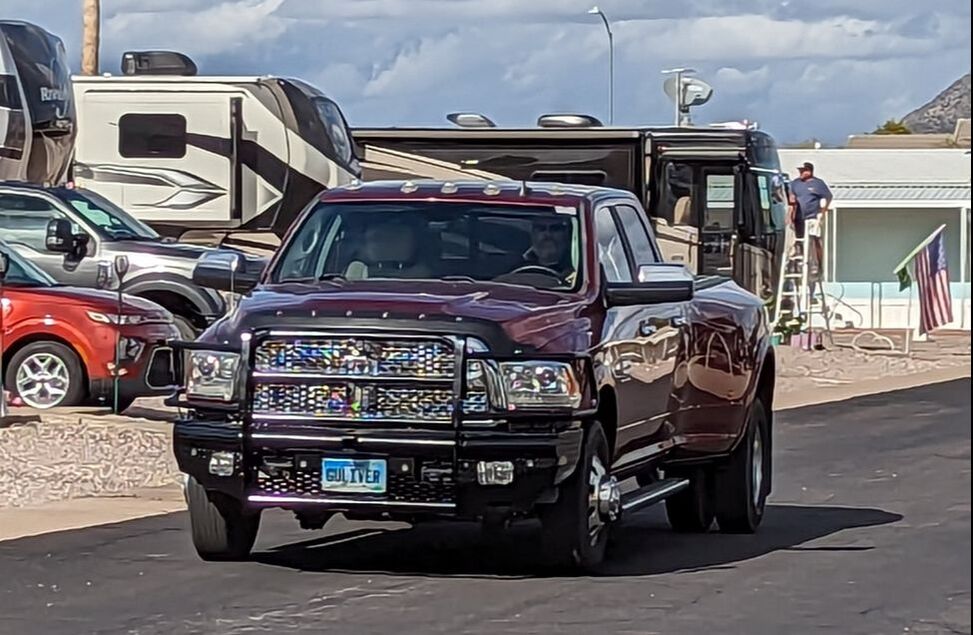 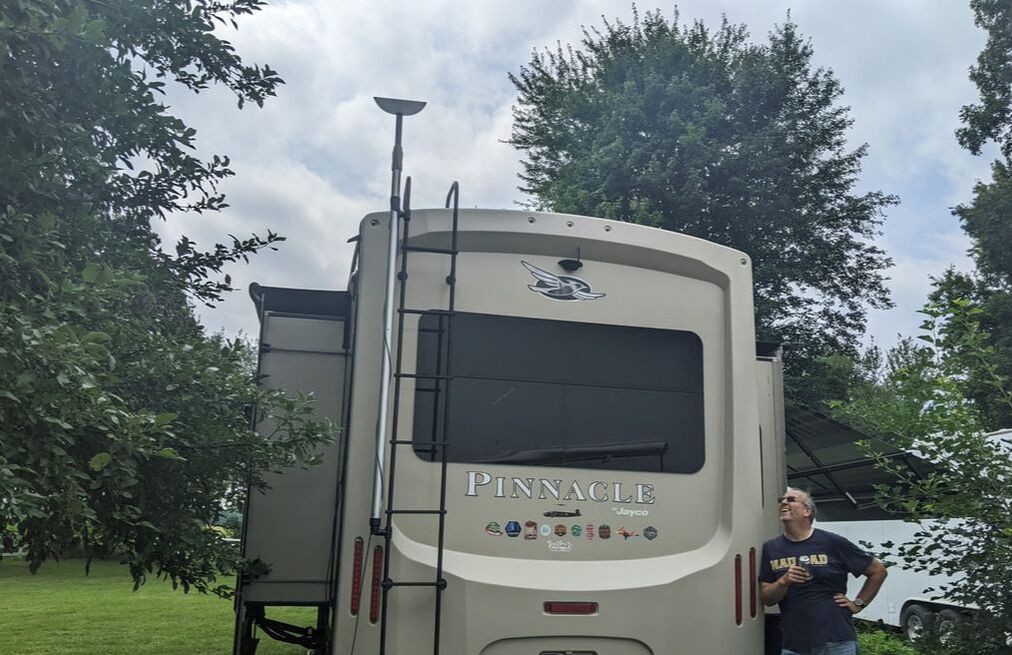 Working remotely from anywhere in the country requires good internet access. As we shared early in our RV journey, we use a variety of technologies to ensure strong Wi-Fi signal. In May 2022, Elon Musk’s Starlink high-speed internet service became available for RVs. After considering it for a month or so, we decided to purchase it. And we’re super glad we did. What Is Starlink for RVs? Starlink is an array of more than 3,000 small satellites in low orbit around Earth. By orbiting only 340 miles from the planet, the satellites can deliver low-latency broadband internet with speeds high enough to support video calls, streaming, and even online gaming. Traditional Starlink required a stationary satellite receiving dish that limited Starlink use to immobile locations. Starlink for RVs extended the high-speed, low-latency functionality to changing locations. Although the service is not designed to be accessible while in motion, it is available if you move from point to point. Setting up Starlink for RVs After getting dropped from video calls in Maine and Vermont due to poor Verizon cell service and no T-Mobile service, I was eager to try Starlink. Although tempted to ask our camping neighbors in Maine if I could use their Starlink service, I refrained. I hobbled through the work week, knowing our Starlink equipment was waiting for us at my brother’s house near Lansing, Michigan. We arrived at my brother’s in great anticipation of the internet speeds we could get. Our $599 equipment fee provided everything we needed to set up the service: the satellite receiving dish, a router, and a 75-foot cable. 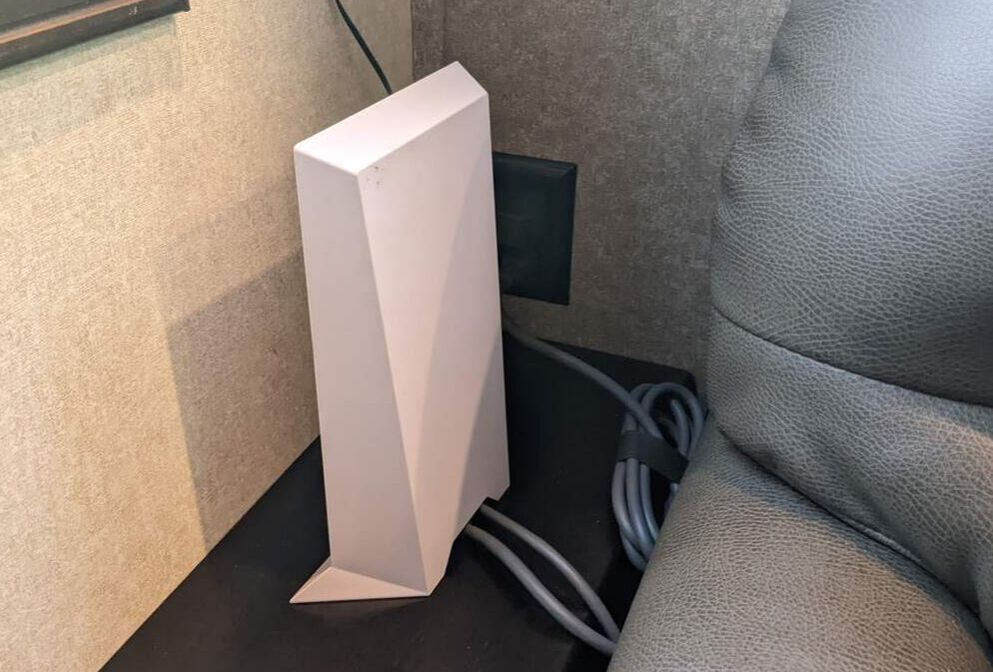 For an additional $150, we purchased a FlagPole Buddy* from Amazon to mount to our RV ladder for easy setup and teardown of Dishy, as the satellite dish is called, when we need it to be high. Other times, we can put the dish on the ground. It requires a clear view of the northern sky. 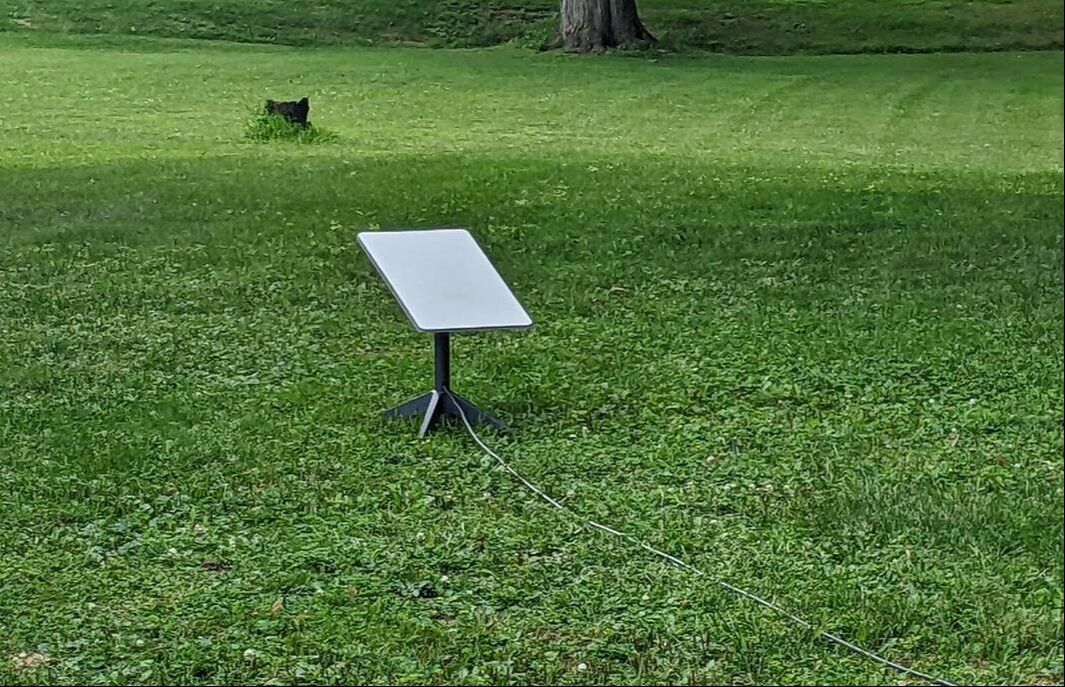  Bob had to download the Starlink app on his smartphone to complete the setup. The app has features that show how the service is working, where Dishy’s view to the satellites is obstructed, and things like that.
Starlink comes with a 30-day guarantee. If you’re not happy with the service in that time period, you can return it and get a full refund on the cost of the hardware, the initial $599. On top of that, the service costs $135 per month. You might still be out the $135 for the first month even if you’re unhappy with it. Assessing Starlink Internet Service The Starlink service didn’t deliver exceptional internet quality at my brother’s house. But it did provide enough for us to stream movies and TV shows. Our Verizon signal came in strong, so I used it for work there. And we canceled our T-Mobile service. At our next location in southwestern Michigan, I hoped Starlink would enable me to work from my office without having to cross the street to my cousin’s house every time I needed to join a video call. Verizon service at Debbie’s farm is not very good. I’m happy to report Starlink has exceeded my expectations for internet quality. Although encountering a few hiccups when our Dishy lost sight of a satellite, I haven’t been dropped from any video calls while using it. I’ve been able to do my work successfully from my office inside our RV. Is Starlink for RVs Worth It? As I mentioned, we can’t use Starlink while traveling from point to point. On those rare occasions when we need reliable internet while in motion, we use our Verizon MiFi. Depending on the location, and the number of other Starlink users there, internet speeds may slow, especially during peak times. For example, if numerous people in the area rely on Starlink for their full-time work, that can affect our internet speed. Similarly, if lots of people use Starlink to stream TV shows and movies in the evening, we might run into some issues while watching our own. Another drawback of Starlink for RVs is that it’s not yet available everywhere. That’s why we’ve kept our Verizon service. We pay $135 a month for Starlink and $70 a month for Verizon to ensure we have dependable internet so that I can work and support our RV living habit. We’ve achieved download speeds as high as 92 Mbps when Dishy had a completely unobstructed view of the entire northern sky. The highest we got with Verizon were in the 40s range when in close proximity to a Verizon cell tower. For us, Starlink for RVs is well worth the cost. We’re glad we made the investment. You might also like RV Travel: The Fuel Factor. * As Amazon associates, we earn from qualifying purchases.  The high fuel prices and a planned trip to Alaska got us seriously thinking about an additional fuel tank for Gulliver. After all, 32 gallons can only take us so far, especially when we average 8 miles per gallon while towing. An additional fuel tank offers a couple of perks. First, it would give us more flexibility in where we stop, enabling us to go longer distances with fewer fillups. That would mean we could take advantage of rest areas, which could save us 20 minutes a pop over a truck stop. Second, it would enable us to stock up on fuel when we find it at a good price. Weighing the Options Most people who add fuel capacity to a truck do so through an additional tank that sits in the truck’s bed. Various makes and models of those exist. Some stick up higher than the sides of the bed and include a gas pump handle for manually filling the in-market tank that came with the truck. Others sit just below the sides of the bed and connect to the onboard tank for more seamless switchover. We wanted one shorter than the sides of our truck as we have a tonneau BAKFlip cover over the bed to protect our fifth wheel hitch when we’re not towing. During travel, we flip the cover open and secure it in place. To accommodate Bob’s handyman skills, we carry a lot of tools in the bed of our truck, too, distributed in four stacks of modular containers secured against the cab — where most after-market fuel tanks are designed to sit. Not wanting to part with or relocate the tools to the trailer, Bob looked into other fuel tank options. He found we could replace our 32-gallon onboard fuel tank with a 55-gallon tank. That’s the route we decided to pursue. The Doctors Are In 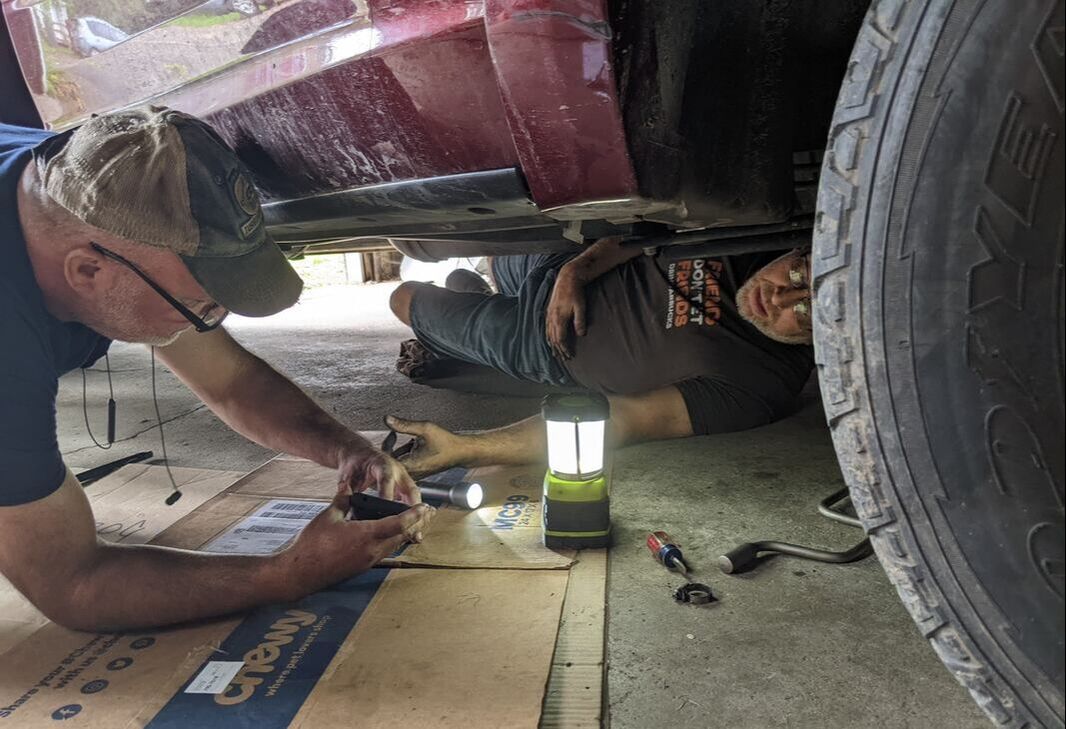 Bob ordered the tank and had it sent to my brother Steve’s house in Michigan. Bob and Steve are both mechanically minded and felt confident they could perform the operation and save money over having a dealer do it. Preparing Gulliver for surgery meant draining his onboard fuel tank. Since we arrived at Steve and Ginger’s with about a half tank of diesel, we had a bit of driving to do to empty his bowels. Two round trips to the Detroit airport, about 70 miles each way, to drop me off and pick me up for a work trip to San Francisco did the job. The day of surgery arrived. Steve offered the use of his garage for the operation. Out with the Old, In with the New 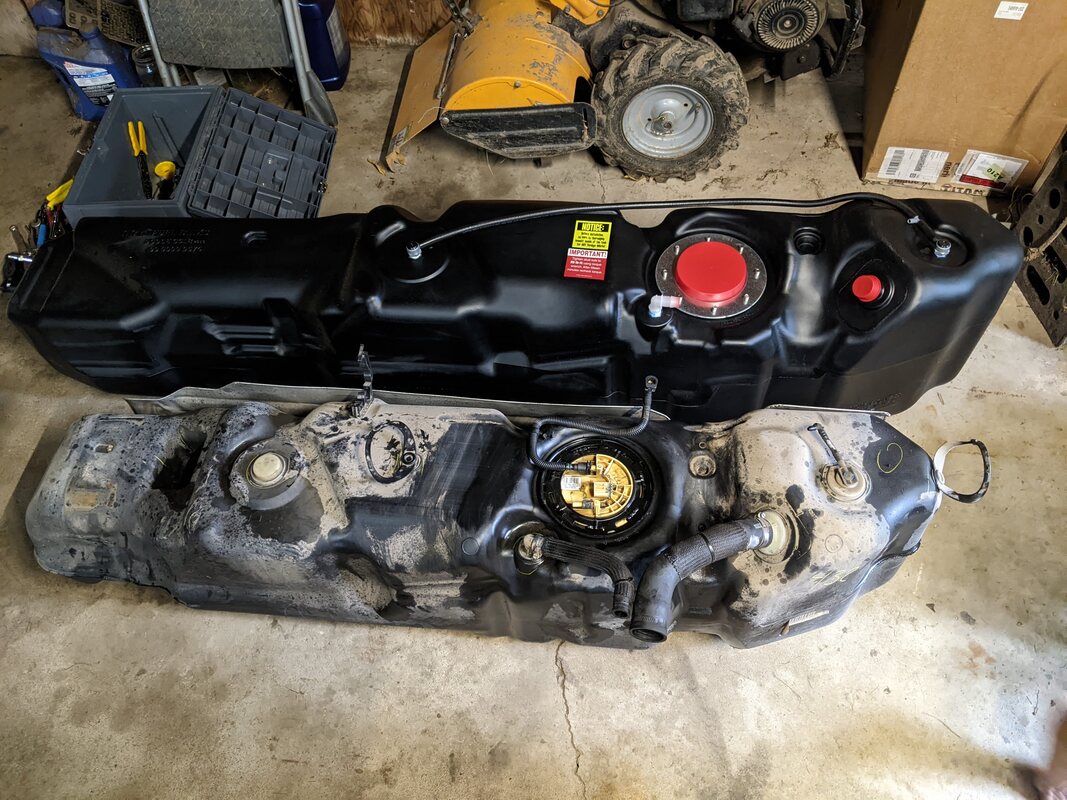 Bob crawled under Gulliver and loosened the bolts holding the original fuel tank in place. As he neared time for the old tank to come out, fumes overpowered him, making him dizzy and lightheaded. I got dizzy too. Did we hallucinate seeing a duck that thought it was a chicken? No, that actually happened.  The guys succeeded in removing Gulliver’s old tank. Then they had to reattach hoses from the original tank to the new tank before they could install it. Bob painstakingly cleaned around the openings of the old vessel before doing so to help ensure no debris got in the new tank. Because the new tank stood taller than the original, installing it required jacking up Gulliver’s tail. That enabled enough wiggle room to get the new tank into position. The guys got it secured and returned Gulliver’s tail to the ground. 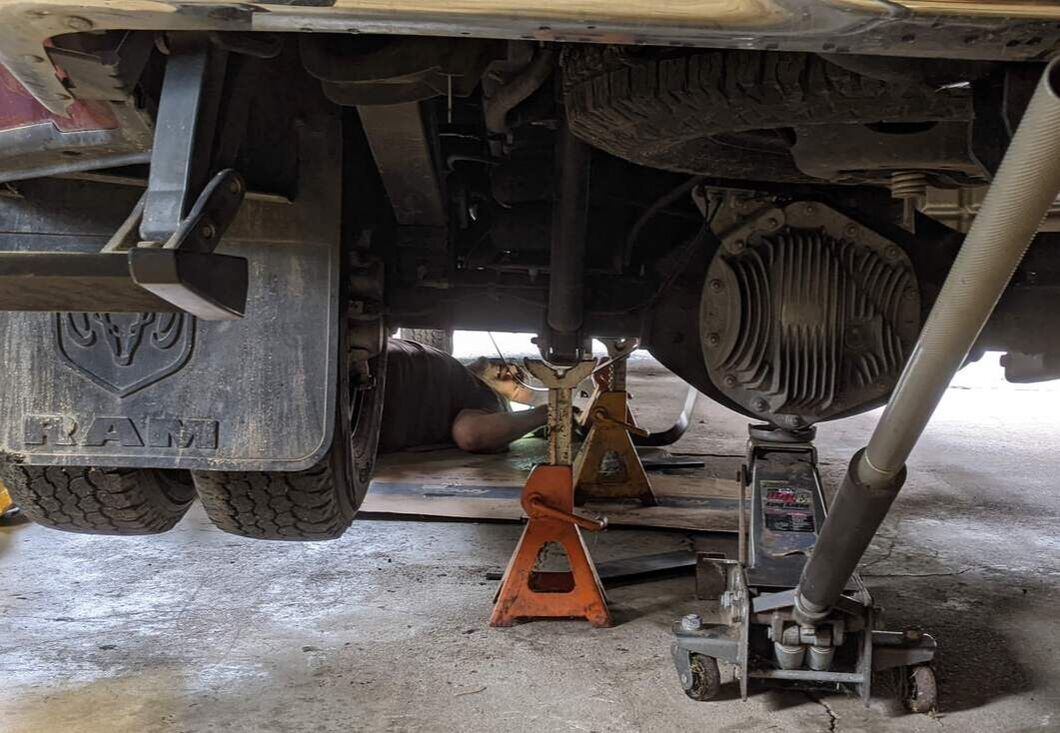 Road to Recovery Before the transplant could be considered successful, the new tank had to be tested for leaks. The guys poured 5 gallons of diesel into the tank. That amount barely covered the bottom. But it held and provided enough fuel to get to a local station to fill the tank in full. As Bob pumped diesel, I peered under the truck to watch for leaks. Thankfully, I saw none. 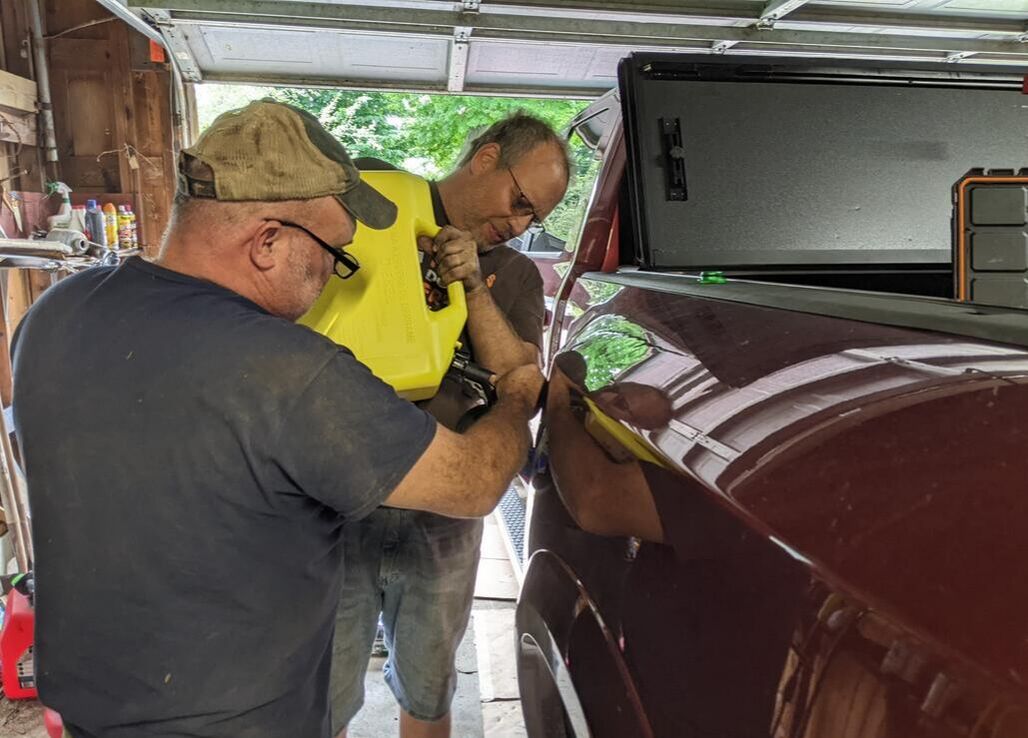 Now, we have a longer driving range. The tank sticks out about 2 inches below the truck, which is no big deal. The only drawback is that the range to empty notification on our dashboard is based on a 32-gallon tank, not its 55-gallon replacement.
You might also like New Shoes for Gulliver. 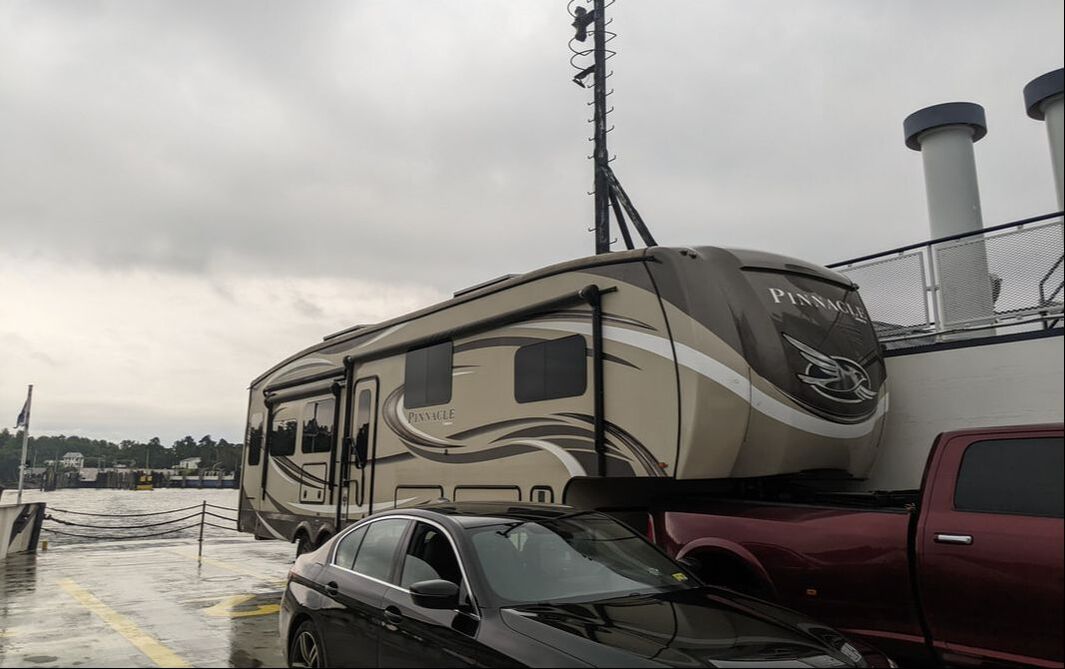 Bob and I relish cruises on the open seas as they provide a way to disconnect from our ordinarily busy lives. In the past, that meant leaving Gulliver and Tagalong behind, parked somewhere safe to give us peace of mind. All that changed when we were looking for the easiest and best way to get around Lake Champlain to relocate from Burlington, Vermont, to Michigan. As we learned in Virginia and Maine, it pays to have insiders who know the area well. That also proved true in Vermont. While discussing our route options with Jim and Kelly, friends who live in the Burlington area, they suggested we take a ferry across the lake. A Fresh Idea When you drive a big rig that spans 57 feet long, 8.5 feet wide, and 13.25 feet tall, the thought of driving it onto a ferry typically doesn’t cross your mind. We had never considered such a thing, thinking our rig way too big to put on a boat. But Jim and Kelly told us semi-trucks cross the lake that way all the time. We looked further into the possibility, and Bob even called the ferry service. Sure enough, they could take us and would measure our combined vehicle length when we arrived to determine the cost. It looked like we’d be out $80 to $90 to take this route, but it would save us significant time, fuel, and wear and tear on our vehicles from the bumpy roads down and around the lake. We were sold. Window of Opportunity On our scheduled day of departure from the campground, rain threatened our journey. We avoid driving in rain whenever possible because doing so forces water into the trailer around the slideouts. Checking and rechecking the weather, we decided leaving by 8 a.m. would give us the best window for the least amount of rain. So, we busied ourselves with getting the trailer ready and hooking up to Gulliver. After hitting the road at about 7:40, we drove a half hour to the ferry station, encountering a few drizzles on the way but no major downpour. Elation flashed across our faces as we pulled into the station and saw a FedEx truck in front of us. If the truck could cross on a ferry, we knew we could as well. 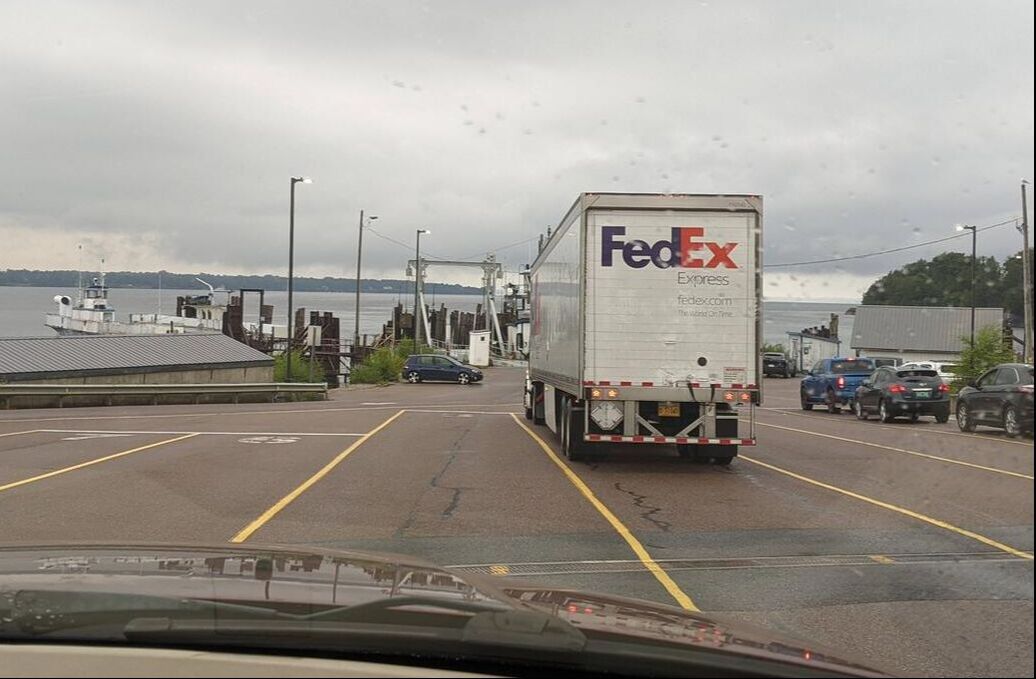 Boarding Pass We checked in and got measured and were charged only $55.65 — a bargain as far as we were concerned. Told to pull into lane five, to the left of the FedEx truck, we obeyed, expecting to have to wait 15 minutes for the next ferry. A dock worker waved at the FedEx truck to board, followed by a line of cars. We thought the outfit could only take one big, heavy vehicle per ferry load. But then the worker waved us on and ushered us to park directly behind the FedEx truck. Just like that, Tagalong was on a cruise, experiencing beautiful views and refreshing breezes as the rain held off and the skies grew brighter. Although the journey was short-lived, taking only about 15 minutes, it was unique and rewarding. And now we know ferries are not out of the question for our travels. 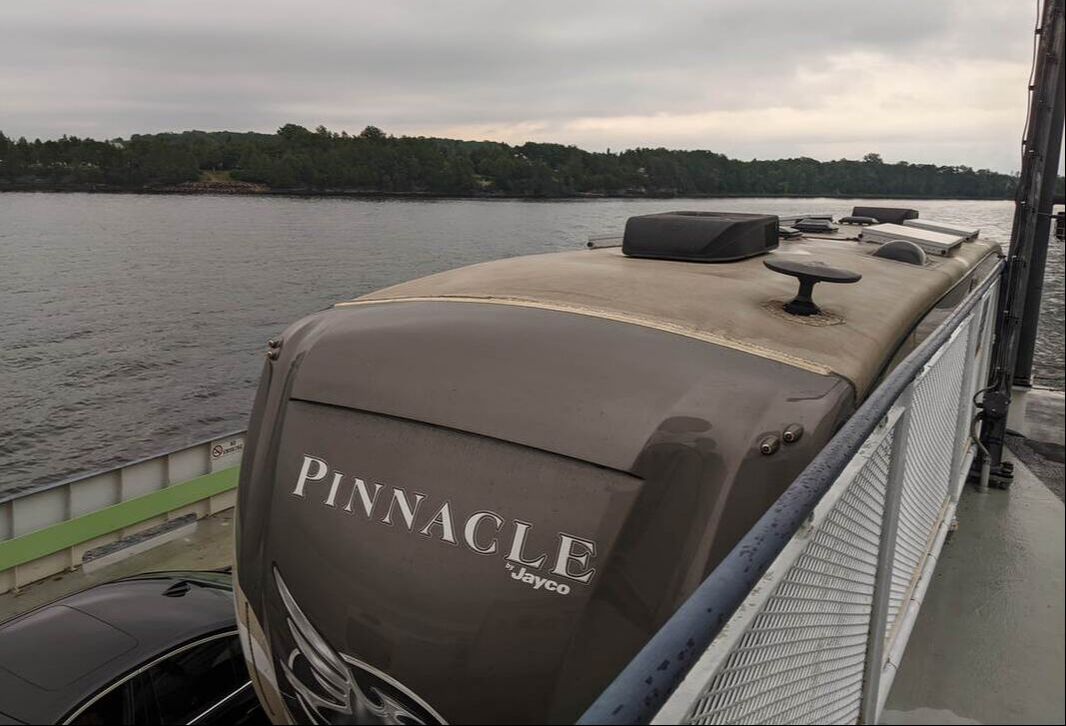 You might also like What an RV Travel Day Is Like.
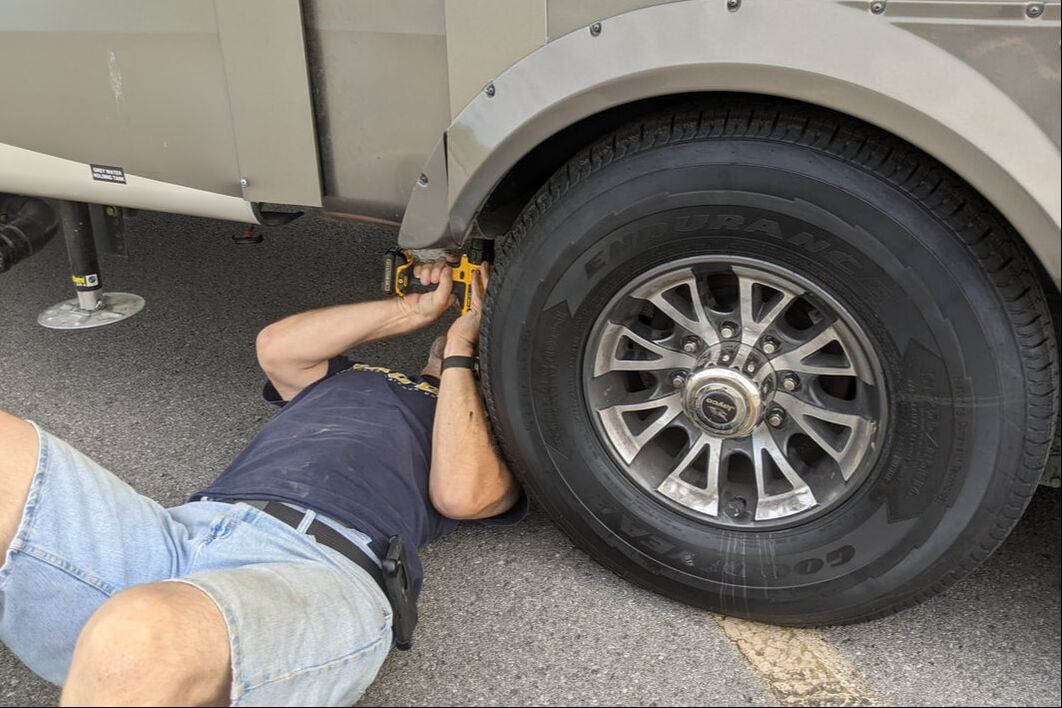 When leaving on an RV journey, it’s vital to know the condition of your rig. If anything’s in need of repair before you depart, it will more than likely be in need of greater repair if not addressed before hitting the road. This is a lesson we learned early on, and it has certainly helped us keep tabs on our rig and fix issues before they ballooned. TV Antenna The TV antenna on our roof is an excellent example. Unfortunately, when we left Louisiana in haste to stay ahead of unpleasant weather, we failed to notice our leaning antenna. We did observe that the antenna direction controller inside the trailer didn’t stop like it should have, but we didn’t look further into it. From outside, we could see that the antenna faced the proper direction, so we considered it good to go. Looking back at pictures from right before we left, however, the issue was apparent. And it likely wouldn’t have been the big problem it became the following morning had we addressed it right then.  Thankfully, we spotted it before we completely lost the antenna off our roof. If that had happened, it would have left a gaping hole for rain to get into and cause all kinds of damage. Electric Cord Cover We don’t only walk around the trailer before setting out on a trip, but we also check things every time we stop at a gas station or rest area, just as truckers do. At one fuel stop, we discovered our electric cord cover had completely blown off our rig somewhere between upper-state New York and Massachusetts. We ensured the security of our electric cord, which was all we could do, and continued on our way. We ordered a replacement cover delivered to our next destination. Protruding Screws 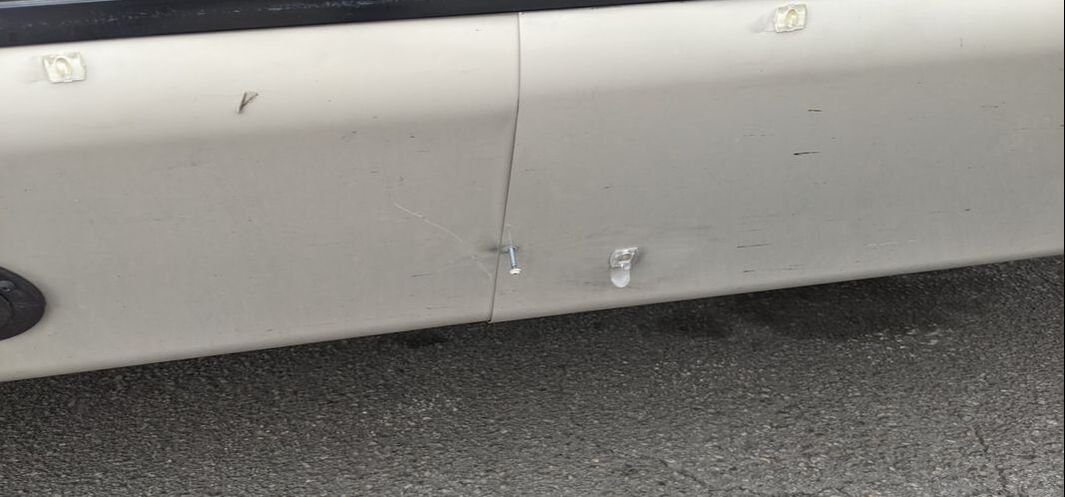 Our walkarounds have also led to the discovery of protruding and missing screws on the skirting around the trailer. Sometimes, retightening is enough to keep the screws in place. Other times, that fix is a short-term solution that has to be reinforced with tape. When tape fails, we have to completely replace screws with nuts and bolts to keep the screws from drilling their way out. 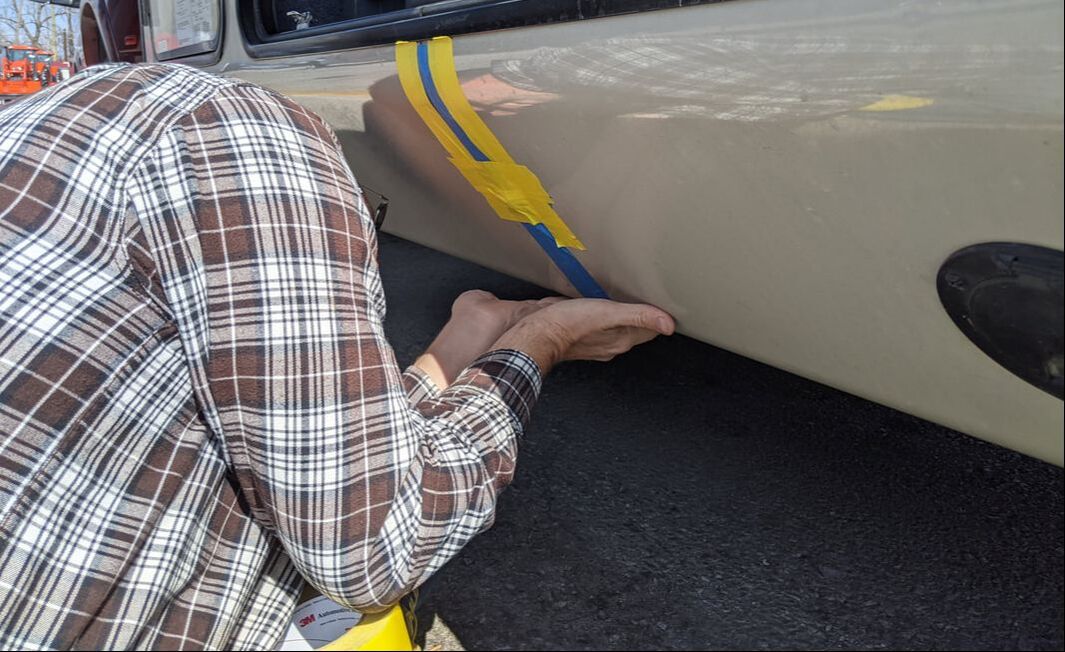 Why do screws protrude? Every time we drive the trailer anywhere, it experiences an earthquake that shakes and rattles everything in and attached to it. The vibrations of tires hitting the road — especially bumpy roads — is enough to slowly push screws out of their tightened positions. Brake Cable Connector Another walkaround saved us from losing our emergency brake cable on the trailer. One end of the cable is secured to the underside of the trailer overhanging the truck. The other end attaches around the fifth-wheel hitch in the bed of the truck so that if the trailer becomes disconnected, the trailer brakes will be applied. 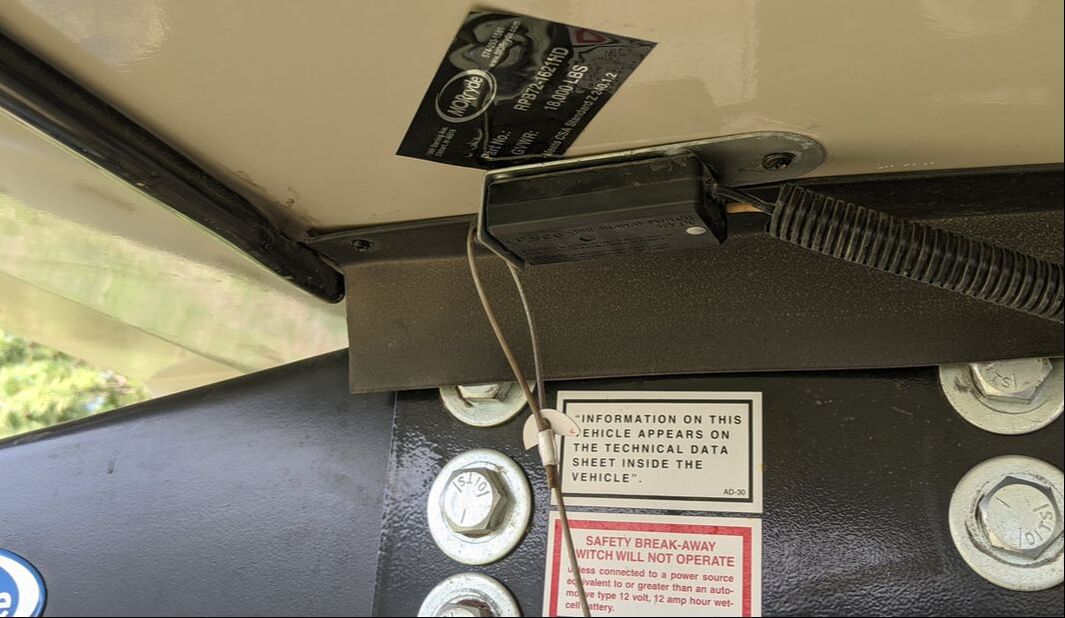 Once again, protruding screws allowed excess movement of the brake cable connector attachment on the trailer. We spotted the issue and were able to fix it with larger screws. Tonneau Cover Clips When not towing, we cover the bed of our truck with a Tonneau cover. When we are towing, the cover folds four times to expose the hitch in the truck bed. The cover came with straps to secure it open, but they were made with subpar quality. In other words, they really didn’t hold the cover in place to keep it from flipping closed. We replaced the original straps with some Velcro straps that wrapped around U brackets, but the new straps gave out during travel. When stopped at a Cabela’s parking lot for an overnight stay, we headed into the store on a mission to find a replacement for the Velcro straps. We rigged a solution with straps that attach to a locking carabiner clip, and we added some pyramid-shape hardware to the truck cover to secure the clips in place. We haven’t had any trouble since. 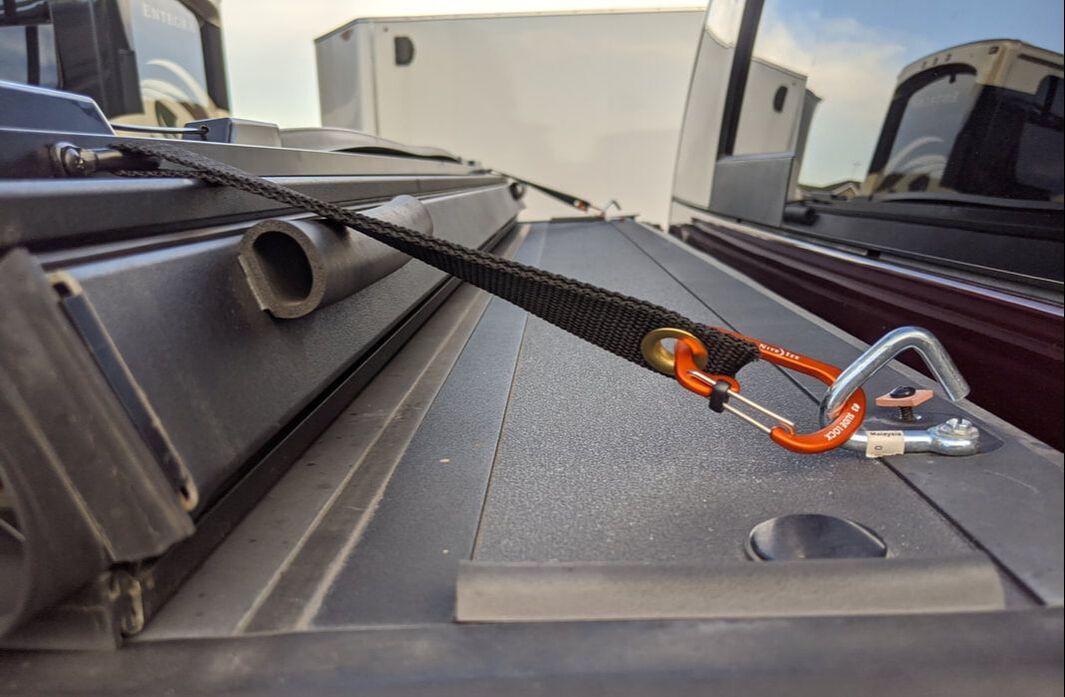 Tire Noise As you can imagine, a walkround won’t reveal troublesome noises on a rig. Having bought new shoes for Tagalong in Tennessee, we were fortunate to be backing up the trailer in a Walmart parking lot before heading north to our next destination. I say fortunate because if we hadn’t been backing up, I wouldn’t have been outside the truck to help Bob and heard an awful grinding noise on our rig, indicating something clearly wasn’t right. Bob thought maybe the brakes were at fault. We switched places so he could hear the noise. Megan helped us pinpoint its side of origin, and we quickly homed in on the problem: Part of our trailer skirting was rubbing against the new front, driver-side tire. “Did Discount Tire do something wrong when installing the new tires?” we wondered. Perhaps the tech had jacked up the rig in the wrong place. Whatever the cause, we clearly had an issue that needed addressing before our 600-mile journey. Upon closer examination, we learned some screws were missing to attach the skirting to the trailer frame. We always travel with lots of tools, so Bob quickly remedied the situation, securing the piece to the frame and away from the tire so we could get on our way. We thanked God for watching out for us. If we hadn’t been trying to back up in a parking lot, we wouldn’t have discovered the issue until much more damage had been done to our new tires. Pre-travel walkarounds have saved us from many incidents that could have inflicted serious damage to our rig, our truck, and even ourselves. The importance of that practice cannot be understated. |
AuthorThis is the travel blog of full-time RVers Bob and Lana Gates and our truck, Gulliver, and fifth wheel, Tagalong. Categories
All
Archives
July 2024
|


 RSS Feed