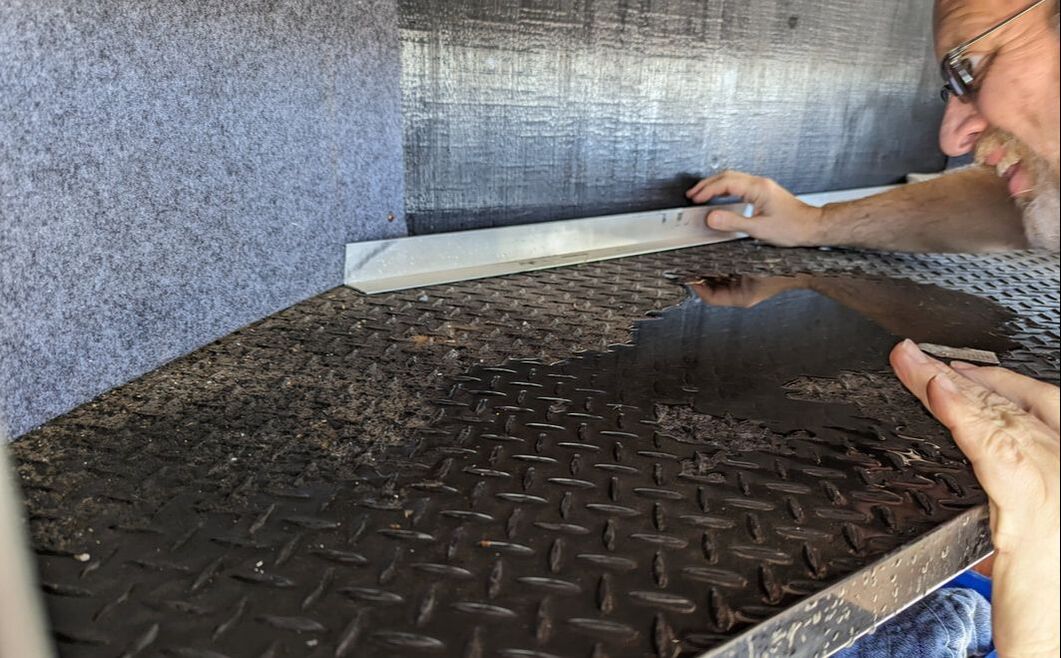
 We had planned to organize our RV cellar to make room for some new ground-mounted solar panels. Opening our cellar compartment, we found something no RVer ever wants to find: a puddle with no clearly identifiable source. The small puddle could have been a fluke, so we opened the front compartment … and quickly wished we hadn’t. More water greeted us. But where did it come from? We pulled out three waterlogged boxes and saw a drip. Pushing up on the foil bubble wrap ceiling in the compartment forced more water out. We opened a side compartment and pushed on the ceiling from there. Yep, more water. Returning to the front compartment, the foil ceiling felt heavy and cold to the touch. We milked much of the water out — probably about a half gallon. But we still needed to find the source. In Search of the Leak I climbed onto the roof, something neither of us had done in many months. We had hired a guy to clean our rig in October. He told us the roof looked good and mentioned some issues toward the front where the rubber membrane meets the nose cap. We assumed he was referring to a known issue from when we ripped our roof in 2020, so we didn’t bother following up. We wish we would have. 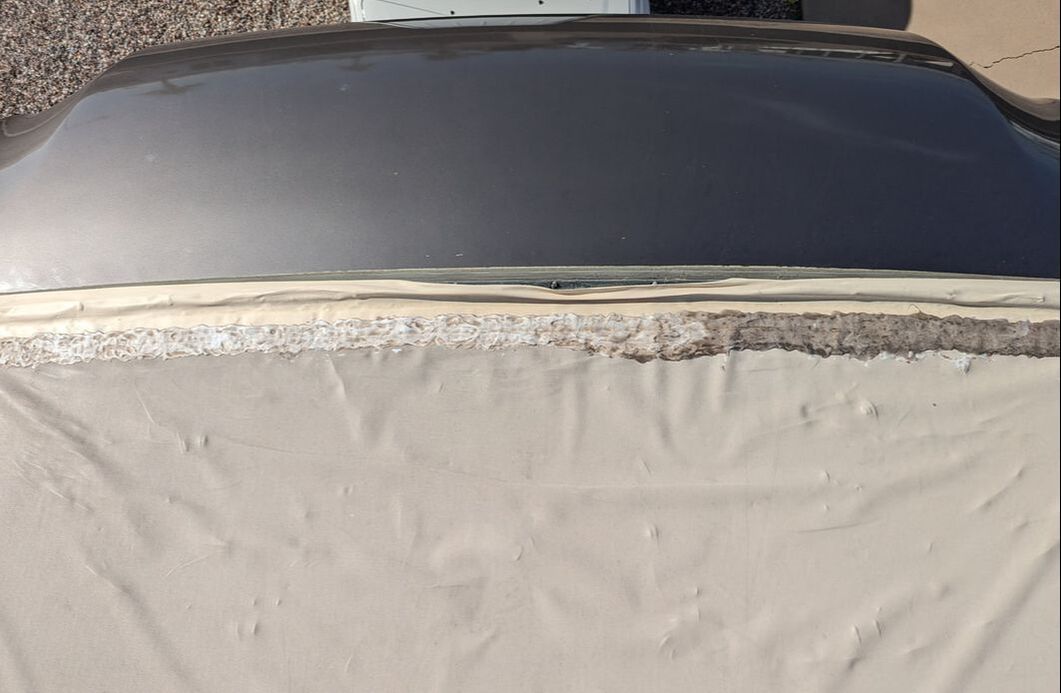 The Eternabond tape we had used to secure our ripped roof membrane back in place under the nose cap had lost some of its stickiness, probably due to wind, exposing some screws and the seam. A day of steady rain a week earlier must have allowed water to get into the trailer and find its way to our compartments. Thankfully, it didn’t make its way into the interior of the rig. So much for organizing the cellar. A new project lay before us: peeling off the old sticky Eternabond and self-leveling caulk that spanned the width of the roof. Two hours later, with our hands ripped and blisters on both of my thumbs, we succeeded in removing the goop and replacing the Eternabond tape.  We ventured to Camping World to purchase enough self-leveling caulk to complete the roof job the next day. It went much smoother and faster — and was easier on our hands. 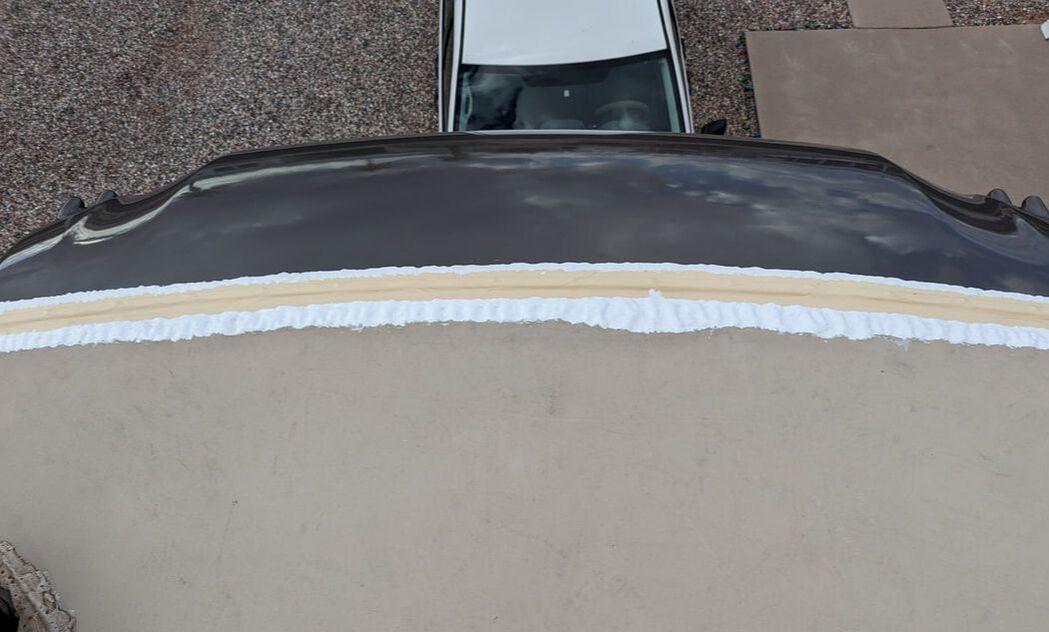 Still More Water Rain the following day tested our handiwork. Our patch job held up to the elements. But when we checked the compartment where we had originally found water, we found more, much to our chagrin. Again, we rubbed along the ceiling to force as much water out as we could. We also took the opportunity to reseal any other ways the water might have gotten in: seams around windows and along edges and trim — and just in time. That night we got more rain. Eager to find our water issue solved, we peeked in the front compartment. No visible evidence of water. But, once again, rubbing my hand along the ceiling brought more water out from hiding. Bummer! Although confident our patched roof and resealed seams withstood the downpour, we were dumbfounded as to the source of the accumulation. We emptied the trailer cellar of its contents so we could get behind the walls protecting the plumbing. Examination revealed no evident leak, other than an old one from our water pump. With easy access to that, Bob replaced the pump while I repeatedly pushed the water-laden compartment ceiling from one end to the other until I hardly got anything out. 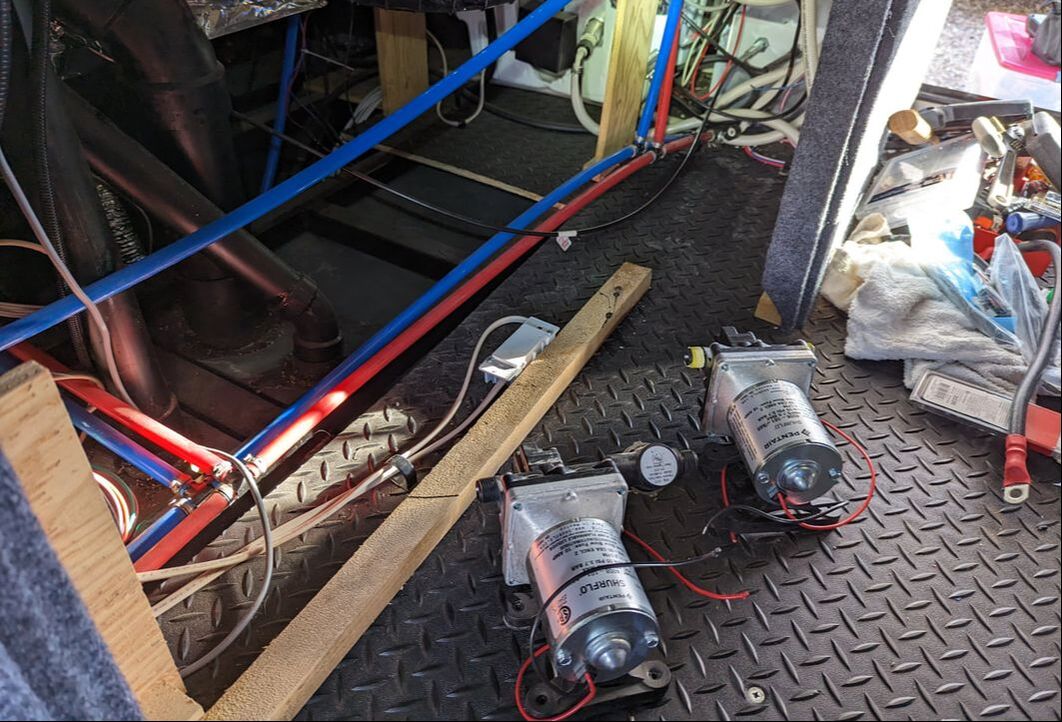 We theorized that we must not have gotten out all of the water from the previous rainfall. Some must have been trapped in the insulation above the compartment ceiling and released after we closed that compartment the last time. Down to Bare Pipes After a rainfree day, we still found we could get water out of the front compartment ceiling. Bob had an epiphany: Our rig is plumbed for a washer and dryer, and those pipes sit above the apparent source of the leak. He pulled a panel off the bedroom closet to access the pipes. Moisture clung to the bottoms of the pipes. Condensation, perhaps? Putting our heads in the opening, we could see discoloration on the fiberglass nose cap, indicating part of it was wet. That fit our theory about the water working its way out from the roof leak.  We pulled out the dresser drawers to expose more pipes and found moisture there as well. Leaving both areas open to air out, we set up some fans to circulate air in and out of the nose cap area. After about three days of that, we still got water out of the front compartment. Our only remaining option to truly get to the source of the issue was to peel back the foil bubble wrap ceiling in the compartment. Why hadn’t we done that from the start? It involved removing some screws, and we weren’t sure we’d be able to get it back into place. Clearly, it formed a moisture barrier, so we didn’t want to compromise its integrity. We peeled back the ceiling and found a little more water … and a soaked corner of the fiberglass insulation. But that was it. Our theory proved true: The water had been steadily working its way out of the rig from the original source of the leak in the roof. 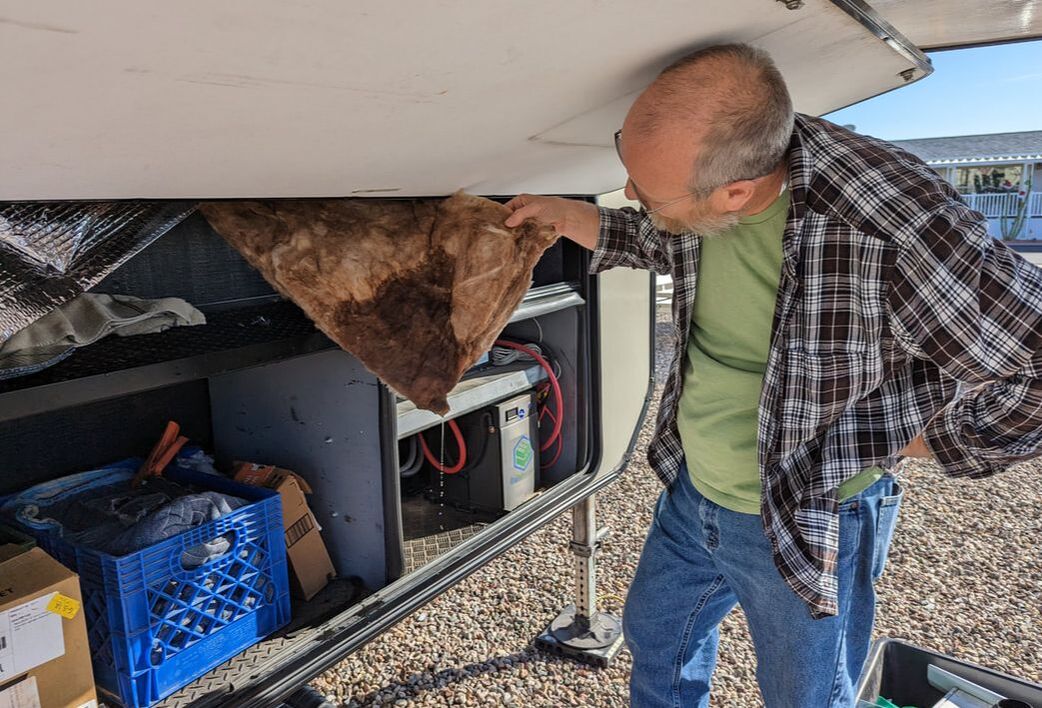 We replaced the fiberglass insulation with foam and put the ceiling back together. After a week of water woes, our rig is once again watertight.
You might also like Our Biggest Challenges in Our Third Year of RV Travel.
0 Comments
Leave a Reply. |
AuthorThis is the travel blog of full-time RVers Bob and Lana Gates and our truck, Gulliver, and fifth wheel, Tagalong. Categories
All
Archives
July 2024
|
 RSS Feed