 “Try not to make too many ruts,” my brother said before we pulled forward onto his property in Michigan. Not wanting to repeat our experience of having to be towed, we had called him the day before to check on the wetness of the land. Steve assured us we’d be able to park in his farm yard. “That thing is heavy,” were the next words out of his mouth as he assessed the damage left by Tagalong’s weight sinking into the soft ground, a result of 4 inches of rain the week before and ½ inch that morning. Bob spun our 18,000-pound trailer around so he could back it into position, carving 6-inch deep ruts in the process. I guess you could say we made a mark with our RV. As Bob stepped on the gas pedal to back into place, our heavy rig moved only slightly before Gulliver’s dually tires spun out, gouging even deeper ruts. Gulliver couldn’t push Tagalong out of the deep-seated grooves in reverse. Driving in forward instead likely would have been a different story.  A Sticky Situation In bare feet (his norm), Steve ran over to get his Jeep. For the third time in our five years of full-time RV living, we had gotten Gulliver and Tagalong stuck. Only this time, we didn’t have to rely on a commercial tow truck or the goodness of fellow campers — and four-wheel drive likely wouldn’t have prevented this sticky situation. Although we didn’t pick up tire chains like tow truck driver Cody had advised after rescuing us from Jim and Jenny’s front yard nearly two months earlier, we were prepared with a sturdy tow strap, and Steve was prepared with a Jeep. Bob connected the strap to the back of Tagalong, and Steve attached it to the front of his Jeep.  This time as Bob attempted to back up, Steve helped pull Gulliver and Tagalong out of the ruts they’d created and farther back in the yard. But we didn’t get fully into position before stopping … and getting stuck again. Steve repositioned his Jeep, and he and Bob doubled the strap to shorten the connection between the two vehicles. We were running out of yard space. The trailer wouldn’t budge. Unable to move our big rig back any farther, we considered our location good and separated the Jeep from the trailer. I stacked two boards in front of Tagalong’s driver-side tires, and Bob drove forward to pull the trailer onto them and make it level side to side. Then we ran through our normal checklist to disconnect Tagalong from Gulliver and set up camp.  Piece of Paradise
We’re enjoying farm living in Michigan, eating fresh produce, listening to the natural sounds of cows lowing, birds singing, roosters crowing, farmers plowing, mowers humming, and children playing. Cool breezes refresh us, walks down the dirt road invigorate us, and hearty farm cooking makes us rub our bellies in delight — and fullness. Rural life has a lot of appeal. Each farm offers an escape from the hustle and bustle of city life where life is simpler and more serene. It can also be an incredible amount of work for those who choose to take advantage of its fertile soil and wide expanse. Our appreciation for those hard workers grows every time we find ourselves in a rural area, which is much more often than not. In our wake, we’re leaving Steve even more work to clean up our tracks — and a mess to meander when he mows. He has a plan to restore the surface of his yard. We hope carrying it out goes smoothly. You might also like The Benefits of Moochdocking.
1 Comment
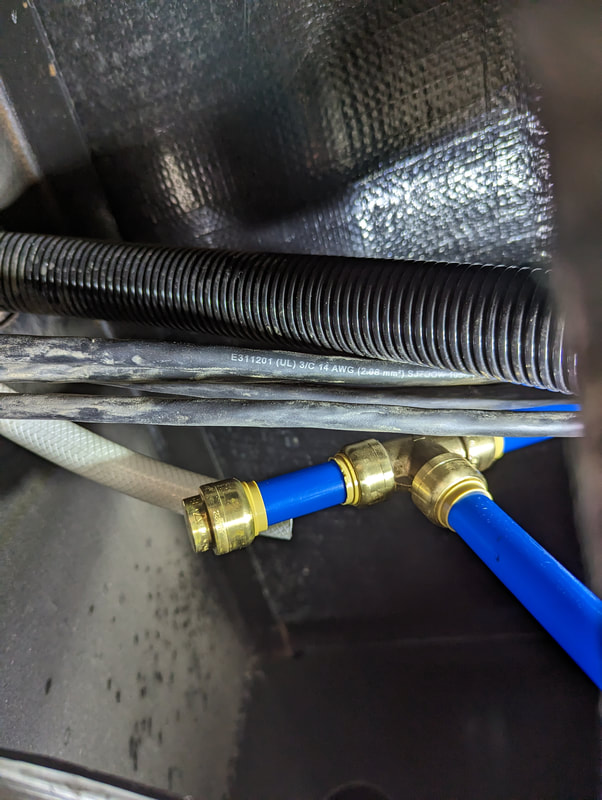
 The weather warmed up in Virginia, indicating the time had come for us to move on. So, we headed north to Massachusetts, trading nearly 90-degree temperatures for pleasant 70s. After two beautiful days, a heat wave brought sweltering, unseasonable 90-degree temps, giving us an extremely warm welcome. Moochdocking at Bob’s brother Bill’s, we were plugged into a 15-amp circuit for electricity, which meant we couldn’t run air conditioning in our trailer. Operating even one of our two air conditioners requires 30 amps of power. We opened all of our windows and turned on our RV vent fan in the ceiling to help propel any hot air out. Despite our efforts, Tagalong couldn’t combat the area heat advisory that brought hot temperatures and high humidity with a heat index of up to 99. The thermostat in our bedroom peaked at 97 degrees. With sweat beading on our foreheads and pooling in our arm and knee pits, we were driven out of the RV. Thankfully, we were able to hang out in the air-conditioned house.  Unlike summers in Arizona, where even nighttime temperatures hover around 100 degrees, the air in Massachusetts cools as the sun fades, making it possible for us to sleep in our own bed. On the hottest day, our bedroom thermostat displayed a balmy 87 degrees at bedtime. With fans in front of our bedroom windows pulling in cool outdoor air and our ceiling vent fan moving out hot air, we were able to doze off. Hope on the Horizon The only way to run Tagalong’s air conditioners in low-powered conditions like we found ourselves in was to power up two generators, something we’d never used them for. Since we were parked between two houses in a small community, we thought we better not try that. We had been wanting to replace our power inverter for a while for one that would allow us to combine energy from shore power and our solar panels. Evicted from our rig, we decided to fork out the nearly $2,000 to purchase the unit. And to our surprise, we found it on sale for 40% off. That sealed the deal. Before the part arrived, Bob watched videos and researched how to install the unit. Equipped with that knowledge, he ordered some other parts for the installation. Delivery day came. We had ordered a 12-volt unit. We received a 48-volt one, not compatible with our battery setup. Bob called customer service after normal business hours. The out-of-country rep said he made a call to the warehouse and received confirmation that the correct unit was in stock and would be shipped to us — scheduled to arrive a whole week later. The delay risked our ability to install and benefit from the unit before departing Massachusetts. While we waited for the replacement, Bob prepped the trailer: changing our three lithium iron batteries to lay on their sides, lowering the shelf above them to allow more room for the larger unit, and changing wires and connectors to accommodate the higher power of the new unit. Anticipation
The replacement arrived a day early. Yay! Only it was the wrong unit … again, the same model we had received the first time. Bob quickly sent it back. Lacking confidence that Amazon could provide what we requested, he ordered the correct unit — for the same price — from a different vendor. With time running out and the Fourth of July holiday potentially affecting shipping, we had the unit sent to an upcoming destination to make sure we didn’t miss it. Bob continued ordering more parts and doing more prep work to make the installation go as smoothly as possible. Meanwhile, the heat wave ended, and cooler temperatures returned, allowing us to spend more time in the trailer. You might also like When Things Go Wrong in RV Life.  Narrow roads do not make for good parking situations with a fifth-wheel RV. They greatly limit our ability to maneuver the truck as needed on the far side of the road to get the trailer into position. When the space we’re trying to back into includes a ditch on either side, flanked by a tree, parking can be much more difficult. After multiple attempts to back from a narrow road into the driveway of our friends Jim and Jenny in Virginia, we decided to take a different tactic: driving front-first into the driveway and onto the yard to back into place from there. Finding a Way In It seemed like a good plan. Having just arrived from Georgia, we were unaware recent rain had softened the lawn. It didn’t help that the front yard sloped down, away from the driveway. Once on the lawn, we had to back the truck up an incline to push our 18,000-pound trailer into place, not an easy feat. Our truck is not equipped with four-wheel drive. Nor does it have Positraction (as mentioned in the movie “My Cousin Vinny”), which would allow us to engage both sets of dual tires at the same time. In essence, we were using only one side of the dually to push the heavy trailer up a grassy hill.  Bob attempted to back up the incline, but Gulliver’s tires only spun out. After getting our truck and RV stuck one other time in our five seasons on the road, we purchased heavy-duty tire traction boards (paid link*), like the ones you see hanging off the backs and sides of Jeeps. Feeling prepared for this type of situation, we fetched the tracks from the trailer’s basement and placed them behind the rear truck tires. Bob once again tried to back up the incline. The tires continued spinning out on the traction boards. We never anticipated that would happen. It seemed we were truly stuck.  Finding a Way Out We pay an annual fee to Coach-Net for RV roadside assistance. Not seeing an easy way out of our predicament (we couldn’t go forward due to trees), we consulted Coach-Net. The dispatcher put us in touch with a tow company. Although we felt out of place for about an hour, not wanting to go inside our home in its inclined state, we took solace in the fact that we had our friends’ home to wait in. A tow truck arrived from Mathews Towing and Recovery. After assessing the scene, the driver, Cody, determined the best way to correct the situation was to winch us out. He wrapped a winch cable around Tagalong’s rear bumper and gave Bob instructions to keep Gulliver’s transmission in neutral and to steer.  Cody added tension to the cable and started the winch procedure. The trailer moved slowly but consistently up the incline toward the driveway. Once Cody thought the RV was close enough, he had Bob put the truck in park, disconnected the cable from the trailer, and moved the tow truck to provide room for Tagalong on the driveway.  Mission Accomplished At this point, Cody gave Bob specific instructions on how to back the trailer the rest of the way out of the grass: slowly and steadily with even pressure on the gas pedal. And it worked! Bob was able to get Tagalong onto the driveway without hitting the garage. As I watched the tail of the trailer to make sure it cleared any obstacles, I managed to get a taste of what sinking sand must be like. My foot landed on what appeared to be hard ground, only to sink almost to the top of my shoe in Virginia mud. I’d have to deal with that later.  Cody stuck around as Bob moved the truck and trailer forward and back to ensure we got parked where we wanted, helping with guidance all the way. Cody even stayed around after, sharing valuable tips and tricks to help us avoid a situation like this in the future. His biggest piece of advice: Get tire chains. “They’re not just for snow,” he said. You might also like How a Flat Tire Helped Us Work Together. * As Amazon associates, we earn from qualifying purchases.   A tornado watch went into effect in Georgia where we were staying. A few hours later, the tornado watch had been downgraded to a severe thunderstorm warning, with 70 mph wind gusts and pingpong-ball-size hail predicted to hit our area in 15 to 30 minutes. Bob rushed around to close all four trailer slideouts while I stayed in communication from Las Vegas, where I had been sent on a business trip. With the slides closed, Bob moved inside the home of our hosts, Greg and Sharon, thankful he didn’t have to stay in the trailer for the onslaught. As Bob and I texted, lightning literally hit the property with a loud BOOM! at just past 11 p.m. Peering out the windows to see if anything had caught fire, Bob didn’t notice any brightness in the dark sky, other than more lightning. Lights Out The sonic boom from the thunder clap had caused Gulliver’s alarm to sound, waking Greg and Sharon. Bob didn’t hear it in the basement, and by the time he ascended the stairs, the alarm had grown silent. Instead, the three heard squealing. Further investigation led them to Greg’s uninterruptible power supply (UPS), which protects his TV. It must have taken a surge. Greg reset his UPS and was pleased to discover his TV hadn’t been harmed. The darkness of the night and the nastiness of the weather prevented the threesome from going outside to check on any damage around the house. They did, however, notice that the internet was out. A look at the house circuit panel revealed four or five of the breakers had been tripped. Greg flipped them back on, restoring power. The outlet powering our trailer had been protected from a ground fault interrupt (GFI) by another outlet in the garage. But the GFI outlet had been fried, leaving Tagalong dark and without our normal Starlink satellite internet. Our fallback cellular internet that runs off our batteries still worked. Bob and Greg replaced the faulty GFI outlet with an extra one Greg had on hand. That fix gave Tagalong shore power and satellite internet again. We both breathed a sigh of relief that the trailer shore power didn’t sustain damage. With another storm forecast to hit the area at 6 a.m., Bob decided to grab his pillow from the trailer and sleep in Greg and Sharon’s basement that night. Morning Dawns The light of day revealed why the thunder had sounded so loud. Lightning had struck two trees about 30 feet from the house. Upon closer assessment, Bob, Greg, and Sharon realized the lightning bolt had run down the outside of both trees.  It must have followed the tree roots underground and boiled some water too, because they found a crack on a deck post and a buckled slat on the deck floor. A potted fern had been sitting on a ceramic plate atop the affected post. The plate had shattered, the pot lay on the ground, and the plant rested outside the pot. In addition to all that, a drain pipe had split and blown apart. 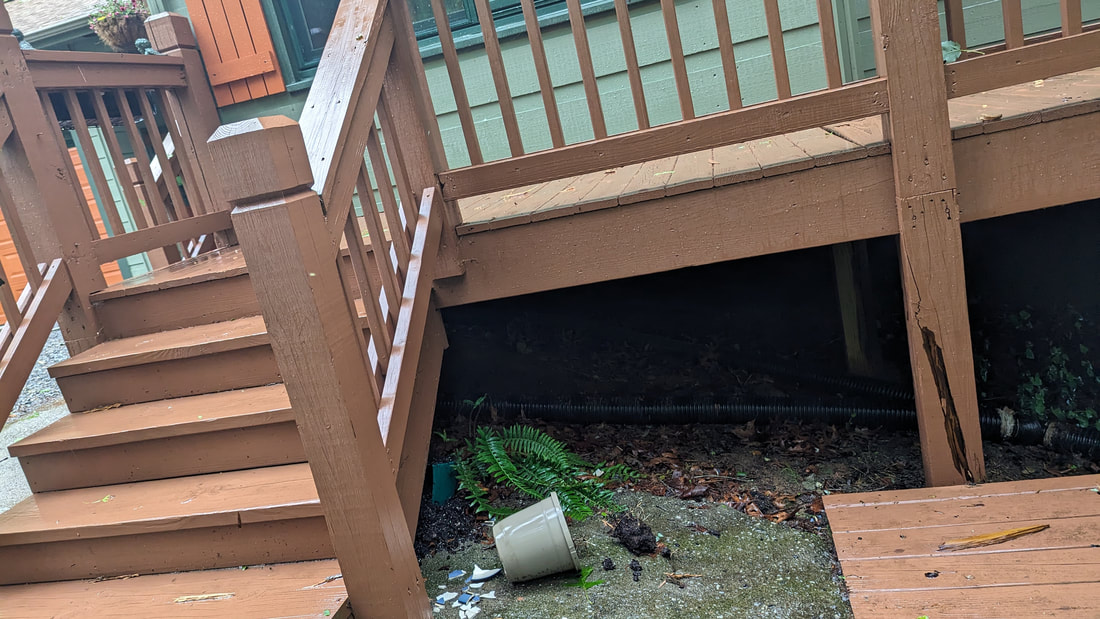 The threesome surmised the lightning traveled from the corner of the house up through the electrical ground wire into the circuit breaker box, causing the electrical problems.
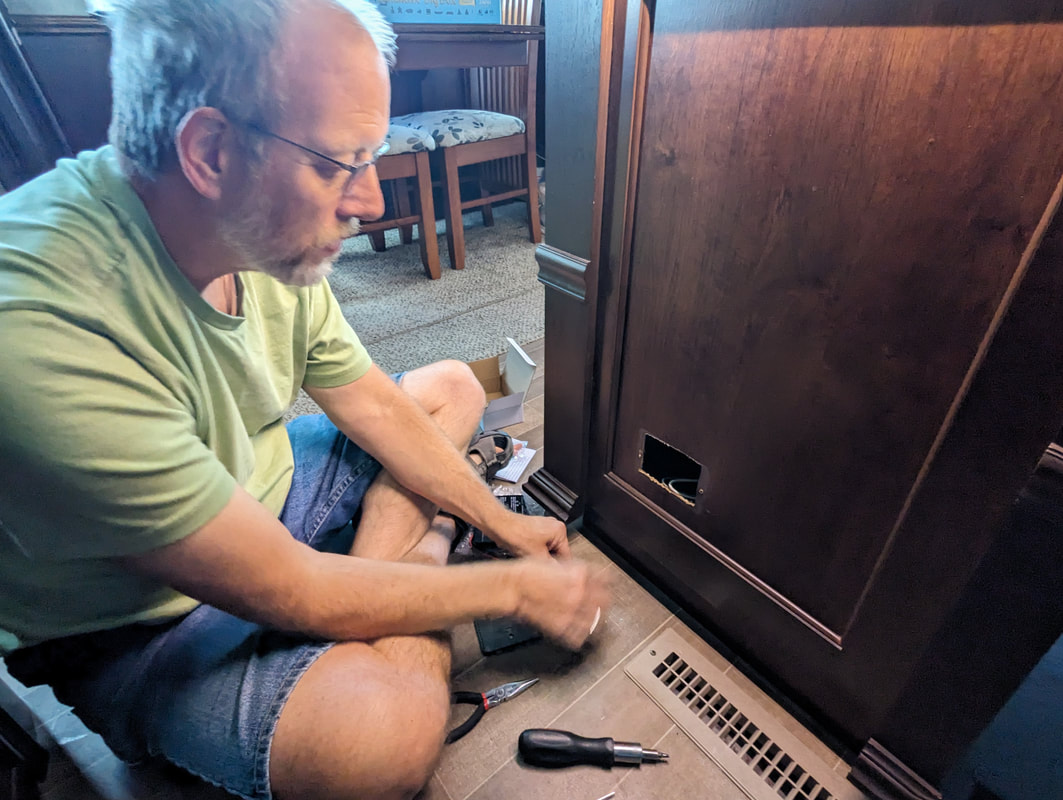
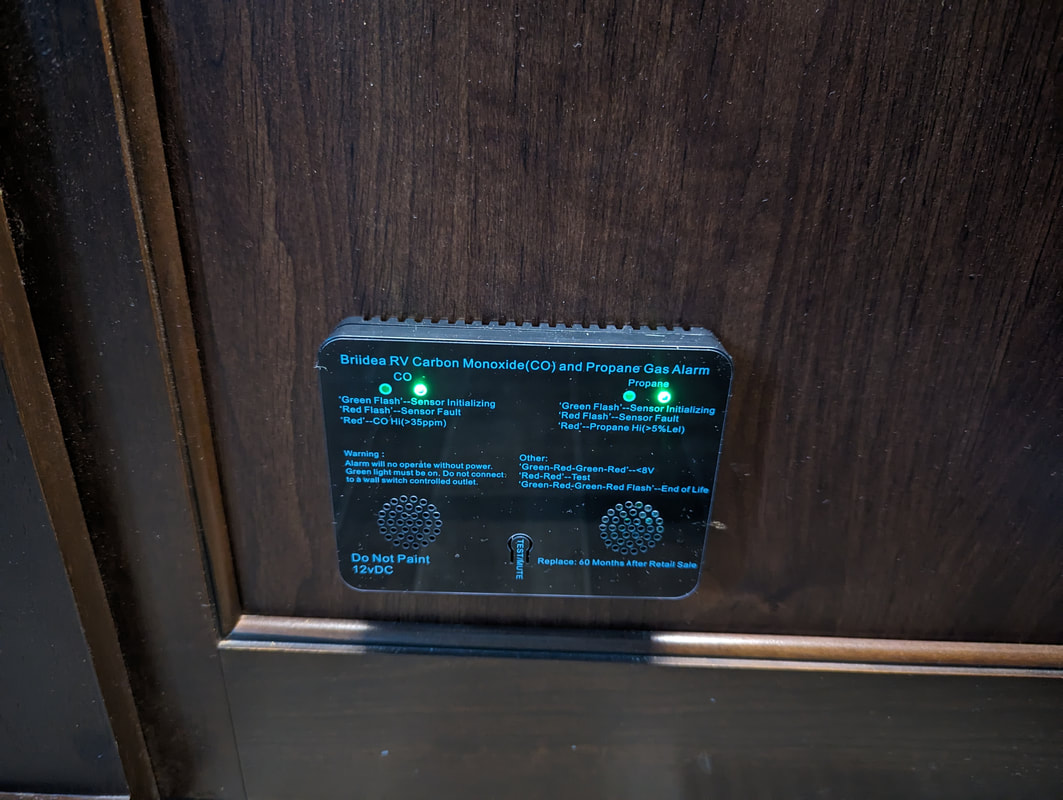
Greg and Sharon didn’t have internet service for a few days. We were glad to be able to share our Starlink internet with them. They continued to find other electrical issues — multiple fried GFIs, Wi-Fi routers, Bose sound system, and the main cable feed from the street to the house — demonstrating how powerful a bolt of lightning can be. I thank God for keeping the three of them safe. You might also like Awakened by a Tornado Warning. 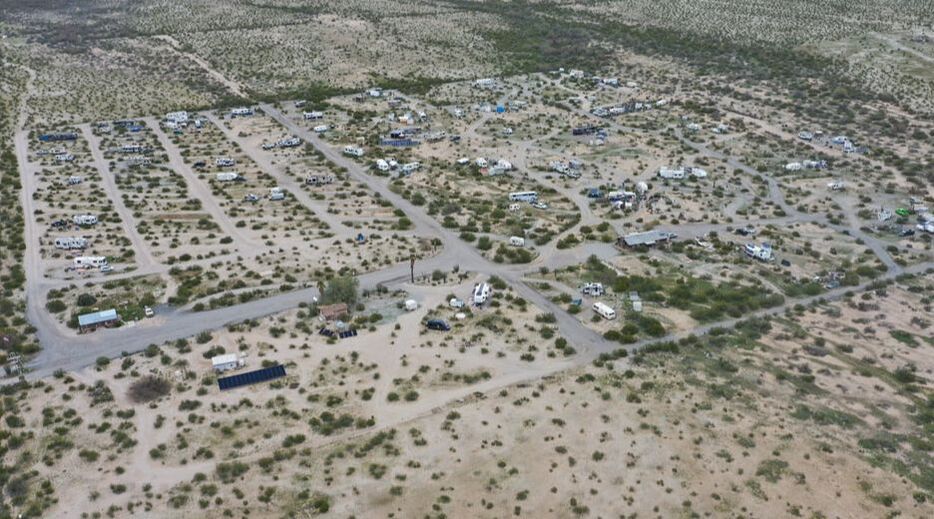 It seemed like a good idea. We dropped off Tagalong in the middle of the desert west of Phoenix, closed up and secure and surrounded by fellow Xscapers. Then we took Gulliver to Yuma to visit my parents. What could go wrong? We knew our rig was in good shape after all the attention we had given it in the past six weeks, so we didn’t expect any issues. Does any RVer in such a situation? Bob’s phone rang at 10:30 p.m. five days into our getaway. His full-time RVer brother, Tom, had called to notify us of a disturbance in the desert: a loud beeping emanating from the Pinnacle (our rig) that could be heard inside a nearby RV above the sound of rain. Suddenly wide awake two hours from our home on wheels, we had to get to the bottom of this. In Search of the Cause Bob and I talked through the possible sources of a beep inside our rig and narrowed it down to three: the smoke detector, the refrigerator (if out of propane), and the carbon monoxide detector. We gave Tom the keycode to get inside our rig. As soon as he opened the door, we heard the loud din through the phone. It wasn’t a steady beep, which eliminated the refrigerator possibility. That left two others. Opening our dining room slide, Tom noticed blinking red and green lights on our carbon monoxide detector. As he got closer, he discovered the code meant our CO detector had reached the end of its life. 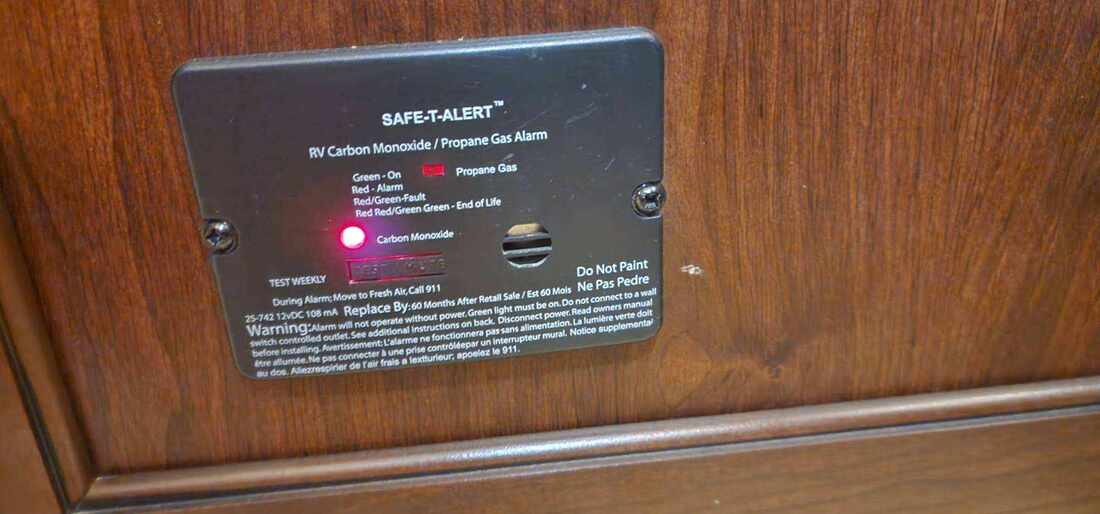 Great! At that hour, no place was open to get a replacement. Even if a place had been open, it would have taken us a minimum of 2.5 hours before we could get back with a new unit. A Temporary Fix Bob and I both searched the internet for a way to deactivate the alarm. Bob found a button combination that would buy us 72 hours — and could be repeated up to 10 times. Tom performed the button operation, and silence returned. We didn’t have to hit the road that night after all. Having to work the next morning, I dozed off while Bob scoured Amazon for a replacement unit. Based on a review by the owner of a 2018 Jayco North Point fifth wheel (the sister of our rig), he ordered a Briidea carbon monoxide detector (paid link) to arrive two days later at my parents’, the date we planned to return to Tagalong. At the mercy of the package deliverer before we could travel, we were able to enjoy some game playing with my parents to pass the time. The unit finally arrived at 3:15 p.m., and we were free to hit the road, allowing us to return before sundown. Out with the Old, In with the New The next day, Bob gathered his tools, got comfortable on the floor of our coach, and went to work to remove the faulty unit. With that out of the way, he connected the wires to the new unit and put it in place, a quick and easy process. The original unit that came with our trailer and the new one detect both carbon monoxide and propane. The factory-installed one, however, only had one light indicator, leaving us to guess the problem if an alarm sounded. The new one has two light indicators for clarity and greater peace of mind.
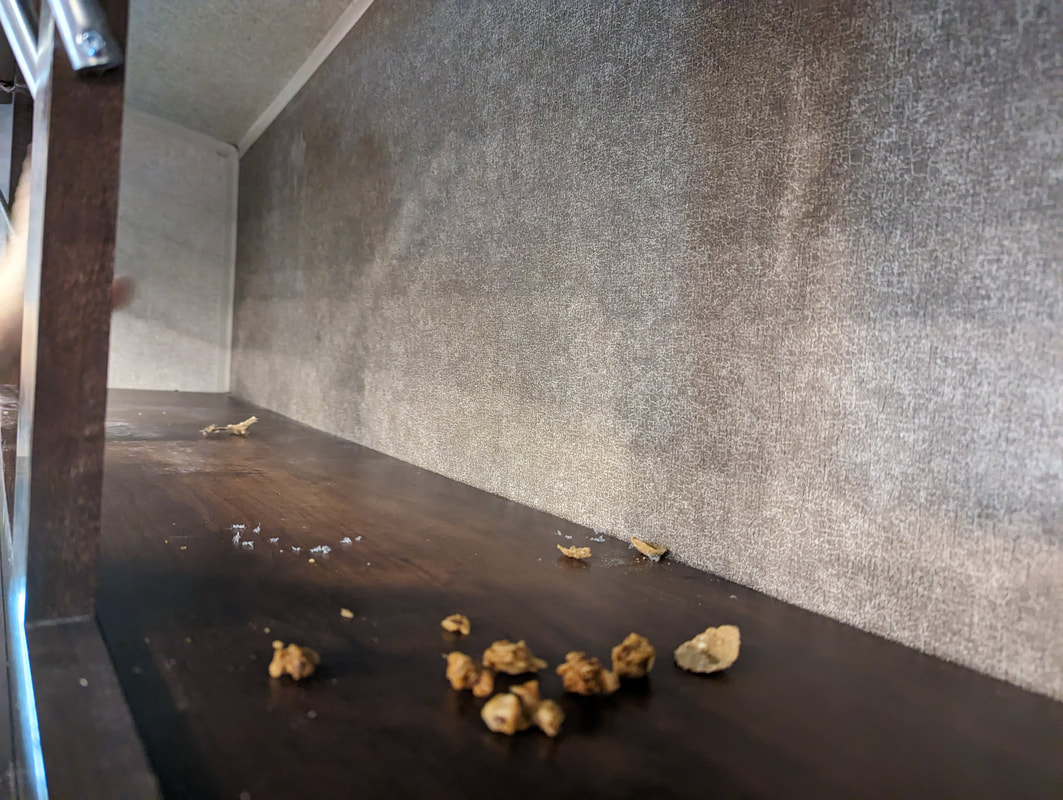
We’re thankful for the fellow Xscaper who noticed the chirping coming from our rig and said something about it. And we’re especially grateful Tom was nearby to call us and help with a temporary fix until we could provide a more permanent solution. The RV community is a friendly one. We’re glad to be part of it. You might also like When Things Go Wrong in RV Life.  Whether you live full time in an RV or in sticks and bricks, issues have a way of popping up when you least expect them. We’ve certainly had our share in both circumstances. Things have gone incredibly wrong for some RVers, forcing them to hang up their travel hats and settle down. We’ve been very fortunate in our RV life. Although we’ve had plenty of challenges, we haven’t encountered anything we couldn’t get through — even though some things took many months to resolve. Some of the simpler incidents in our fourth year of RV living included separating trailer skirting and losing a hubcap off the truck. An Amazon order remedied the hubcap issue, and some screws and bolts fixed the skirting problem. We also had a loose window in the trailer that would occasionally open on its own as a result of travel over bumpy roads. Closing it required powering open the dining room slideout part way. The last time that happened, while driving through Canada, I went to close the window and discovered a loose screw in the control mechanism. Since tightening the screw, we haven’t had any issues with the window. Who knew it was such a simple fix all these years! Here are some more significant excerpts of things gone wrong in RV life from the past year: Mysterious Drip Right before setting out on the Alaska Highway, we noticed a puddle under our kitchen slideout — the last thing we wanted to see before hitting a notoriously rough road, especially after all the water problems we had already dealt with. Upon examination, Bob quickly found the culprit: a plastic, instead of brass, tee joint connecting the pipe to our ice maker. Yes, you read that right. Our rig came equipped with an ice maker. We used it early on but quickly realized its ineffectiveness for boondocking, with no water connections. So, we stopped using it and resorted to a couple of silicone ice trays, which also save precious freezer space. Bob bandaged the pipes and made a point to keep an eye on them until he could replace the tee with something more effective, which he did when we were in North Pole, Alaska. Crunched Levelers For our first overnight stop on the Alaska Highway, we pulled into a downward-sloped rest area. We had learned from other leveling challenges that for best operation, our refrigerator couldn’t be at a pitch more than 3 degrees. Knowing that and not wanting to sleep so that we rolled off the bed, we attempted to raise the rear of the truck to make the front of Tagalong more level. This involved driving up on some stacked plastic leveling blocks, which we use for the trailer all the time. With the dually wheels on each side of the truck and the weight of the trailer on top of them, the plastic crunched and broke into pieces as soon as Bob drove onto it. So much for that idea. We ended up disconnecting the trailer from the truck for that stop so that we could get the trailer even from front to back and enjoy our evening there.  Trailer Lockout Upon arrival at an overnight stop, I attempted to go inside the trailer to open the dining room slideout. But I couldn’t get in. Although the main door opened, the screen door attached to it wouldn’t budge. That meant we couldn’t lower our stairs, which fold up inside the door, to get into the rig. 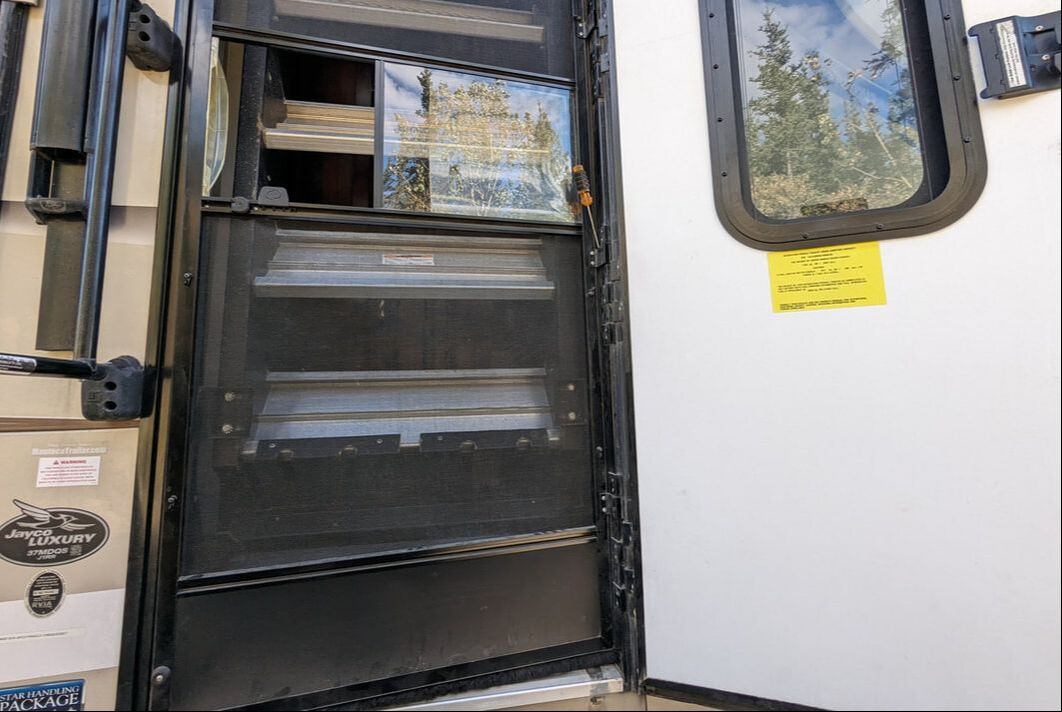 Bob grabbed his cordless drill and removed hinges from the screen door to allow us in. That worked temporarily but didn’t correct the underlying issue. After much scrutiny, we realized that one of the brackets on the stairs was bent, catching on the screen. Bob successfully straightened out the bracket and filed it down, fixing the problem. 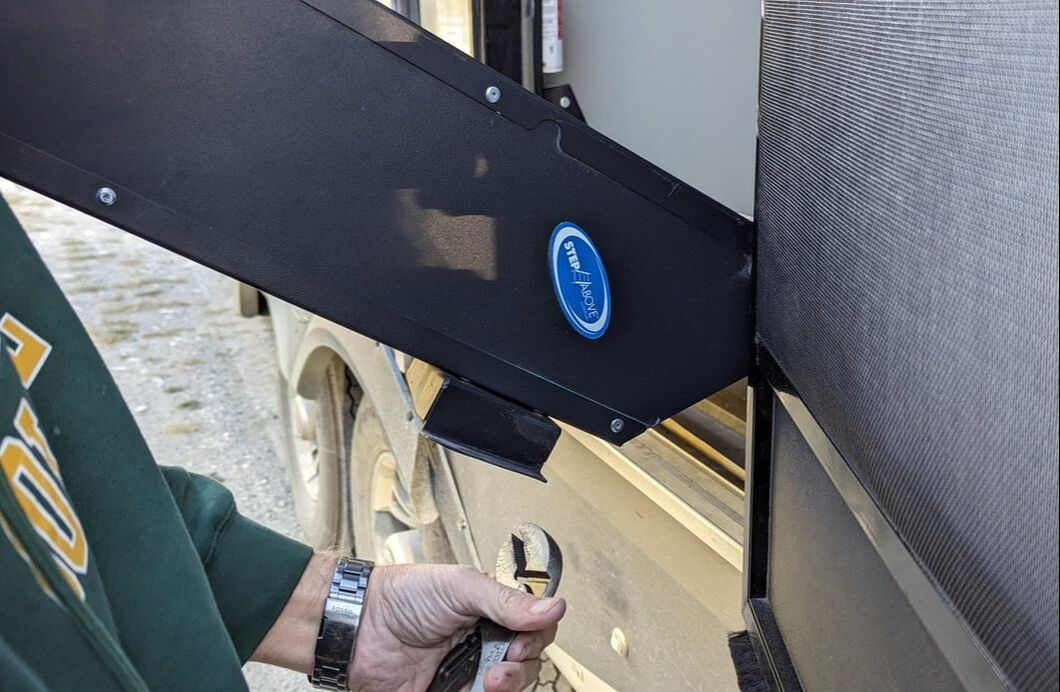 Missing Smoke Detector After arriving at a location and setting up camp for the week, I looked up and noticed two screws hanging from the ceiling above our kitchen island. As I stared at them, I racked my brain trying to identify what used to cover the screws. Then it dawned on me. I asked Bob if he had moved the smoke detector. He said no. A search high and low for the device didn't uncover it. I suddenly remembered I had been having difficulty opening the dining room slideout. I pulled it in a few inches and, sure enough, the smoke detector sat atop it. Bumpy road conditions must have rattled it loose from its ceiling perch. No Hot Water Our rig has two ways to heat water: with propane and with electricity. Upon arrival at Fool Hollow Lake Campground in Show Low, Arizona, Bob noticed the lack of hot water coming out of the tap, despite the electric water heater being on. He tried to heat the water with propane, but that didn’t work. We had encountered a similar issue another time, so after some troubleshooting, he pinpointed the problem: a faulty thermal cutoff. It’s a safety device that prevents melting if the water gets too hot. He happened to have a spare, and replacing it produced warm water out of our faucet. 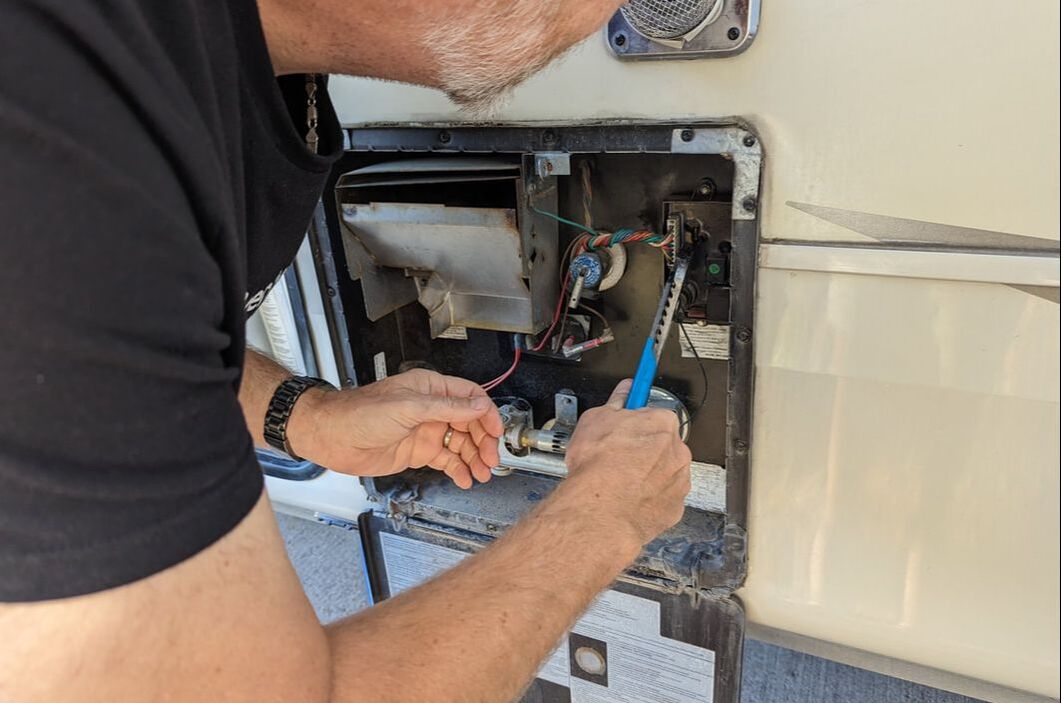 Forgotten Purse It’s not uncommon to accidentally leave possessions at places and have to return to fetch them. When that act of fetching involves driving a tall, heavy fifth wheel through traffic in Portland, Oregon, it’s downright nerve-racking. That’s where we found ourselves after I realized I had left my purse at McDonald’s north of Portland, about a half hour away. With white knuckles, Bob graciously drove back through the city — and then through it a third time after retrieving the purse to get to our destination. I try to double-check that I have my purse with me now before we hit the road from anywhere. You might also like: 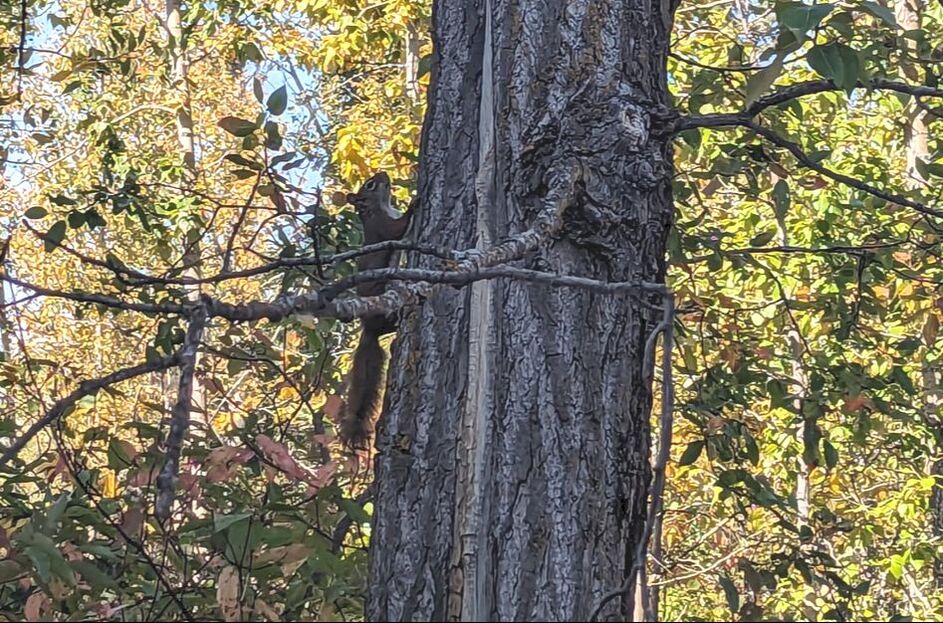 After two days of hearing birds prance across our roof, we had had enough. I climbed on top of our fifth wheel to assess the damage. Surprisingly, I found nothing but a couple of bird droppings. So much for my birds-on-the-roof theory. Immersing myself in my work, I forgot about the noise disturbance. Later that day, however, we heard a chewing sound inside our trailer and froze to try to determine its origin. It seemed to be coming from the in-floor heater vents. We had eradicated a couple of mice earlier in the week. This new gnawing sounded louder and more damaging than mice, like the rat that chewed through the ABS pipe under the kitchen sink in our sticks-and-bricks house. That varmint caused much water damage and left us with a makeshift kitchen for about four months. It seemed evident we had an unwanted RV guest. Finding the Culprit Being parked in a campground in Alberta, Canada, surrounded by trees, birds, and squirrels, we concluded we had somehow acquired a squirrel. Having seen movies that portrayed squirrels jumping at people’s faces, the thought of finding the creature inside our rig put me on edge. After the chewing noise dissipated, we exited the trailer in search of potential entry points. Finding a few obvious places large enough for a small squirrel to pass through, we spent a couple of hours sealing them, believing the rodent had departed. 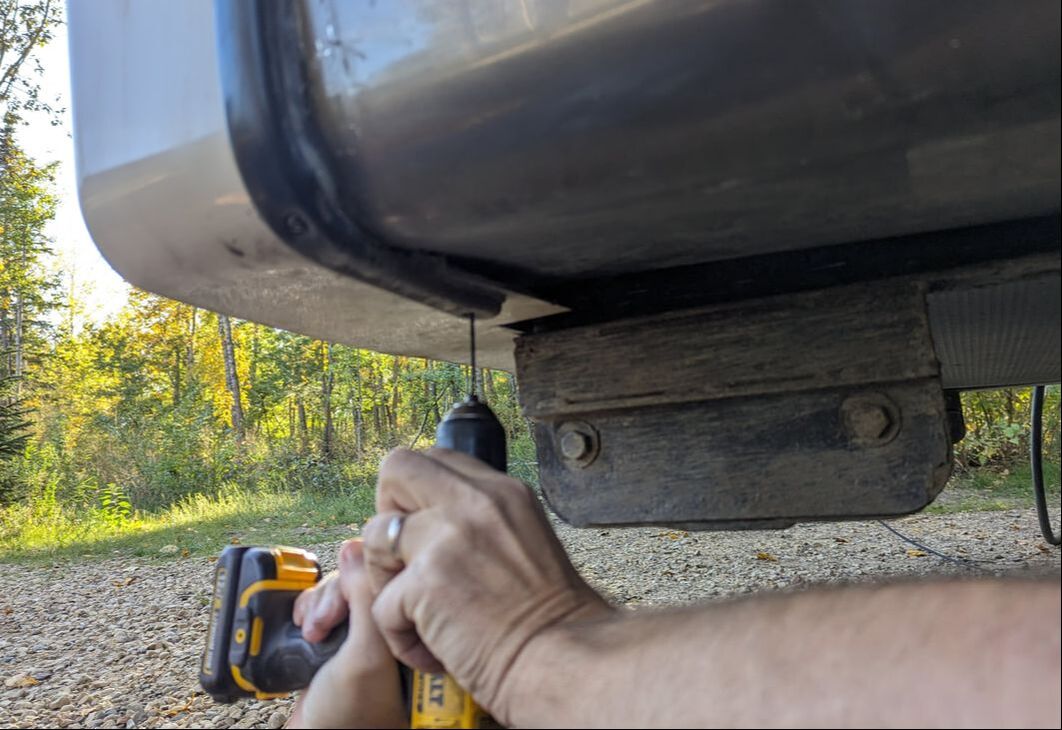 The next day, a red squirrel perched in a tree outside our window, confirming our belief that it had vacated our rig. Looking directly at our window and baring its teeth, Twitchy, as we named the creature, loudly voiced his disapproval, chattering at us for several minutes. I wish I had snapped a picture of him then, but the squirrel scurried off before I got my camera ready. Planning for a Long-Term Stay We went outside to watch as Twitchy leapt from branch to branch and dashed down a tree trunk. He returned and bolted under our trailer. We bent down to see where he went and found no squirrel in sight. But then we heard him moving around inside the bottom of our rig, underneath the floor. Twitchy still managed to find a way in. While pounding on the exterior wall of the trailer and then the underbelly to try to encourage Twitchy to leave, Bob heard something move. It appeared the squirrel had stashed some precious cargo inside our rig in anticipation of the coming winter. We hoped the gnawing noises we had heard were from Twitchy chewing nuts or seeds he hid in the rig and not our pipes or wires. Thankfully, squirrels are transient creatures, storing goods in multiple holding places for the best protection from predators. Twitchy left our rig just as quickly as he had entered and moved on to another hiding spot. 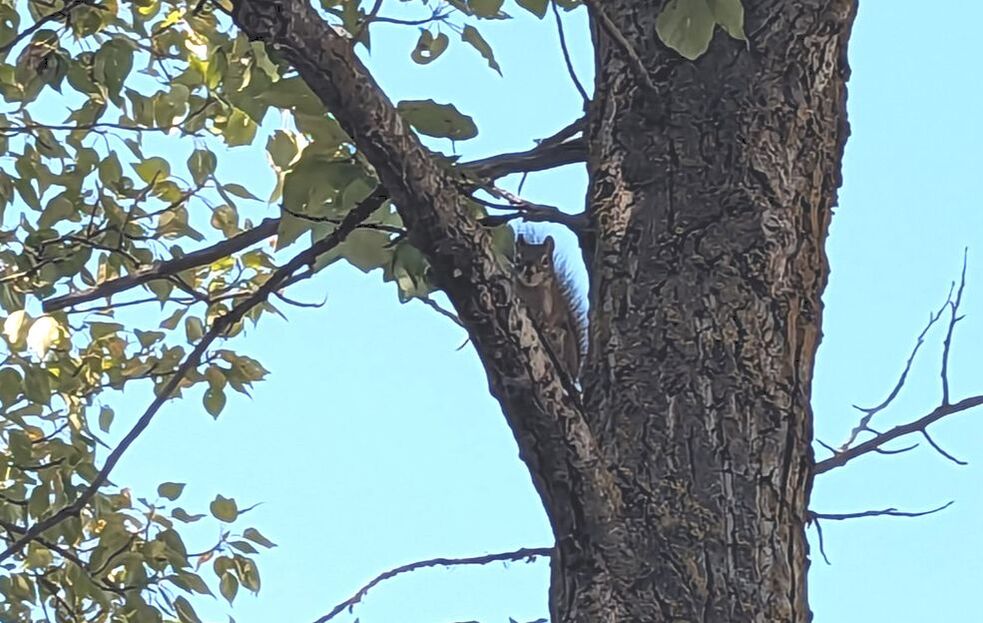 We heard Twitchy inside our rig again the next day, but by the time we left the campground the day after, all evidence of Twitchy’s presence with us had been erased — well, as far as we know. We couldn’t hear any nuts rolling around under our trailer floorboards from the cab of the truck.
Avoiding a Potential Mishap If the squirrel had truly taken up residence under our floor, getting him out would have proven challenging. It would have required cutting the protected underbelly of our rig to try to find the varmint, with no guarantee that we’d cut into the right spot. And if Twitchy had been in there for a while, he might try to get deeper into the rig, like into our living area. In our first four years of full-time RV living, we didn’t know squirrels could get inside an RV. After this encounter, I found an article that told the story of a squirrel that had chewed its way into a man’s RV living space. The same article gave tips to rid an RV of squirrels: apple cider vinegar, peppermint oil, or dryer sheets. We didn’t try any of those things because we weren’t sure where to put them, nor if they’d work. We didn’t think we’d see much wildlife after our return trip on the Alaska Highway. Clearly, we thought wrong. We’re thankful Twitchy didn’t do any obvious damage and that he’s in our distant past (pun intended). You might also like Attack of the Killer Cardinal. 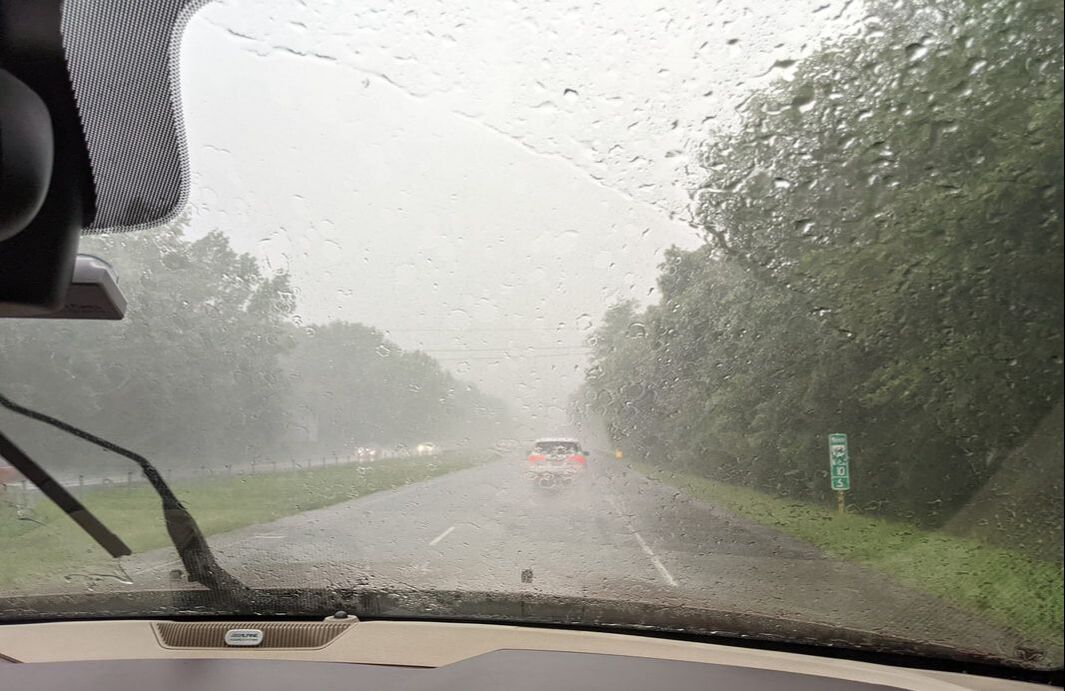 After three weeks on our annual tour with two WWII bombers, we returned to Alaska to continue our adventures, pleased to find dry conditions and fewer mosquitos than when we left. We had planned to stay in the same spot a couple of hours north of Anchorage for three nights before moving on. Some people have no trouble driving their RV in rainy conditions. We’re not among them. We’ve driven through rain a few times out of necessity, but anytime we can avoid it, we do. The weather forecast called for rain on our scheduled day of departure, as well as the day before. Having experienced our fair share of water problems earlier in the year, we decided to head out sooner than planned and drive most of the way to Homer on a Friday. Not wanting to fight weekend crowds, we opted to stop about 80 miles shy of our destination and hunker down at a grocery store that allows overnight RV parking. One night turned into two as precipitation socked us in. We didn’t mind, though. The downtime proved beneficial after a very busy three weeks on tour. We relaxed, read, watched movies, and recuperated. Sunday’s weather forecast showed a possible break in the rain. We ate breakfast, hustled into the store for a few essentials, and refilled our propane. Then, we secured everything in the rig and readied it for the 1.5-hour journey to Homer. Only the rain didn’t stop completely. What’s the Big Deal About Driving in the Rain? We have no issue driving Gulliver in the rain. He handles well and is watertight. Towing in wet weather, however, is not ideal as poor visibility and slick road conditions can worsen Gulliver’s ability to stop a 17,000-pound trailer. In addition, Tagalong doesn’t tend to fare well in rain. He’s not built watertight. In fact, small openings around his wheel wells under the kitchen and living room slideouts allow for water to get inside the trailer while it’s moving. Wet roads can be enough to kick up water and spew it inside.  This makes for messy circumstances when we open our rig upon reaching our destination. Water streams across the main living area floor, from the dining table to the kitchen island and from there to the corner between the refrigerator and office. Sopping up the rivers and pools is no big deal. The bigger issue is longer-term damage from water getting into the wood. But water isn’t the only concern. The tires kick up silt and sand from the road, which attaches itself to the wood wall between the refrigerator and office. 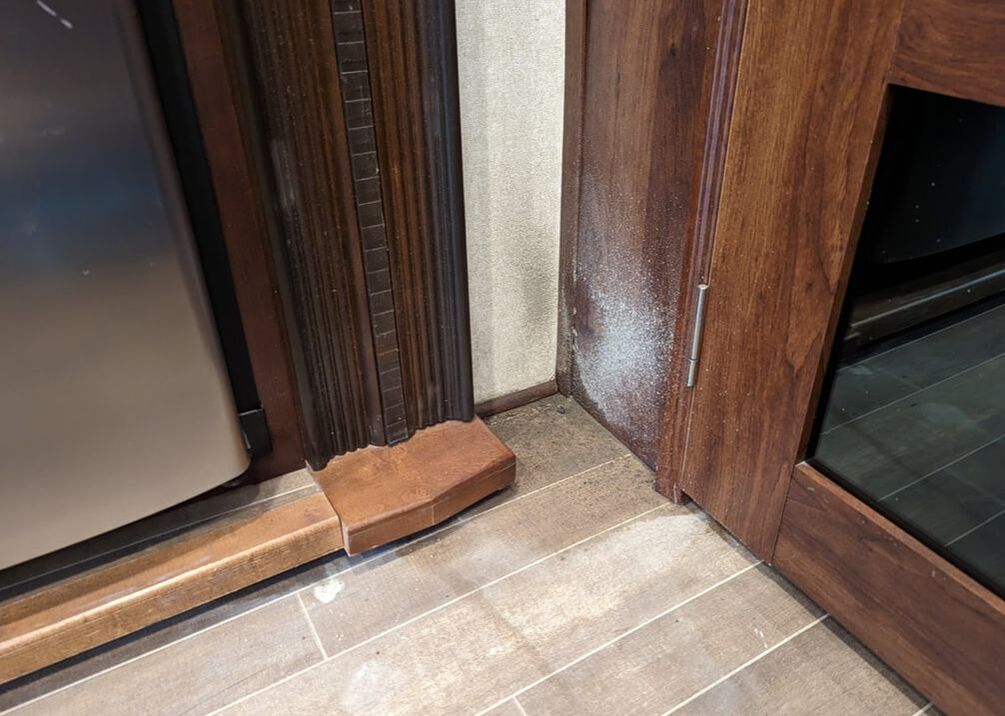 Preparing for the Onslaught Because we left the grocery store parking lot in the rain, I stashed a towel in each of the faulty corners inside the trailer. The rain lightened up but didn’t completely subside. A moose crossing the road in front of us tested our stopping ability on the slick highway. The brakes held, and we didn’t hit it. Thankfully, we didn’t encounter the moose while driving through fog. 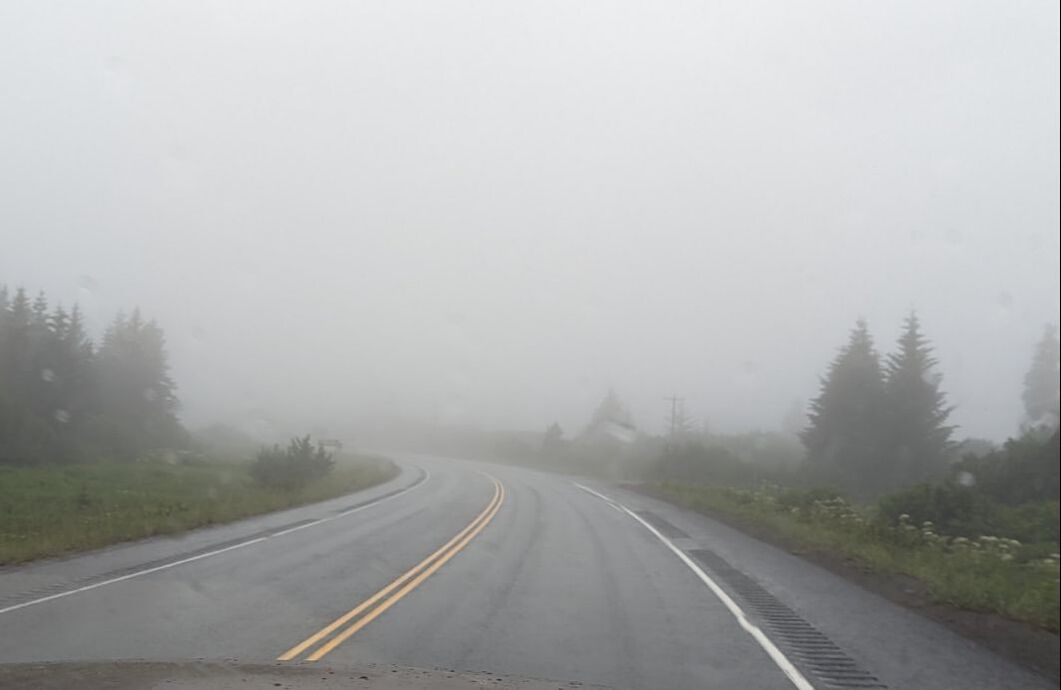 We reached Homer and parked Tagalong in the mud, setting up in continued rain. We opened his door to find both towels soaked to the point that I could wring them out — and a braided river still greeted us. Silt clung to the wall, and a patch of waterlogged carpet threatened to soak our socks if we removed our shoes. I cleaned up the mess, and we finished establishing home for the week. Despite the mud and rough start, we can’t complain about our amazing views. Oftentimes in life, we have to go through hardships to reach our goals. I’d say we did that in this case. We’ll continue to monitor the weather and do our best to avoid driving Tagalong in the rain. And for those times we can’t, maybe we’ll come up with some better solutions to absorb the water and silt.
You might also like How We Determine Our RV Stops. 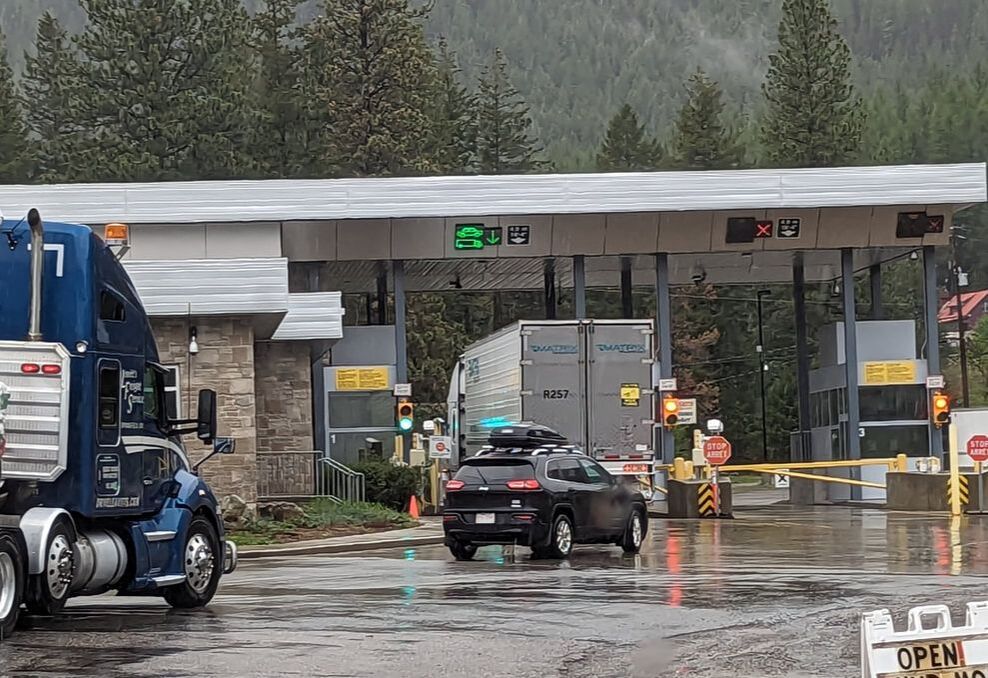 Canada offers a lot of beautiful scenery: majestic mountains, towering evergreen trees, massive bodies of water, bright green grass, abundant wildlife, and quaint towns. Many RVers enter the country for a peaceful camping experience. We had a trek to Alaska in mind, which requires driving through British Columbia and the Yukon. We had done a little research before crossing the Canadian border to find out what we could take, what we couldn’t, and special requirements. We learned there were restrictions on chicken and eggs but that fresh produce was OK to bring. After watching videos of other RVers’ border crossings, we realized the Border Services Officers didn’t tend to request much in the form of paperwork. We felt prepared to enter the country and decided to cross at Eastport, Idaho, as we were working our way from Eugene, Oregon, to Dawson Creek, British Columbia, for the official start of the Alaska Highway. 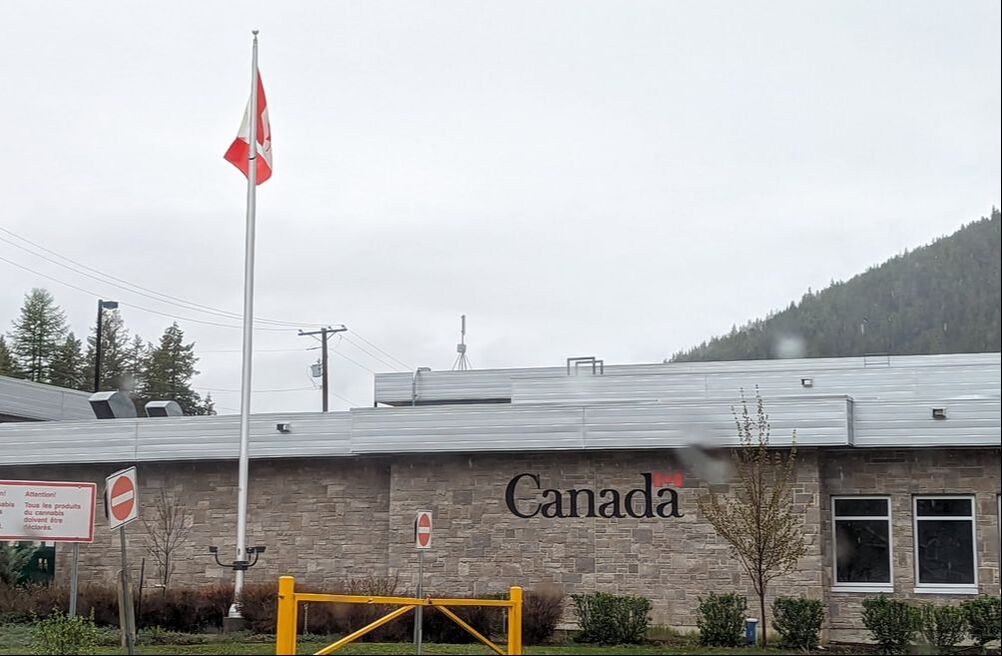 Interrogation We reached the border crossing and stopped behind a semi-truck. After about 10 minutes in line, it was our turn to approach the border inspection station, where we handed over our passports and were greeted with a battery of questions:
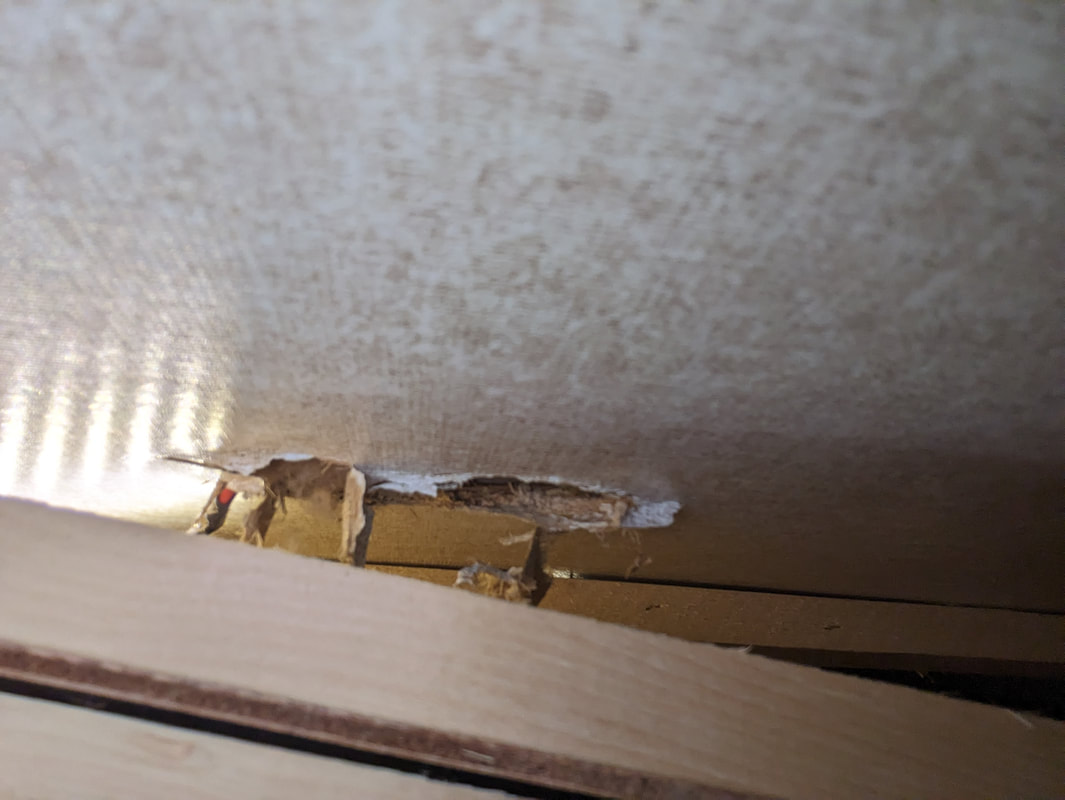
Because we live in our RV, we often answer the “Where are you from?” question by saying we’re full-time RVers. Thankfully, Bob remembered to provide our legal city and state: Sioux Falls, South Dakota. We assured the officer no one was traveling with us. We didn’t know at the time that we had a stowaway (more on that later). Excitedly, we shared that we were headed to Alaska and would be in the country fewer than 30 days. Bob enjoyed telling the officer that I worked as an editor and that his job was to “keep looking this good.” Bob volunteered that we were carrying two rifles and had paperwork for them. That led to another question: “Why are you carrying the rifles?” We answered for protection against dangerous wildlife. Bob also volunteered that the rifles and the ammo were locked separately. The agent asked where the rifles were. We told him. Then the officer asked if we had any other weapons. We told him we left them behind in Arizona. He asked what we left behind. Bob rattled off the list. The guard asked if we had any pistols with us. We assured him we didn’t. He asked if we had any other ammo for guns we didn’t have in our possession. We told him no. We remembered we had a small canister of CBD cream we had picked up about three years earlier and divulged that information. We had purchased it for its supposed benefits for bodily aches and pains. After a few uses, we weren’t convinced it really worked. In-Person Encounter Because we had rifles and the necessary paperwork to carry them through the country, we had to park and go inside the building. The guard told us not to take the rifles with us, to leave them where they were, but to take the CBD cream. We obeyed. Inside the building, we presented our paperwork and the CBD cream to another official. We paid a $25 fee to carry the rifles. The officer told us they’d accept anything but American cash. As for the cream, it seemed to be problematic as cannabis and CBD items are controlled substances in Canada. As such, it required extra paperwork for the Border Services Officers but not for us. We offered to surrender the CBD cream if that would make things easier. The agent told us that was going to happen anyway. Because of that extra paperwork, we had to show an ID. Since our driver’s licenses didn’t display our current address, the official also requested to see our truck registration. I ran out in the rain to get it. We saw another fifth wheeler get turned around back to the U.S. for having what looked like some sort of vape device. After showing our truck registration, we got our rifle paperwork back along with a receipt for our payment, and we were free to tour the country — about 20 minutes after arriving at the border crossing. Illegal Immigrant(s) We didn’t know we had smuggled a stowaway into Canada until later that night, when we heard scurrying across our ceiling as we tried to sleep. The day before, we had discovered evidence that a rodent had found its way into our rig. Since we were boondocking in Eastern Washington state at the time, we guessed the unwelcome houseguest to be a field mouse. 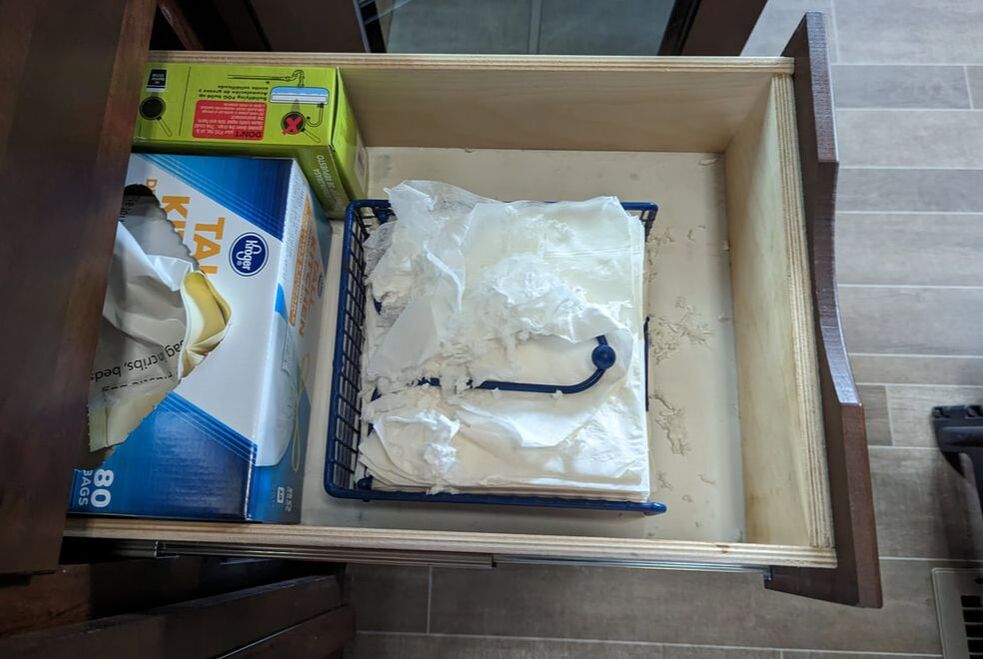 Much of our incentive for risking a rainy drive to enter Canada was to get away from field mice. We had hoped the washboard road away from our boondocking spot would be enough to scare the critter away or knock it out permanently. No such luck. After setting up at a campground in Kimberley, British Columbia, and enjoying a relaxing evening, Bob stayed up late playing a video game. A field mouse scampered across the living room floor in plain sight, uninhibited by the bright lights. (I had read that field mice don’t like light.) Ours was a rebel. We went out the next day to purchase mouse traps. Before we left, we discovered signs of a mouse in our upper cabinet, which we thought was safe from rodents. We knew if any got in there, they would hit the mother lode: baking ingredients, cereal, rice, dry beans, and pasta. How did a mouse get in there? we wondered. We removed all of the contents from the cabinet and found evidence that the mouse had chewed a hole in our interior. The creature had been traveling across our rafters, having a heyday. That’s why we had heard it overhead in bed. After returning from the store, we set out four traps. By 3 p.m., one snapped, announcing that we had caught a mouse. We reset the trap to make sure we didn’t have more rodents. That night, we didn’t hear any ceiling scurrying.
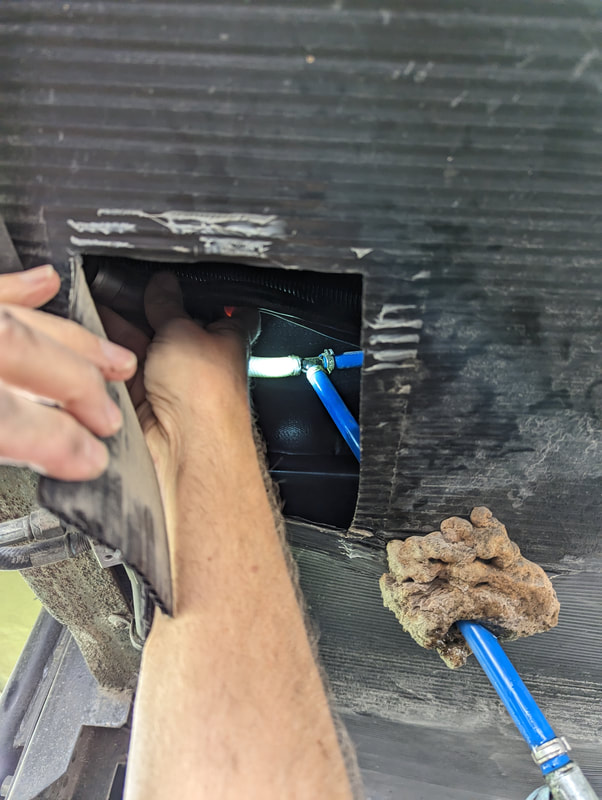
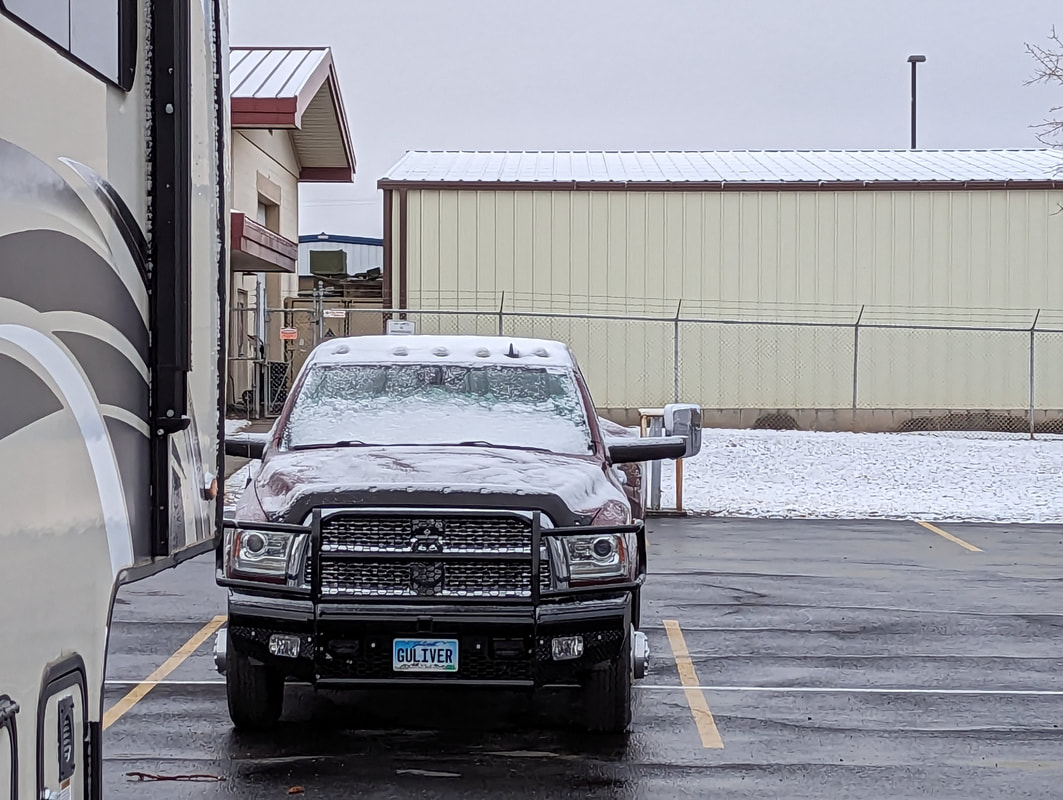
By the next morning, we caught another mouse. We reset that trap too. Better safe than sorry. Sure enough, the cycle continued, with a third trapped mouse the next day. We reset the traps again and awoke the next morning to find them all empty. We had successfully freed our rig from three illegal, unwelcome guests and could get back to normal full-time RV life. You might also like Driving Across the Border to Mexico. 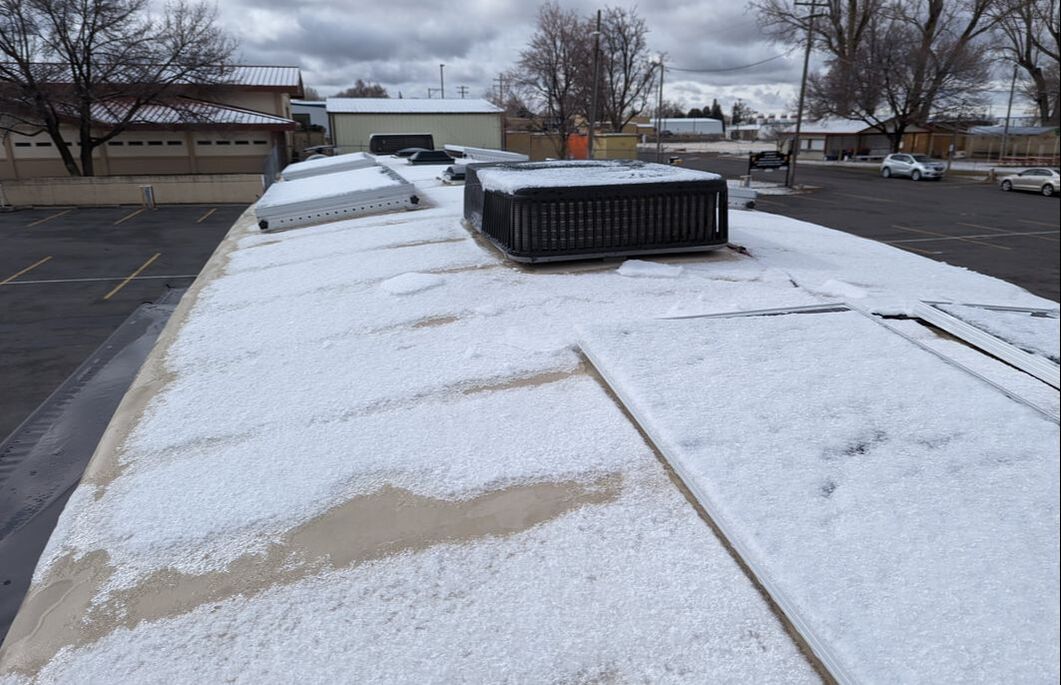 After two weeks in the desert outside of Las Vegas, we took advantage of a break in the weather and headed north. We made it to Twin Falls, Idaho, and decided to hunker down for some more not-so-great weather to pass through. As we were setting up, we noticed some water pooled on top of a storage bin in our basement, made a mental note to check it later, and continued on. Good thing, because no sooner had we finished setting up and moved inside the trailer than a rainshower hit. We thanked God for giving us a clear window of weather for the duration of our trip. Winter Wonderland Grateful to be in a city where we could restock our supplies, we headed to a grocery story the next day. Not long after we got all our goods inside the trailer and put away, I noticed white flakes flying at us. We hadn’t seen snow since we’re not sure when. It stuck only briefly before melting away. The same thing happened the next day. The third day, however, we awoke to a winter wonderland. A fresh layer of snow blanketed Gulliver and the ground outside our trailer. We took joy in our frosty surroundings, a welcome change of scenery from the desert landscape. Our delight didn’t last long, though. While busy about our day, we both heard a loud crash and jumped up to see what had happened. Peering out our windows didn’t reveal anything conclusive, so we bundled up and left the warmth of our trailer to investigate. Ice covered our stairs. Careful not to slip, we braved the 30-degree temperature that felt like 18 with the wind chill. We found plenty of snow and ice on the roof and water on the ground where some had melted, but no clear indication of what had caused the noise. We decided a sheet of ice must have been blown by the wind and crashed into something on the roof or onto the ground. Water in the Basement The wind continued to blow that day until all snow and ice had been eliminated from our roof and our surroundings. Despite the blustery conditions, we made a point to sop up the water in our basement, dejected to have yet another water problem. 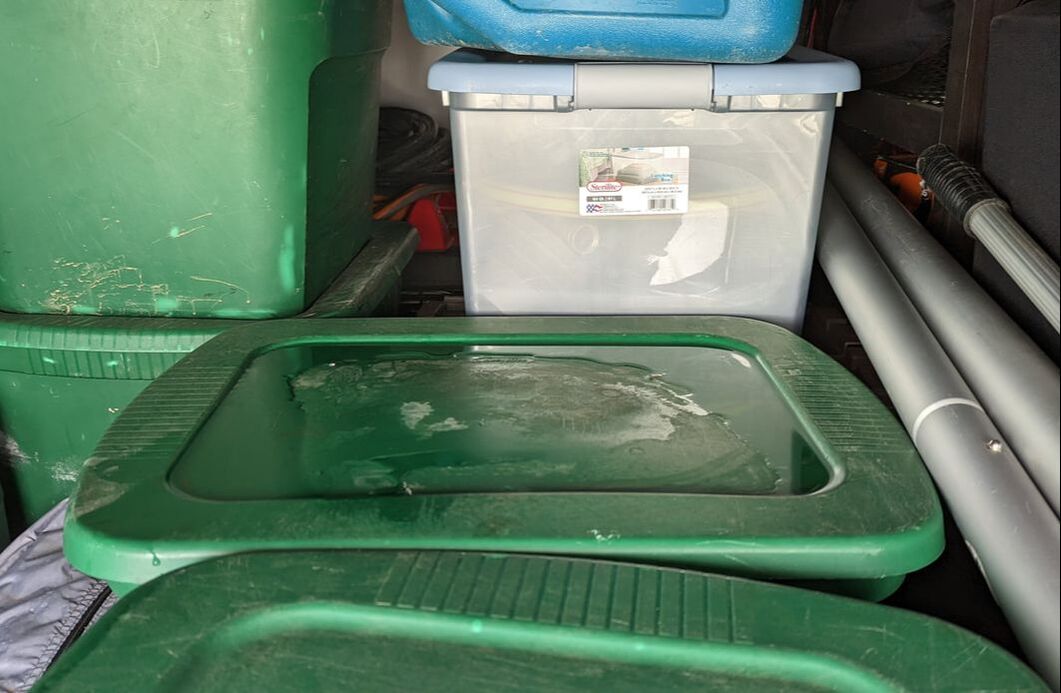 As we tried to identify the source of the leak, we noticed a warped, discolored ceiling panel and a drip from the box protecting our leveling wires from damage. Bob pulled down the ceiling panels and more water dripped from them. A closer look at the panels revealed we had had an issue for a while. We touched the water pipes originating from the bathroom. They felt completely dry. We decided the water must have been a result of condensation since we found ourselves in much colder conditions than we had experienced up to this point. Nothing else made sense. So, we stuffed a rag around the pipes in the bathroom floor to seal the hole between it and the basement. Shark Bites Save the Day The next morning, we dried the pool again. Midday, when the weather had warmed ever so slightly, we found yet another puddle in the basement. “Where could the water be coming from?” we wondered. I had noticed a white, hard-water residue on top of the storage bin. Putting my sleuthing skills to work and investigating under the bathroom sink, I saw that same white residue on the cold water PEX pipe. Aha! We sopped up the water in the basement, again, and secured a rag around the blue PEX pipe under the sink to test our theory. A few hours later, sure enough, the rag under the sink was wet and the basement was dry. We had finally pinpointed the source of the water: a seep, not a drip, from the cold water pipe close to the bathroom faucet. That explained why we occasionally heard the water pump kick on when we weren’t running any faucet. 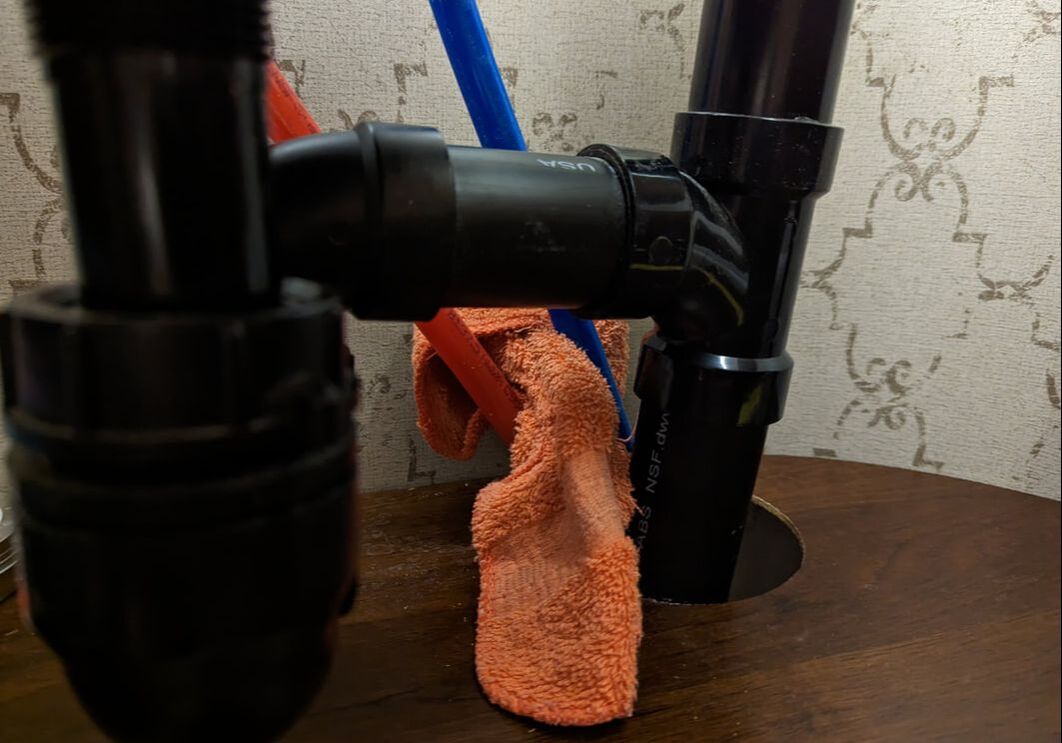 To repair the leak, Bob went to the local Ace Hardware store and bought some Shark Bite ball valves to enable us to turn off the water to the bathroom sink if needed in the future. Unlike sticks-and-bricks homes, RVs don’t typically have shut-off valves at sinks. Bob also got some short, braided hoses to ensure enough flexibility to make the needed fix. He cut the red and blue PEX pipes under the bathroom sink, attached the braided pipes and the SharkBite valves, and connected everything back together. Voila! No more water leak. 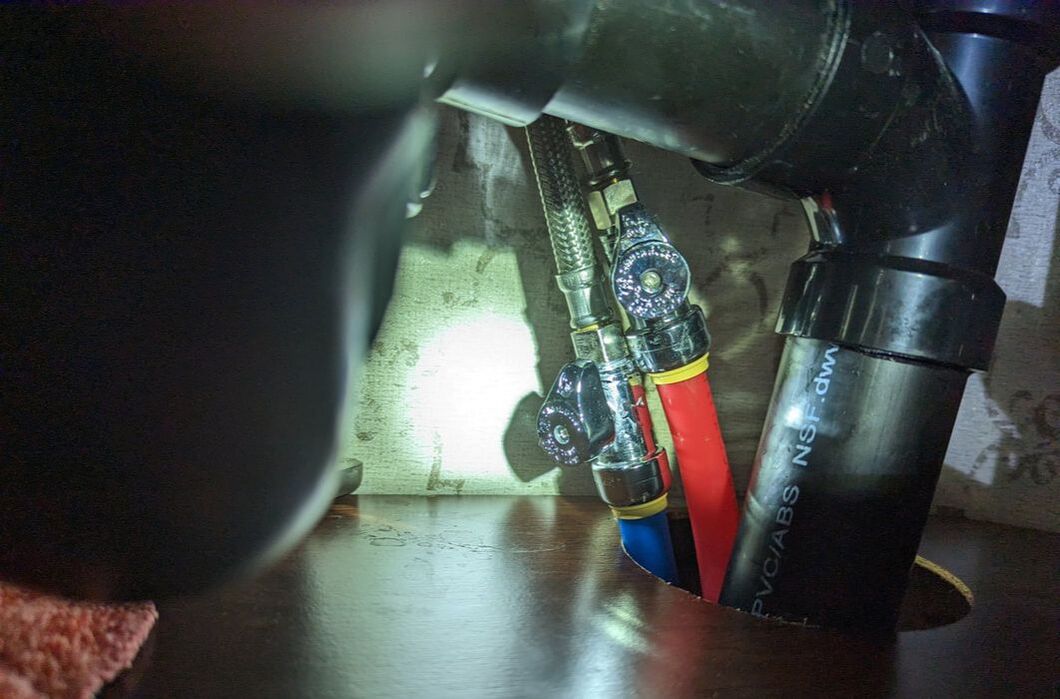 An Alarming Adventure At 4:30 one morning during our stay in Twin Falls, a high-pitched beeping pulled us out of our warm slumber. It sounded like the familiar noise we hear when a propane tank runs empty. I got up to switch the tanks and noticed a flashing light in the bathroom, where we have a battery monitor. The unpleasant sound turned out to be coming from there. Relieved that I didn’t have to go out in the cold to deal with propane bottles, I looked closer at the monitor and saw 33 degrees. It alerted us to near-freezing temperatures inside the front battery compartment of our rig, which meant it would be dangerous to charge our batteries until the compartment warmed up. Bob was able to stop the noise, and we drifted back to sleep. No batteries were harmed. Our water leak was gone. And we were warm. We had and continue to have much to be thankful for. You might also like Frozen Pipes, Armadillos, and Brake Issues — Oh My! |
AuthorThis is the travel blog of full-time RVers Bob and Lana Gates and our truck, Gulliver, and fifth wheel, Tagalong. Categories
All
Archives
July 2024
|


 RSS Feed