Our Jayco Pinnacle fifth wheel was built in 2018. Although online streaming had become popular by then, including a TV antenna on an RV roof was standard practice.
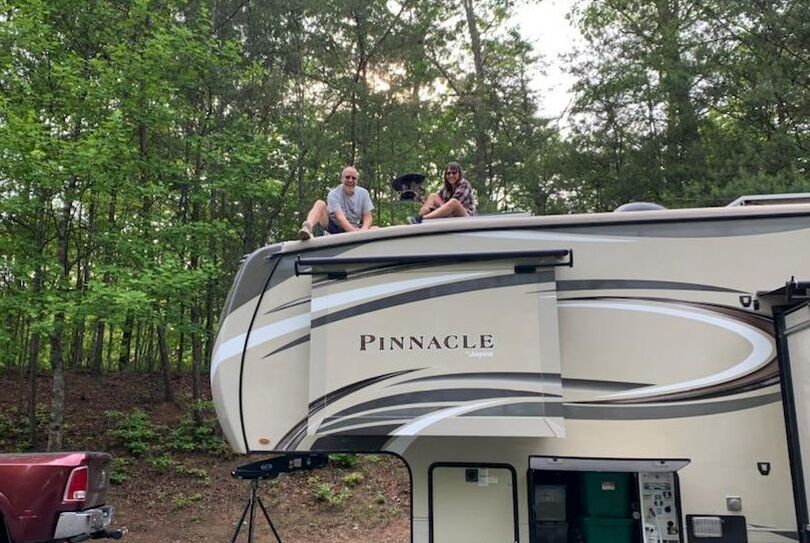
We moved into our fifth wheel in April 2020 and never used the TV antenna, relying on streaming channels for our watching pleasure. For us, the antenna proved problematic, creating a contact point toward the front of our rig for low-hanging trees to easily grab and turn it. When that happened, the metal part of the unit faced sideways or forward, making it even easier to catch on leaves and branches.
Bob had wanted to remove the RV TV antenna since we became full-time RVers. It led to some major issues, such as pulling our roof membrane out from under the rig’s nose cap — which resulted in roof leak issues later on — and leaning off our roof.
Out with the Old
After another roof rip while traveling from Mississippi to Georgia, Bob decided the time had come to do away with the antenna once and for all. He consulted YouTube to see what might be involved in the process. We already knew we’d have to remove the self-leveling caulk around the unit on the outside. But we didn’t know what needed to be done on the inside.
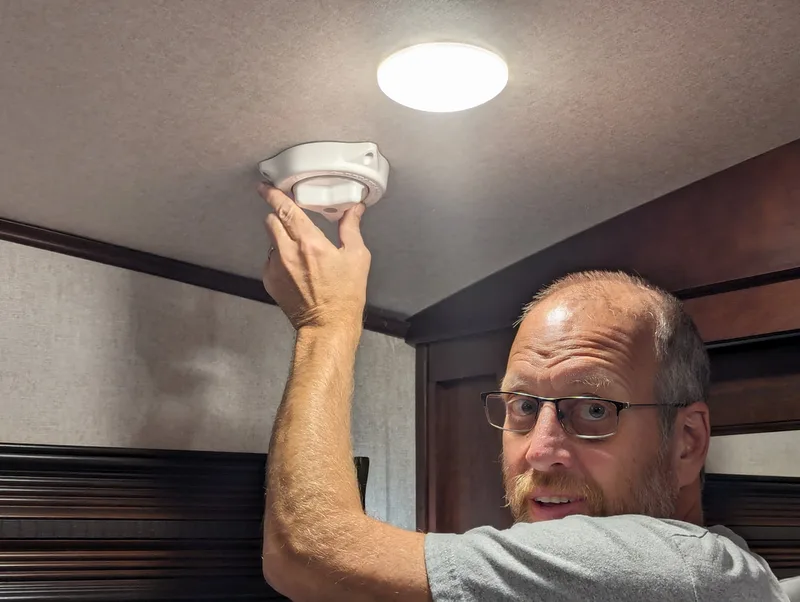
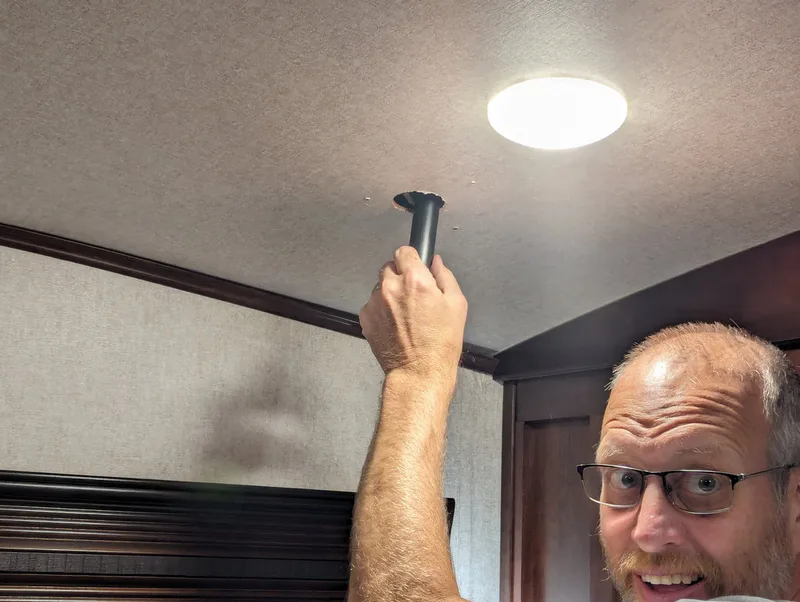
The TV antenna controller was attached to our bedroom ceiling. When packing the rig for travel, we always checked to ensure the antenna faced the correct way. Bob removed three screws to disassemble the controller. An 8-inch or so PVC pipe dropped out of the ceiling.
We moved into our fifth wheel in April 2020 and never used the TV antenna, relying on streaming channels for our watching pleasure. For us, the antenna proved problematic, creating a contact point toward the front of our rig for low-hanging trees to easily grab and turn it. When that happened, the metal part of the unit faced sideways or forward, making it even easier to catch on leaves and branches.
Bob had wanted to remove the RV TV antenna since we became full-time RVers. It led to some major issues, such as pulling our roof membrane out from under the rig’s nose cap — which resulted in roof leak issues later on — and leaning off our roof.
Out with the Old
After another roof rip while traveling from Mississippi to Georgia, Bob decided the time had come to do away with the antenna once and for all. He consulted YouTube to see what might be involved in the process. We already knew we’d have to remove the self-leveling caulk around the unit on the outside. But we didn’t know what needed to be done on the inside.
The TV antenna controller was attached to our bedroom ceiling. When packing the rig for travel, we always checked to ensure the antenna faced the correct way. Bob removed three screws to disassemble the controller. An 8-inch or so PVC pipe dropped out of the ceiling.
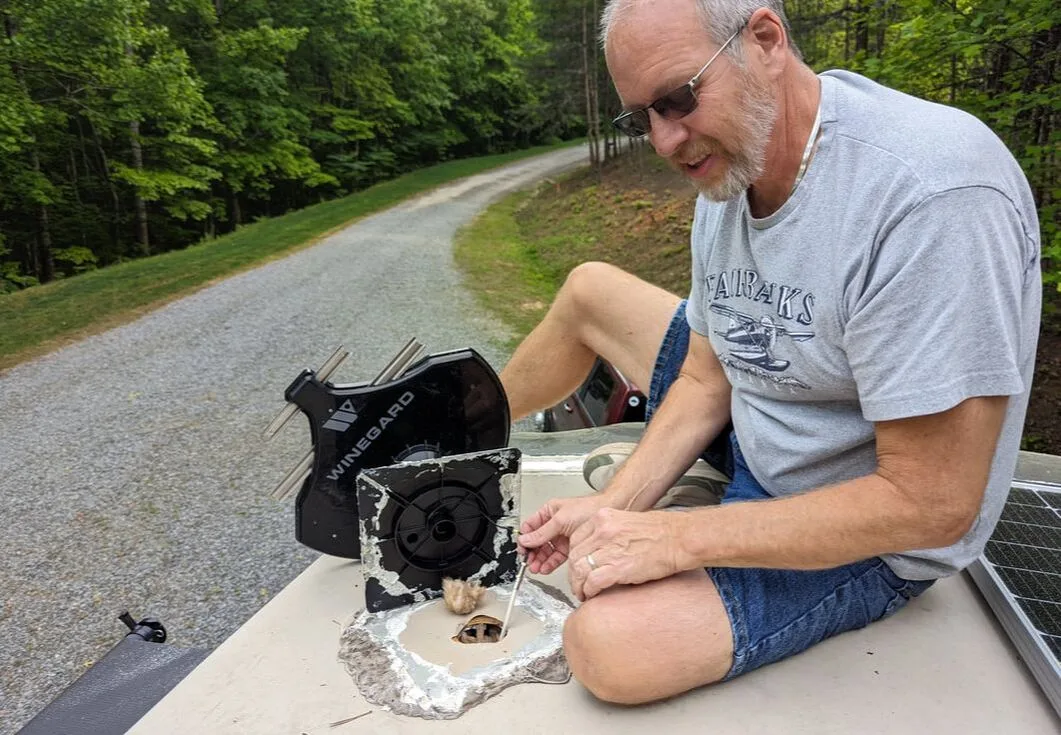
Climbing onto the roof of our rig, he painstakingly peeled away the caulk around the TV antenna, a blister-creating process. That revealed four screws holding the unit in place. After removing those, the antenna didn’t easily let go. It held securely in position.
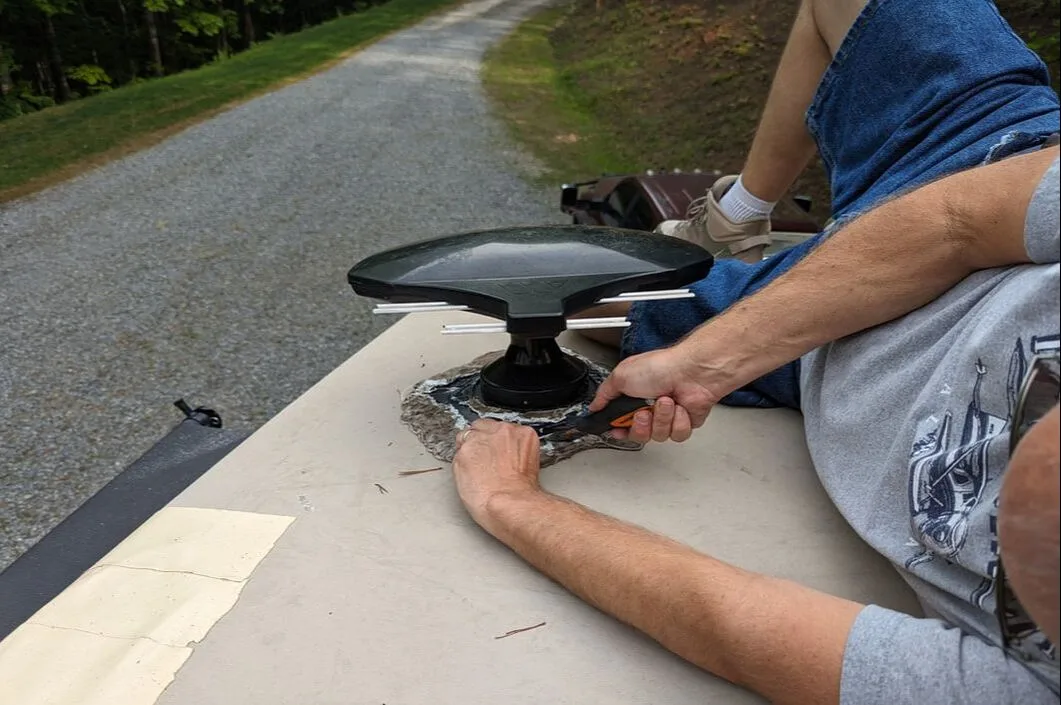
Bob broke the seal around the unit and was able to separate it from our roof and disconnect the coaxial cable, exposing about a 3-inch hole that matched the one in the bedroom. With the unit out of place, he carefully removed the rest of the caulk, a necessary step before we could effectively cover the hole.
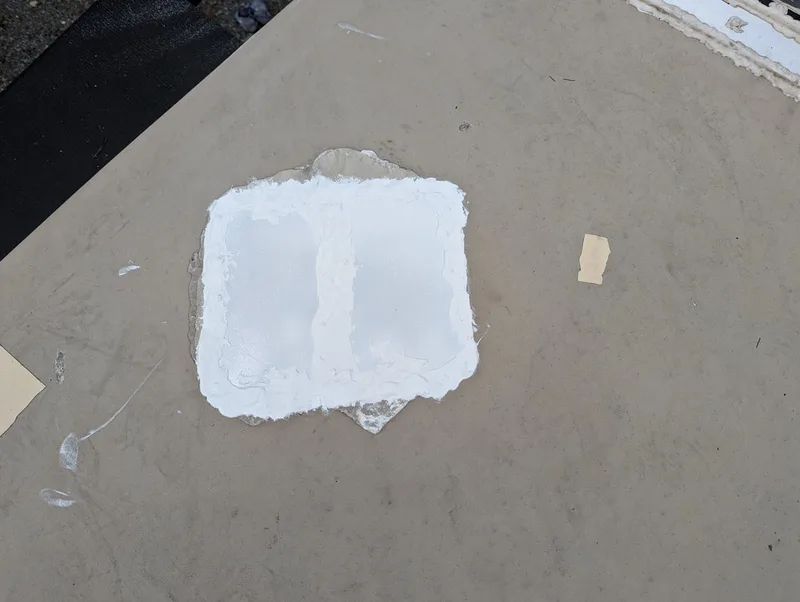
In with the New
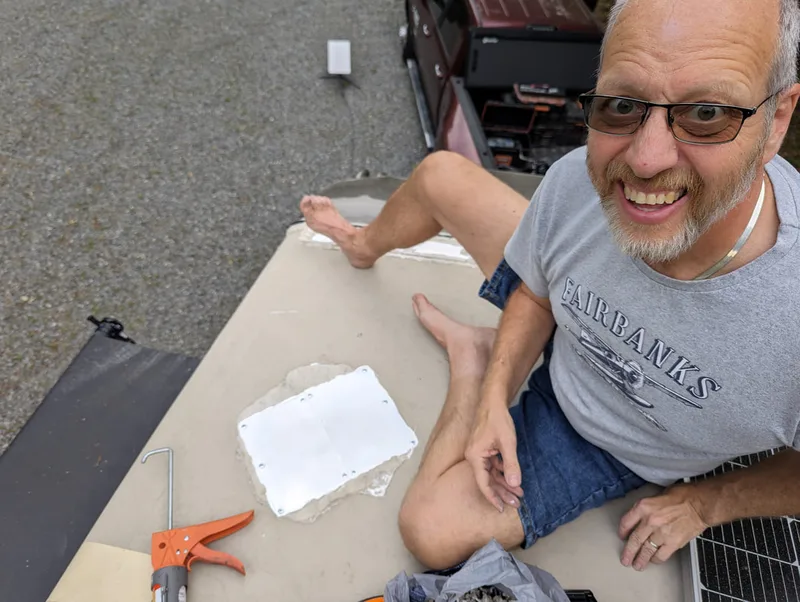
We had found some 0.032-inch aluminum at Lowe’s that we thought would work great to repair the new roof opening. Bob spray-painted it to keep it from getting overly hot on bright, sunny days. Then he cut it into two even pieces to ensure coverage of the screw holes left from the antenna.
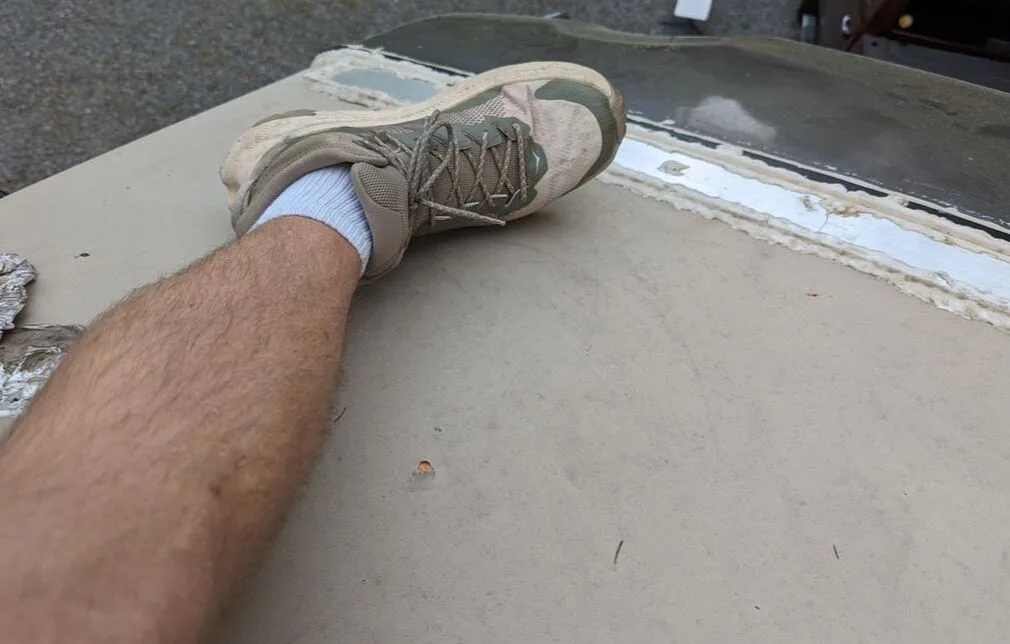
In the process of covering the hole, he managed to rip a new opening in the roof from his shoe rubbing on the membrane. Undeterred, he took off his shoes to avoid introducing additional holes and applied Eternabond tape, a staple on our rig, to hide the hole.
We had found some 0.032-inch aluminum at Lowe’s that we thought would work great to repair the new roof opening. Bob spray-painted it to keep it from getting overly hot on bright, sunny days. Then he cut it into two even pieces to ensure coverage of the screw holes left from the antenna.
In the process of covering the hole, he managed to rip a new opening in the roof from his shoe rubbing on the membrane. Undeterred, he took off his shoes to avoid introducing additional holes and applied Eternabond tape, a staple on our rig, to hide the hole.
Bob positioned the first piece of aluminum and screwed it into place. Carefully matching up the seam with the other piece, he repeated the process. Then he spread new self-leveling caulk around all edges, making sure to cover the screws and middle seam.
We’re relieved to be rid of the antenna from our roof. The topmost items on it now are two air conditioning units, conveniently located away from the roof’s edges.
You might also like Navigating Low-Clearance Bridges in an RV.
You might also like Navigating Low-Clearance Bridges in an RV.
It’s interesting how something as “standard” as an RV antenna can become more of a liability than a benefit, especially with how much we rely on streaming now. The issues you described with low-hanging branches and roof damage really highlight why removing it makes sense for full-time RVers.
I also appreciate how detailed you were with both the removal and repair steps. The aluminum patch solution and use of Eternabond tape are great practical tips. And honestly, the part about creating another small tear mid-project is so relatable—DIY rarely goes perfectly, but it’s all about adapting and moving forward.
Glad it all worked out in the end! This is definitely a great resource for anyone considering doing the same.
I like how you walked through both the inside and roof work; that’s often the part people are unsure about. The aluminum patch + Eternabond combo seems like a solid, durable fix. And the note about painting the aluminum to reduce heat is a smart touch.
Also appreciated the honesty about the extra tear mid-project—been there. Taking the shoes off to protect the membrane is a great tip.
Makes total sense to ditch the antenna if you’re streaming anyway. Clean roof, fewer snags, fewer leaks. Nice upgrade!